How to Draw Mordecai

Use the video and step-by-step drawing instructions below to learn how to draw Mordecai from Cartoon Network's Regular Show. A new drawing tutorial is uploaded every week, so stay tooned!
Intro: Start off with a pencil sketch. In the beginning stages, don’t press down too hard. Use light, smooth strokes for sketching.

Step 1: Start by drawing a small circle at the top of the page. It doesn’t have to be perfect. It’s just a guide for the Mordecai’s head.
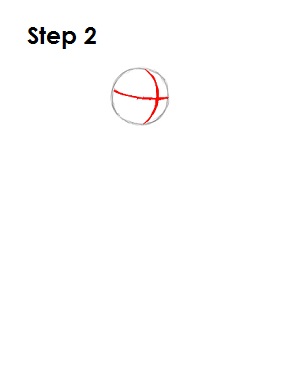
Step 2: Next, draw two intersecting lines across the circle, one vertical and one horizontal. Bend the lines so that they contour to the shape. These will be construction lines that will help you place Mordecai's facial features later on.
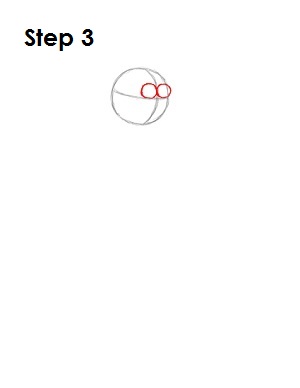
Step 3: Draw two small circles sitting on top of the horizontal construction line as guides for Mordecai's eyes. The circles should be on either side of the vertical construction line.
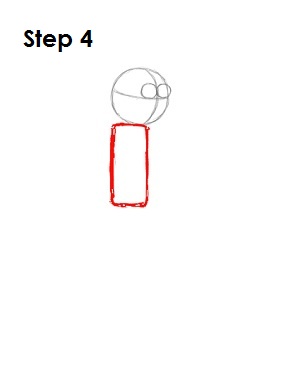
Step 4: Under the head shape, draw a rectangle as a guide for Mordecai's body. The rectangle should be narrow and a bit taller than the width of the circle.
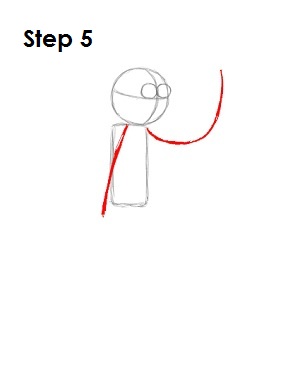
Step 5: Draw two lines that begin at the top of the rectangle as guides for Mordecai's arms. The line on the left side drops down lower than the rectangle, and the line on the right curves up about as high as the head.
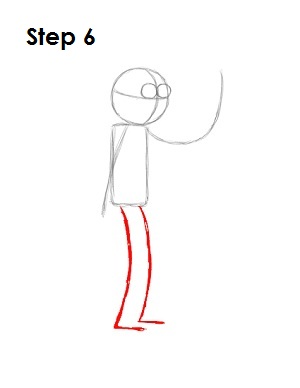
Step 6: Under Mordecai's body draw two curved lines as guides for his legs. Mordecai is tall, so draw the lines about one and a half times the length of the body. Draw the lines so they angle forward a bit at the end for Mordecai's feet.
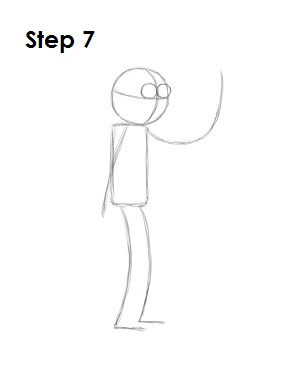
Step 7: That’s it for the initial sketch! You have the basic Mordecai shape. Now go in and tighten your drawing. From this point on, press harder with your pencil in order to get darker lines and a more defined sketch.
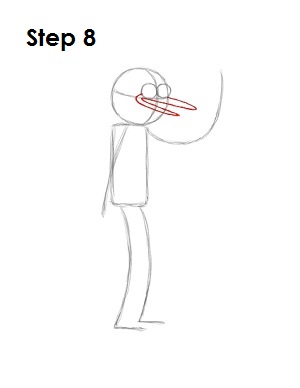
Step 8: Draw Mordecai's beak right under his eyes. Start with the top part of the beak by drawing a line on the right side of the right eye and extending it toward the right arm. Once the line is about as long as both eyes, curve it back toward the bottom of the left eye. Draw a smaller arc underneath for the lower part of Mordecai's beak.

Step 9: Draw a small curved line over Mordecai's beak for that bump he has on top. Draw three arcs on the lower part of the top beak for his teeth.
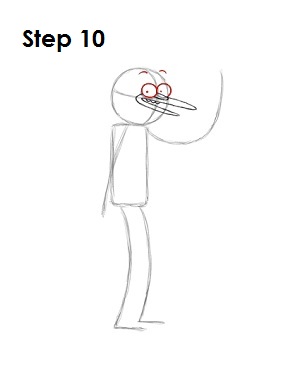
Step 10: Darken the shapes for his eyes and draw a small circle inside each for his pupils. Draw a small curved line above each eye for Mordecai's eyebrows.
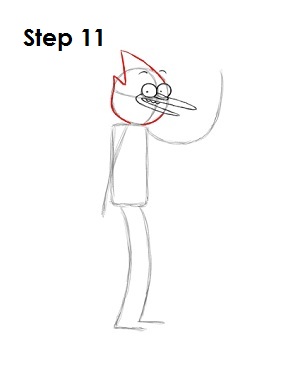
Step 11: Use the original circle as a guide to draw Mordecai's head. Darken the sides and lower part of the circle. Mordecai is a blue jay, so he has a crest on his head. Draw this by adding two spikes on top, one big and one small.
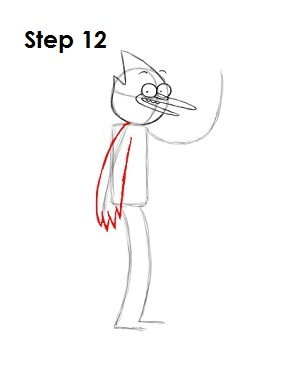
Step 12: Draw the left arm by using the initial line as a guide. Draw around the guide line to make it thicker. When you reach the bottom, draw four spikes for Mordecai's fingers and thumb.
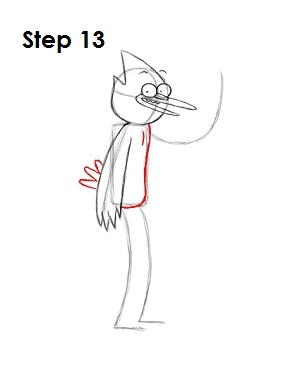
Step 13: Use the initial rectangle as a guide to draw Mordecai's body. Make the side of the rectangle wavier and the corners rounder for a more organic feel. Draw a line at the top for his chest and three arcs on the left side behind his arm for Mordecai's tail feathers.
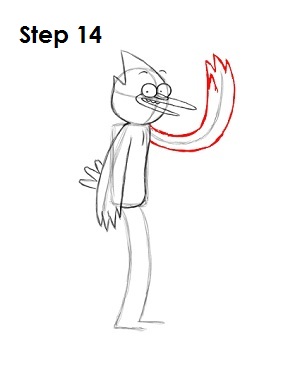
Step 14: Draw the right hand by using the curved line as a guide. Thicken the guide line and draw the spikes at the end for Mordecai's fingers and thumbs.
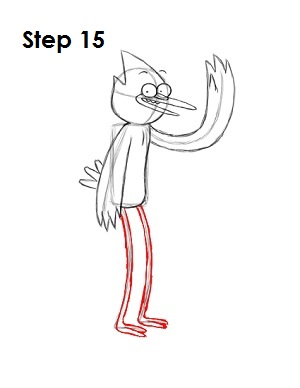
Step 15: Thicken up the initial guide lines at the bottom to create Mordecai's legs. Don’t draw them to thick because he has skinny legs. Draw two arcs at the end of each leg for his toes.
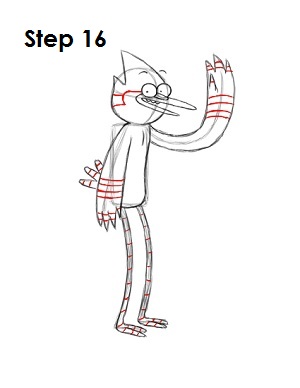
Step 16: Draw the detail lines all throughout Mordecai's body. A couple on his head, a few on his hands, fingers and tail, and a lot on his feet. Use the image above for further reference when drawing.
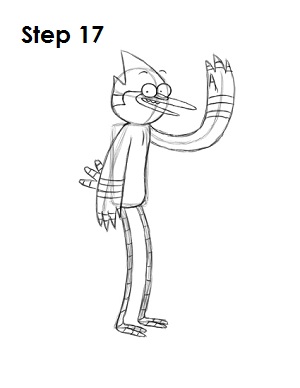
Step 17: That’s it! You now have a nice sketch of a Mordecai from Cartoon Network's Regular Show. You can stop at this quick drawing for a rough, sketchy look, or continue to the step below to go for a more finished look.
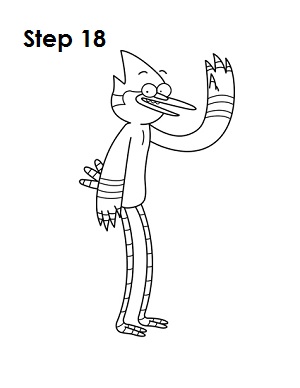
Step 18: For a more finished, inked look, carefully draw over the final sketch lines with a pen or marker. Wait for the ink to dry, and then erase your pencil marks. You now have a finished inked drawing of Mordecai! You can stop here or go to the final step to complete your Mordecai drawing in its entirety.

Final Step: For a completely finished Mordecai drawing, you have to color it. You can use anything you want: markers, color pencils or even crayons! Color his feathers blue except for the two white bands on each hand. The small shape on his head is black, along with the bump on his beak. Mordecai's beak and legs are gray. That’s it! You now have a completed drawing of Mordecai from Cartoon Network's Regular Show.


