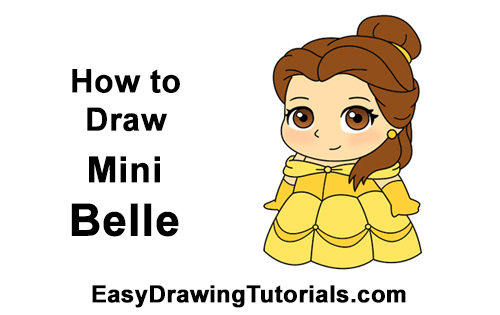
Use the videos and step-by-step drawing instructions below to learn how to draw a Mini or Chibi version of Belle. Stay tooned for more tutorials!
The written step-by-step video tutorial:
Intro: Start off with a pencil sketch. In the beginning stages, don’t press down too hard. Use light, smooth strokes for sketching.
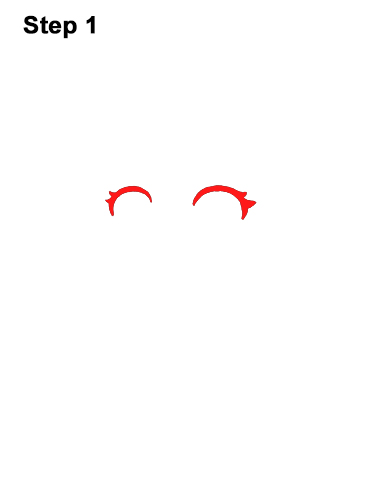
Step 1: Draw a short, curved line for the shape of mini Belle's first eye. Draw another short curved line on the right side for the other eye. Sketch lightly at first to get the shape of the line right. Make the curved lines thicker to represent the eyelashes. Pay attention to the placement of the curved lines. Don't draw them too far apart. Draw two small triangle-like shapes on the left side of the first eye to emphasize the Belle's eyelashes.
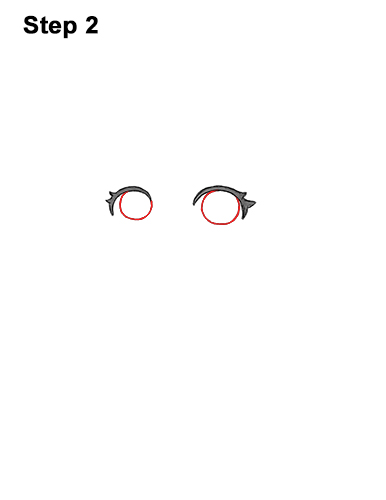
Step 2: Under each of Belle's eyes, draw a small circle for the irises. The circle on the left should be close to the left tip of the line. The circle on the right should be closer to the middle of the eye.
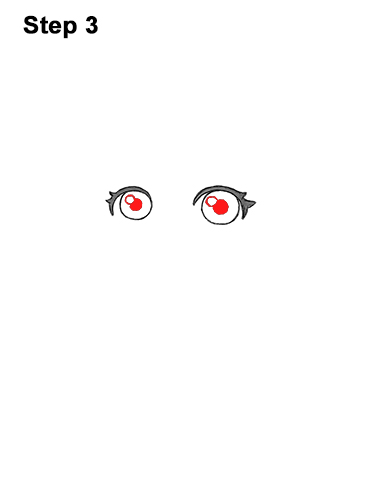
Step 3: Inside each iris, near the top, left side, draw a tiny circle to represent glare. In the middle of the iris, draw a big dot for the pupil. Draw another big dot inside the other eye for the other pupil.
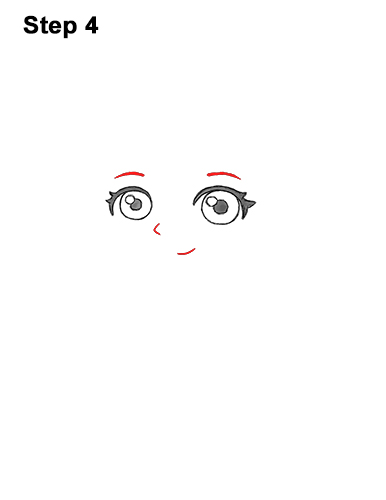
Step 4: Above each eye, draw a thick, curved horizontal line as a guide for mini Belle's eyebrows. The eyebrow on the left should be a bit shorter because of perspective. Near the lower, right side of the eye on the left, draw a small line similar to a less-than sign (<) for the nose. Under the nose, on the right, draw a short, curved horizontal line for the mouth.
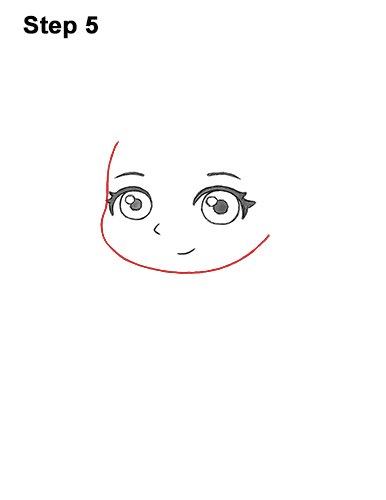
Step 5: Draw chibi Belle's head by first drawing a vertical line next to the eye on the left. Make a small mark under the mouth to indicate where the bottom of the head will be. Connect the left side of the head with the line below the mouth using a long curved line. Continue drawing the line to the right and curve it up slightly to finish the bottom of the head.


