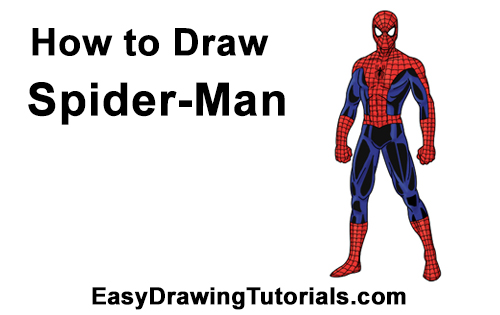
Use the video and step-by-step drawing instructions below to learn how to draw Marvel's Spider-Man (full body). A new cartoon drawing tutorial is uploaded every week, so stay tooned!
The speed drawing video:
The written step-by-step video tutorial:
Intro: Start off with a pencil sketch. In the beginning stages, don’t press down too hard. Use light, smooth strokes for sketching.

Step 1: Draw a small circle near the top of the page as a guide for Spider-Man's head. First draw four tiny marks for the height and width of the circle, then connect the marks using curved lines. Don't worry if the circle isn't perfect. It's just a guide. If you would still like a perfect circle, you can just trace the edge of a coin or anything else that's circular.

Step 2: Draw a small arc under the head as a guide for Spider-Man's jaw and chin. Don't draw the arc too low, otherwise your Spidey will end up with a big chin.

Step 3: Draw a vertical line across the middle of the head as a guide to help you place Spider-Man's facial features later on. Add two short lines under the head as guides for the neck.

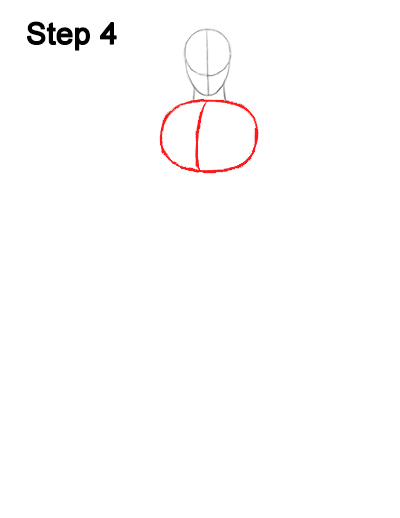
Step 4: Draw a big oval under the head as a guide for Spider-Man's chest. Pay close attention to the size of the chest in relation to the head. You can draw a bigger oval for a bigger chest , but Spidey should be leaner than other characters, like the Hulk, for example. Add a curved line near the middle of the oval for the division of the chest.

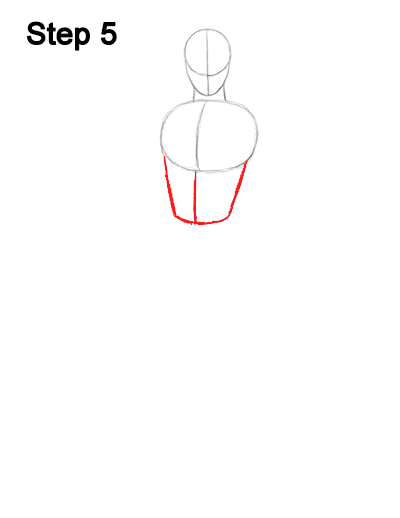
Step 5: Draw the middle section of the torso using a series of lines. Use two slightly tilted vertical lines for the sides and a curved horizontal line for the bottom. Add a vertical line across the middle that connects with the middle line from Spider-Man's chest.


