
Use the video and step-by-step drawing instructions below to learn how to draw Master Chief from the Halo video games. A new drawing tutorial is uploaded every week, so stay tooned!
Intro: Start off with a pencil sketch. In the beginning stages, don’t press down too hard. Use light, smooth strokes for sketching.
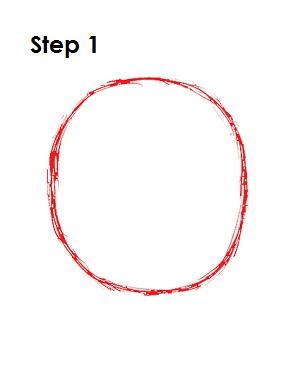
Step 1: Start by drawing a big circle in the middle of the page. The circle doesn’t have to be perfect. It’s only a guide for Master Chief’s helmet.
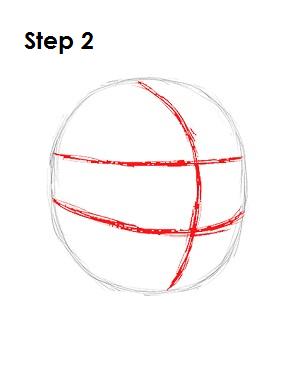
Step 2: Now draw three intersecting lines across the circle, one vertical and two horizontal. The vertical line should be closer to the right side. The horizontal lines should divide the circle into three parts of descending sizes. The top part should be the biggest, the middle part should be a bit smaller, and the bottom part should be slightly smaller still. Don't worry about the measurements being exact. Just roughly estimate them. Give all the lines a slight bend to contour to the circle.
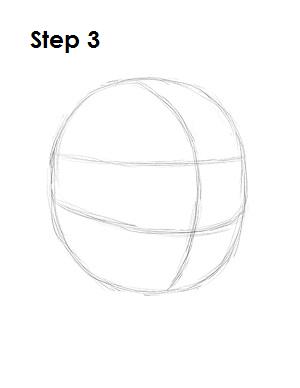
Step 3: That’s it for the initial sketch! You have the basic Master Chief helmet shape. Now go in and tighten your drawing. From this point on, press harder with your pencil in order to get darker lines and a more defined sketch.
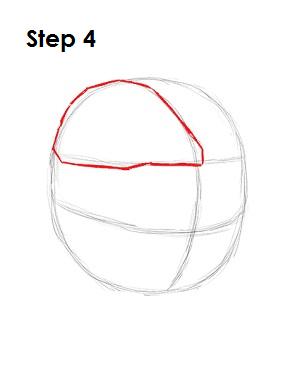
Step 4: Tighten the section on the upper left side of Master Chief's helmet shape by using the shape created by the construction lines and original circle as a guide. Follow the path of that shape when drawing and give it more angular corners as you darken it.
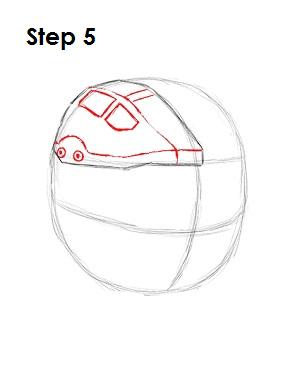
Step 5: Draw a few shapes and lines inside the section for extra detail. Draw a few square-like shapes at the top and a couple of circles at the bottom to represent the bolts in Master Chief's helmet. Draw some more lines to create more edges along this section.


