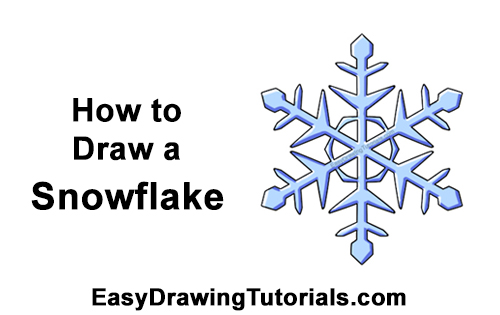
Use the videos and step-by-step drawing instructions below to learn how to draw a Snowflake. Stay tooned for more tutorials!
Stay tooned for more free drawing lessons by:
- Liking us on Facebook>>
- Subscribing on YouTube.com>>
- Visit How2DrawAnimals.com for free animal drawing tutorials>>
All of the free art lessons on EasyDrawingTutorials.com are good drawing tutorials for beginners and experienced artists alike. The online tutorials are easy to follow; they teach you the how to draw basics while showing you how to draw fun cartoon characters step by step. Each cartoon character has a video drawing tutorial option, as well as step-by-step photos and written text to follow.
To draw a Snowflake step by step, follow along with the video tutorial below and pause the video after each step to go at your own pace. You may find it easier to follow the step-by-step drawings below. The new lines in each step are shown in red, and each step is explained in the text below the photo, so you'll know exactly what to draw in each step. You may want to open the video in a new tab and use both drawing methods! Take your time and draw at your own pace.
The written step-by-step video tutorial:
Intro: Start off with a pencil sketch. In the beginning stages, don’t press down too hard. Use light, smooth strokes for sketching.
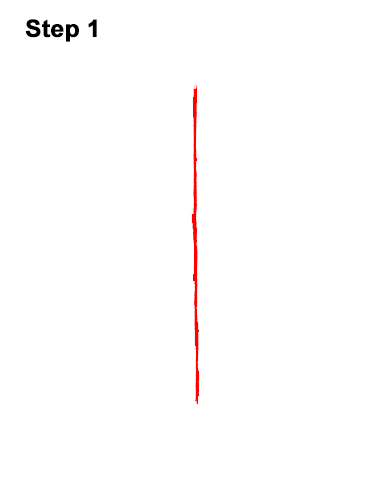
Step 1: Draw a long, vertical line for the first part of the snowflake. The line doesn't have to be perfectly straight, but if you want a straight line, you can use a ruler.
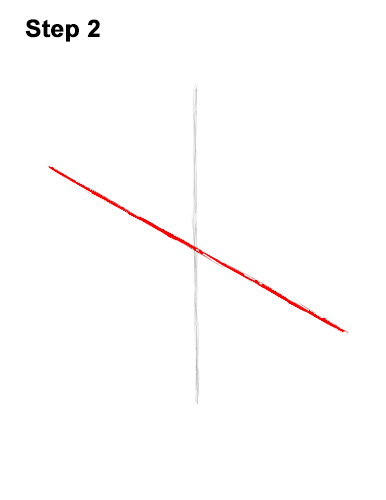
Step 2: Guesstimate where the middle of the line is and make a small mark. Draw a long, diagonal line that bypasses the small mark in the middle of the vertical line.
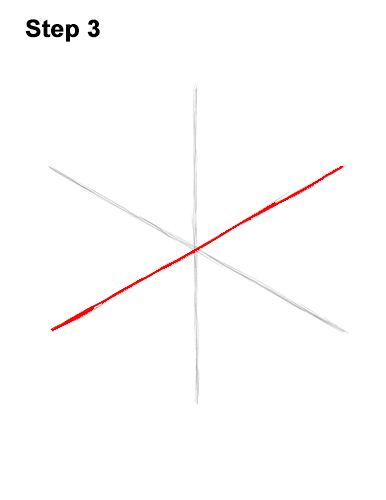
Step 3: Draw another diagonal line that slopes the other way. All three lines should be about the same length. The space between them should be about equal too.
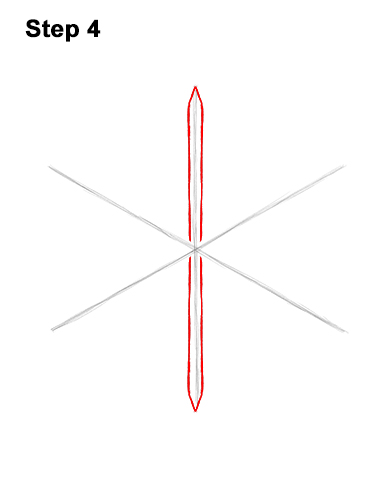
Step 4: Draw a couple of vertical lines around the first line to make the shape thicker. Make the tips pointy and don't connect the shape in the middle.
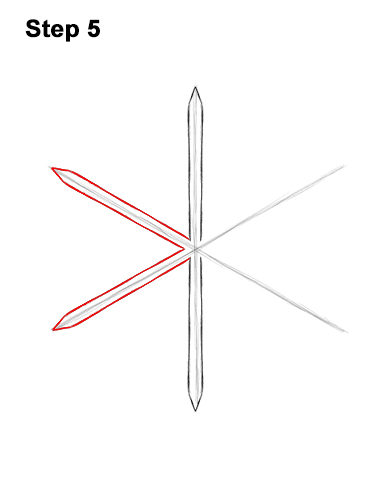
Step 5: Do the same thing for the lines on the left side. Follow the initial lines and make the shapes thicker. Don't make these new shapes too thick. Follow the initial lines closely and make the tips pointy.


