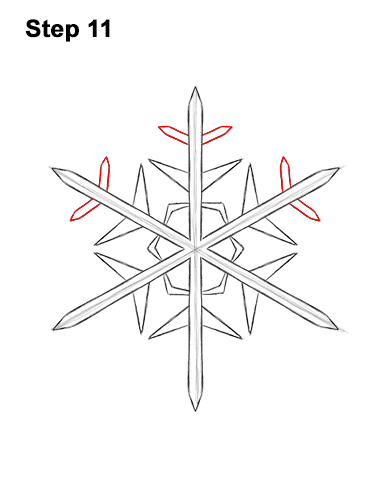
Step 11: Draw a small, thin shape with a pointy tip to each side of the top spokes. Each of these small shapes should be made up of two short lines that come to a point at the top.
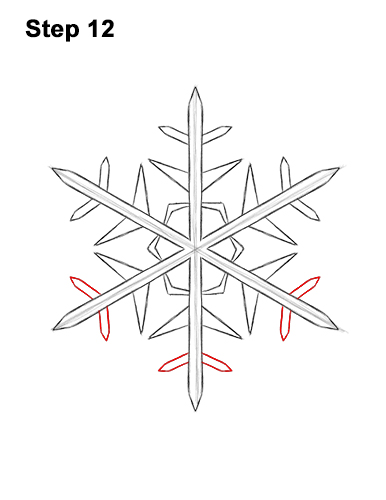
Step 12: Draw the small, pointy shapes to the bottom part of the snowflake too. Sketch lightly as you draw so that it's easy to erase if you make a mistake.
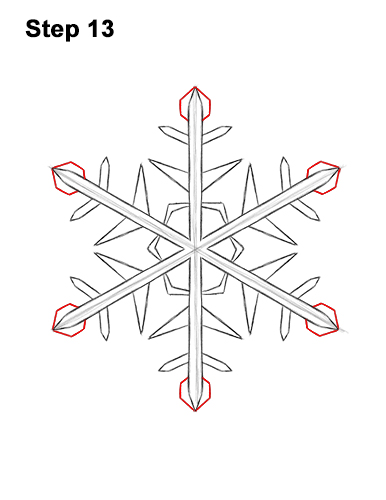
Step 13: Add a small, hexagonal shape at the tip of each end on the snowflake. You can also use a diamond shape instead. Or skip this part entirely if you don't have enough room. Every snowflake is different, so it's okay if yours looks slightly different.
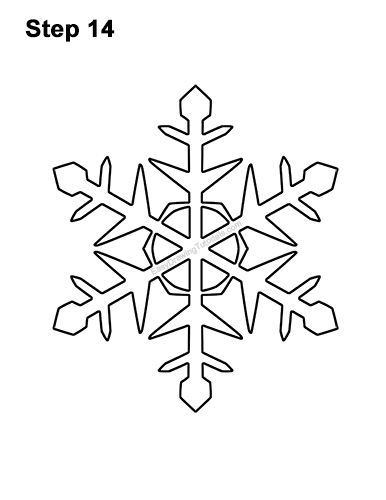
Step 14: Using a pen or marker, carefully go over the lines to make your snowflake drawing permanent. For a cleaner drawing, just ink over the outer edges of the shapes; don't overlap the lines. After inking, get rid of every pencil mark with an eraser.
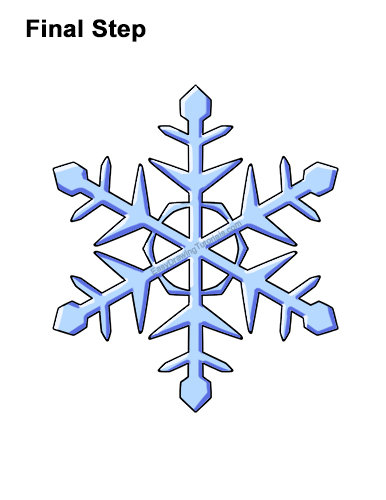
Final Step: Color your snowflake drawing using color pencils, markers or crayons! Use dark blue on the edges. Use light blue or the rest of the snowflake. For a simpler drawing, only use light blue. Don't forget to pause the video to draw at your own pace.
Thanks for visiting! Subscribe to the EasyDrawingTutorials YouTube Channel for a new tutorial every Sunday.
To learn how to draw animals, visit How2DrawAnimals.com.
RELATED TUTORIALS
 |
 |
 |
 |
 |


