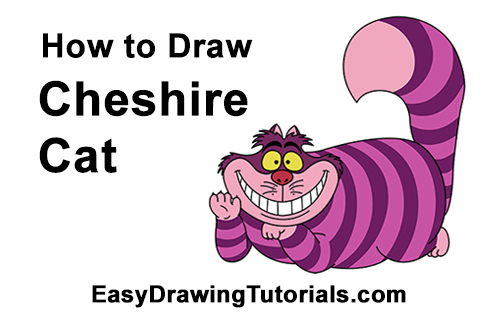
Use the video and step-by-step drawing instructions below to learn how to draw the Cheshire Cat from Alice in Wonderland. A new cartoon drawing tutorial is uploaded every week, so stay tooned!
The speed drawing video:
The written step-by-step video tutorial:
Intro: Start off with a pencil sketch. In the beginning stages, don’t press down too hard. Use light, smooth strokes for sketching.
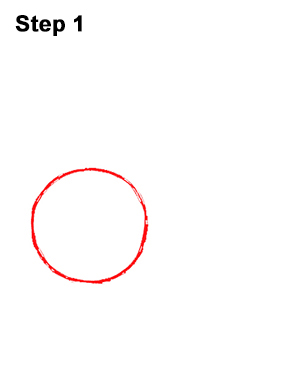
Step 1: Draw a circle on the lower left side as a guide for the Cheshire Cat's head. First draw some marks for the height and width of the circle, then connect the marks using curved lines. Sketch it out lightly at first, then darken the lines when you get it right. Don't worry if the circle isn't perfect. It's just a guide. If you would still like a perfect circle, you can just trace the rim of a glass or anything circular.
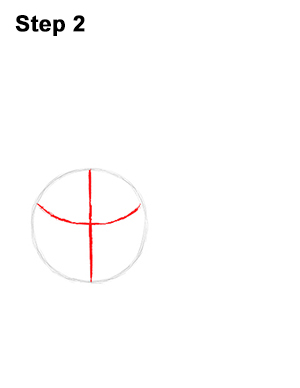
Step 2: Inside the circle, draw two intersecting lines, one horizontal and one vertical. Curve the horizontal line up a bit. These are construction lines that will help you place the Cheshire Cat's facial features later on.
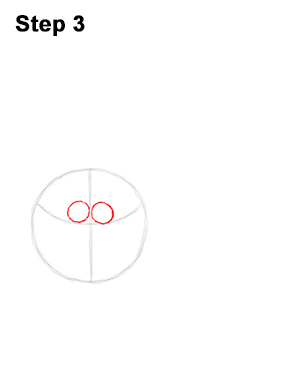
Step 3: Draw two small ovals inside the head right on top of the horizontal line as a guide for the eyes. The eyes should go on either side of the vertical construction line. The eyes should be very close to each other, grazing the vertical line in the middle.
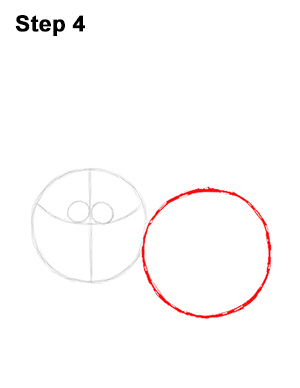
Step 4: Draw another circle to the right of the head as a guide for the back part of the Cheshire Cat's body. This circle should be slightly bigger than the circle for the head. This circle should be placed a bit lower than the head. Their edges should touch.
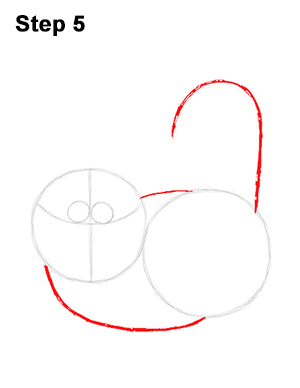
Step 5: Draw a couple of curved lines that connnect the two circles to complete the guide for the Cheshire Cat's body. The line at the bottom should be longer and should curve from the left of the head to the bottom of the body. Draw another long, curved line on the top left side as a guide for the tail.


