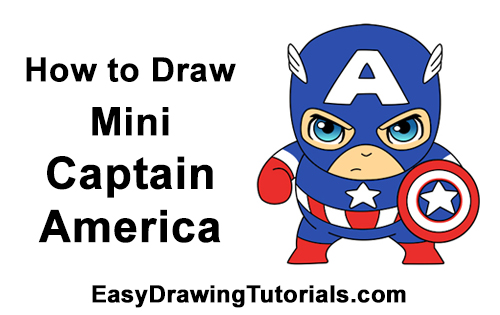
Use the videos and step-by-step drawing instructions below to learn how to draw a Mini or Chibi version of Captain America. Stay tooned for more tutorials!
The written step-by-step video tutorial:
Intro: Start off with a pencil sketch. In the beginning stages, don’t press down too hard. Use light, smooth strokes for sketching.
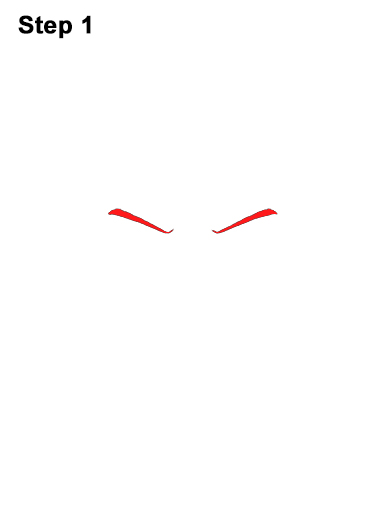
Step 1: Draw two diagonal lines for mini Captain America's eyebrows. Make these lines thick and don't draw them too close together. The two lines should look the same, except they should be mirror images of each other. Sketch lighly at first so that it's easy to erase if you make a mistake. Darken the lines when you get them right.
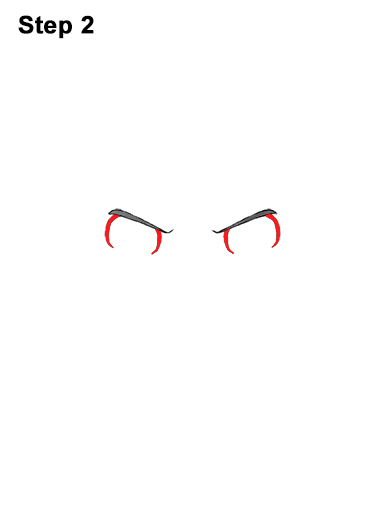
Step 2: Under each eyebrow, draw two curved lines for the sides of Captain America's eyes. These lines should be short and curved, similar to parantheses (). Make these lines thick so that they represent eyelashes.
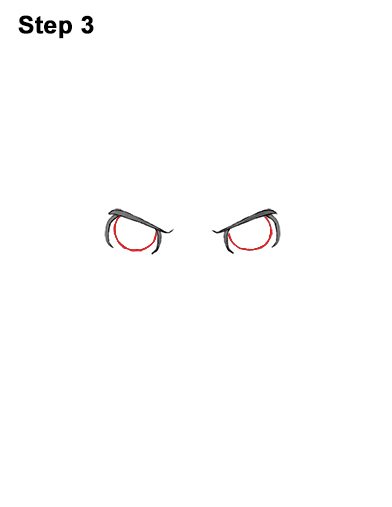
Step 3: Under each of Cap A's eyes, draw a small half- circle for the irises. Try to make both irises the same size. The half-circles should be almost as big as the eyes.
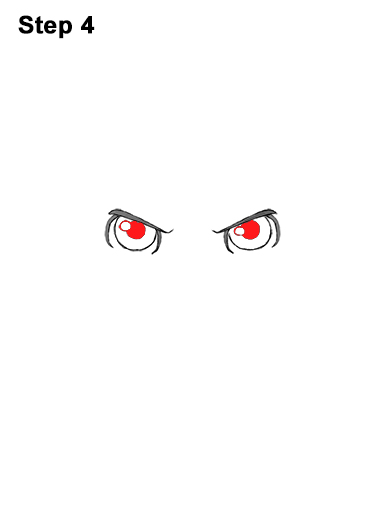
Step 4: Inside each iris, near the top, left side, draw a tiny circle to represent glare. In the middle of each iris, draw a big dot for the pupil. The top part of the pupils should touch mini Captain America's eyebrows.
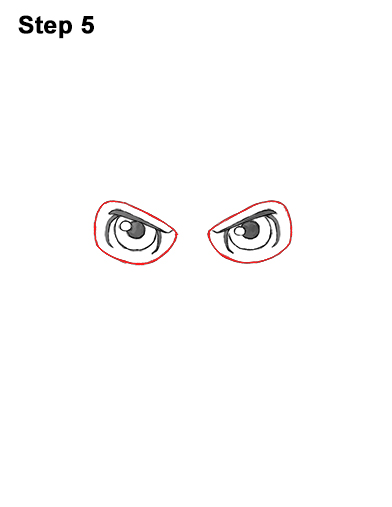
Step 5: Draw the mask's eye holes by first drawing a line over each eyebrow. Then draw a long curved line around each eye at the bottom. Follow the basic shape of chibi Captain America's eyes as you draw the holes. The inner edge of each of the eye holes, at the top, should be a bit pointy.


