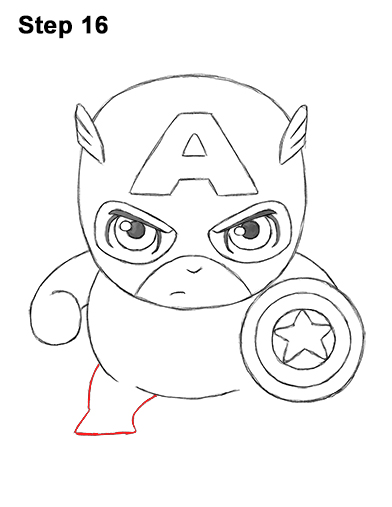
Step 16: Draw the first leg on the lower right side of the body. The top part of the leg is made up of two curved lines. Chibi Captain America's foot should be flat and pointy on the sides.
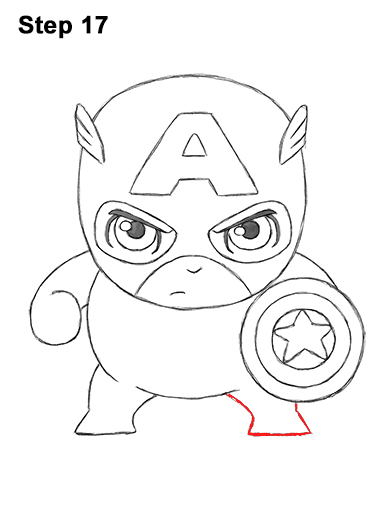
Step 17: Draw the leg on the right the same way. Use curved lines for the top part and make the bottom edge flat.
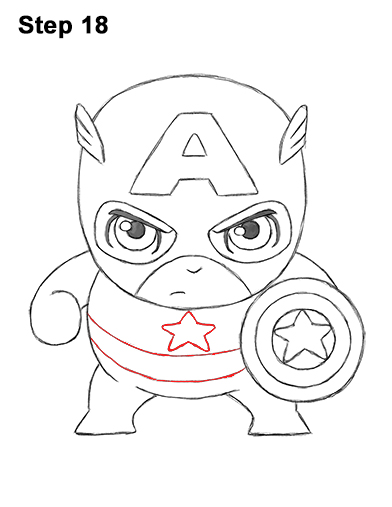
Step 18: Draw a small star right below Captain America's head. Remember to pause the video as you draw along to get the shape of the star right. Under the star, draw two long horizontal lines for the uniform's design. The lower line should almost touch the bottom edge of Cap A's body.
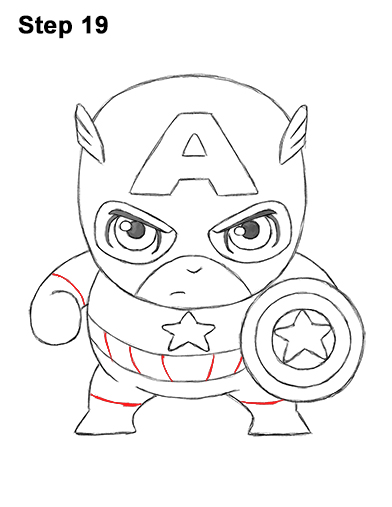
Step 19: Add a few more short lines inside chibi Captain America's body to complete the design of the uniform. Draw one on the arm for the glove, one on each leg for the boots and five on the torso for the stripes.
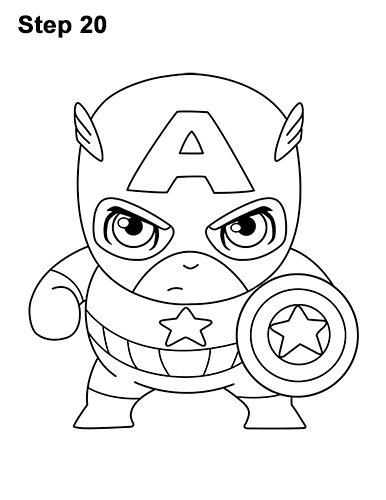
Step 20: Using a pen or marker, carefully go over the lines to make your drawing permanent. After inking, get rid of every pencil mark with an eraser.
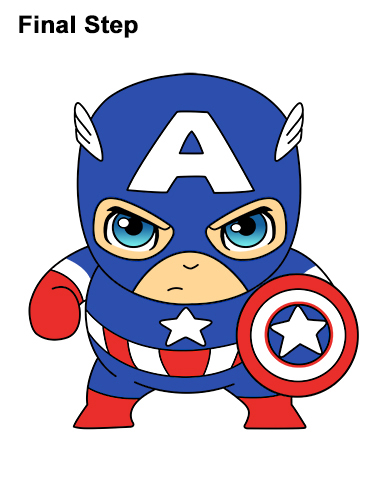
Final Step: Color your Captain America drawing using color pencils, markers or even crayons! To get a gradient effect on the eyes, color the top parts dark blue and the bottom parts light blue. Use blue for the main part of the uniform and on the innermost circle of the shield. Use peach for the skin. Using the peach color, draw the bottom edges of the eyes. Leave the inside blank. Use red for the gloves, boots, the stripes on the torso and the outermost circle on the shield.
Thanks for visiting! Subscribe to the EasyDrawingTutorials YouTube Channel for a new tutorial every Sunday.
To learn how to draw animals, visit How2DrawAnimals.com.
RELATED TUTORIALS
 |
 |
 |
 |
 |


