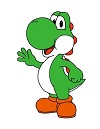
Use the video and step-by-step drawing instructions below to learn how to draw Yoshi from Nintendo's Mario Brothers video games. A new cartoon drawing tutorial is uploaded every week, so stay tooned!
Intro: Start drawing Yoshi with a pencil sketch. In the beginning stages, don't press down too hard. Use light, smooth strokes for sketching.
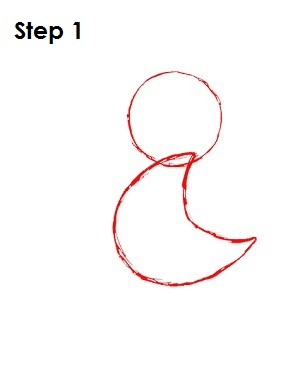
Step 1: To draw Yoshi, start with a small circle on the top right side of the page. This is the basic shape for Yoshi's head. Under the circle, draw a thick crescent-moon shape. The points of the half-moon should point to the right, and the circle of the moon should be on the left. This is the basic shape for Yoshi's body.
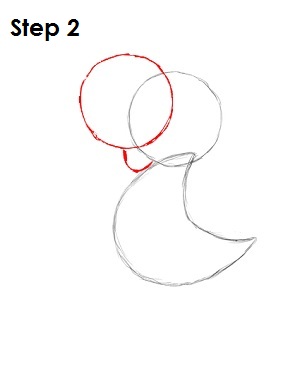
Step 2: Next to the head you drew in step 1, draw a circle the same size as the head. Draw this circle to the left of the head and up a little higher. The two circles should overlap and look like a Venn diagram. This circle will be Yoshi's nose. Below Yoshi's nose circle, draw a U-shaped curve that connects the nose circle and the head circle. This will be Yoshi's mouth.
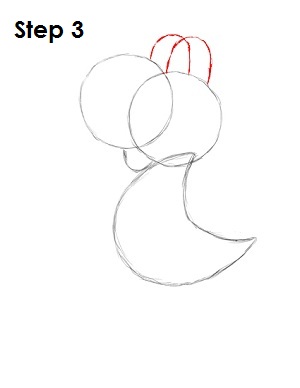
Step 3: Now you will draw two upside-down U-shaped curves on top of this video game character's head. Both curves should overlap and connect the head circle with the nose circle. These will be Yoshi's eyes.
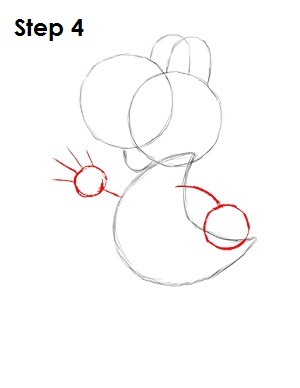
Step 4: On the top left side of Yoshi's half-moon body, draw a short line going up and to the left, and then draw a circle at the end of it. At the end of the circle, draw four small lines going up and to the left. On the right side of his body, draw a bigger curved line with bigger circle at the end of it. These are basic guides for Yoshi's hands.
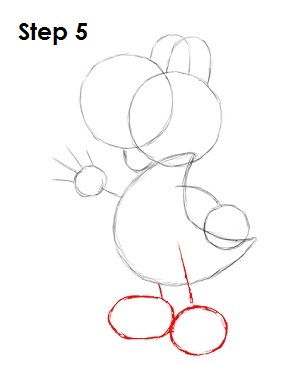
Step 5: From the bottom left side of Yoshi's body, draw a small line with an oval under it. To the right of that, draw a longer line that begins inside the moon shape and comes down and outside of it slightly. Under this line draw a circle. These are basic guides for Yoshi's legs.


