
Use the video and step-by-step drawing instructions below to learn how to draw Finn from Adventure Time. A new cartoon drawing tutorial is uploaded every week, so stay tooned!
Intro: Start drawing Finn from Adventure Time with a pencil sketch. In the beginning stages, don’t press down too hard. Use light, smooth strokes for sketching.
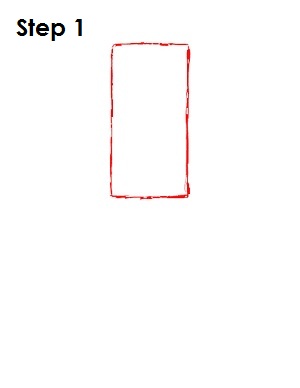
Step 1: To draw Finn, start with a long rectangle near the top of the page. This will be the basic shape for Finn’s head and body.
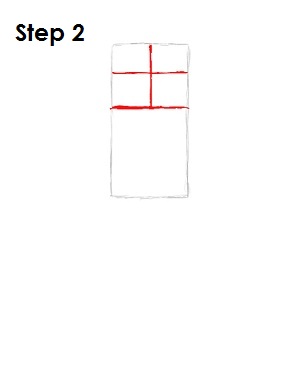
Step 2: Next, draw a horizontal line somewhat above the middle of the rectangle to form a square. Inside this square, draw two intersecting lines, one vertical and one horizontal. These will be construction guides that will help you place Finn's features later on.
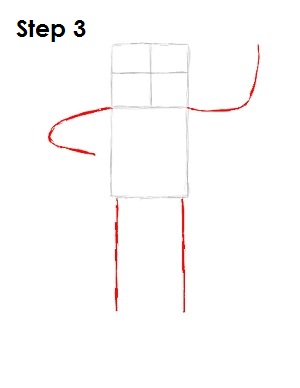
Step 3: Draw in guides for Finn's arms and legs. Draw his arms as two curved lines on the sides of the rectangle that come out of the ends of the lowest horizontal line. Finn's legs are two vertical lines at the bottom of the main rectangle.
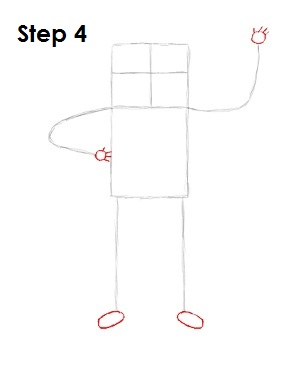
Step 4: On the ends of each guide for Finn’s arms, draw small circles. On each circle draw in four small lines. These are basic construction guides for Finn’s hands and fingers. At the end of each leg line, draw two small ovals. These will be Finn’s feet.
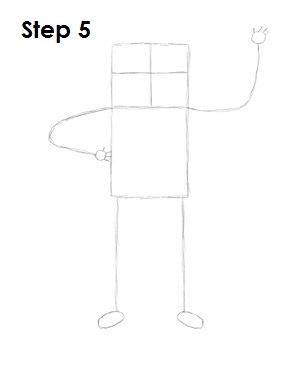
Step 5: That's it for the initial sketch of Finn from Adventure Time! You have the basic Finn shape. Now go in and tighten your drawing. From this point on, press harder with your pencil in order to get darker lines and a more defined sketch.


