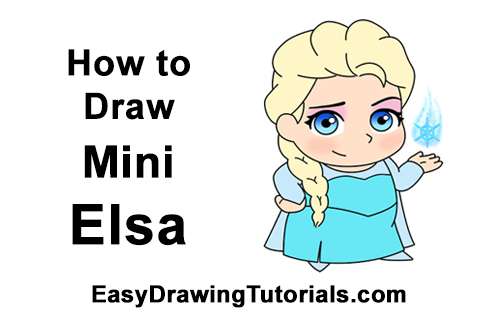
Use the videos and step-by-step drawing instructions below to learn how to draw a Mini or Chibi version of Elsa. Stay tooned for more tutorials!
The written step-by-step video tutorial:
Intro: Start off with a pencil sketch. In the beginning stages, don’t press down too hard. Use light, smooth strokes for sketching.
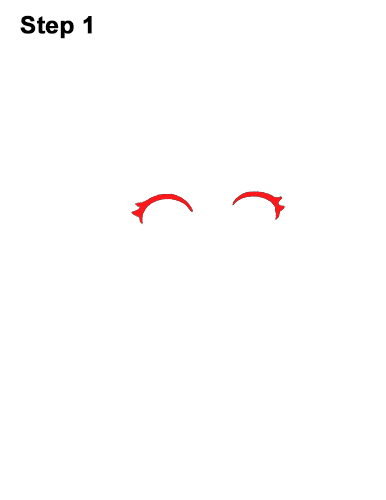
Step 1: Draw a short, curved line for the shape of mini Elsa's first eye. Draw another short curved line on the right side for the other eye. Make the curved lines thicker to represent the eyelashes. Pay attention to the placement of the curved lines. Don't draw them too far apart. Draw two small triangle-like shapes on the left side of the first eye to emphasize Elsa's eyelashes. On the right side of the second eye, draw a couple of triangle-like eyelashes too.
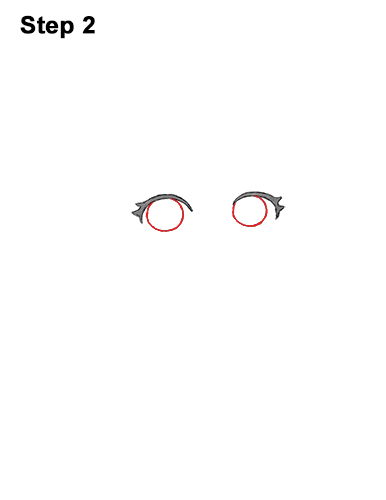
Step 2: Under each of the eyes, draw a small circle for the irises. The circle on the right should be close to the right tip of the line. The circle on the left should be closer to the middle. Elsa's eyes should be big, so don't draw these circles too small.
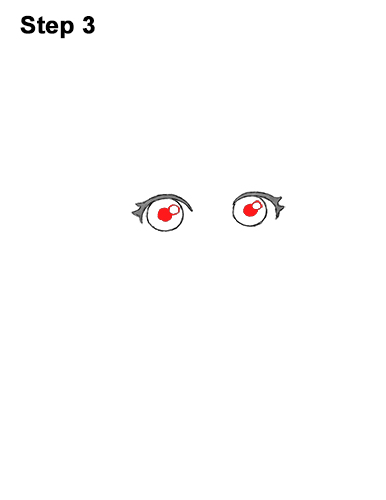
Step 3: Inside each iris, near the top, right side, draw a tiny circle to represent glare. In the middle of each iris, draw a big dot for mini Elsa's pupils.
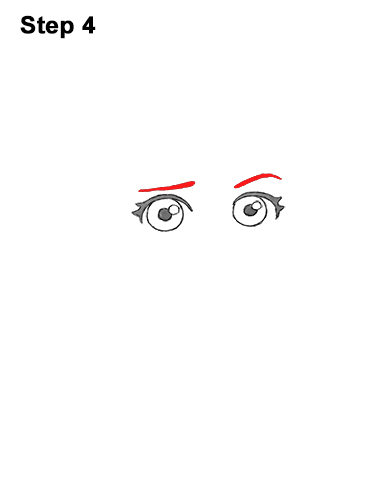
Step 4: Above each eye, draw a long line for the eyebrows. The eyebrow on the left should be close to the eye, and the ends should curve upward a bit. The eyebrow on the right should curve like a rainbow, and it should be higher up above the eye to give mini Elsa a playful look.
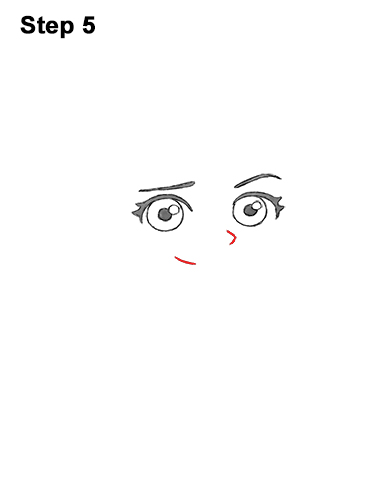
Step 5: Near the lower, left side of the eye on the right, draw a small line similar to a greater-than sign (>) for the nose. Under Elsa's nose, near the left side, draw a short, curved horizontal line for the mouth.


