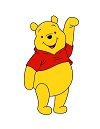
Use the video and step-by-step drawing instructions below to learn how to draw Disney's Winnie the Pooh. A new cartoon drawing tutorial is uploaded every week, so stay tooned!
Intro: Start drawing Winnie the Pooh with a pencil sketch. In the beginning stages, don't press down too hard. Use light, smooth strokes for sketching.
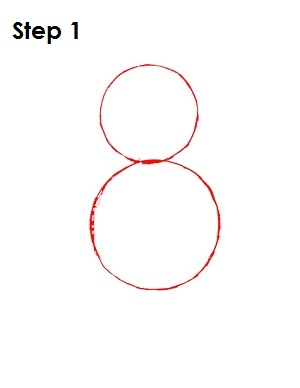
Step 1: To draw Winnie the Pooh, start by sketching a small circle near the top of the page. This will be the basic shape for Winnie the Pooh's head. Under that circle and slightly to the right, draw a bigger circle. This will be the basic shape for Winnie the Pooh's body.
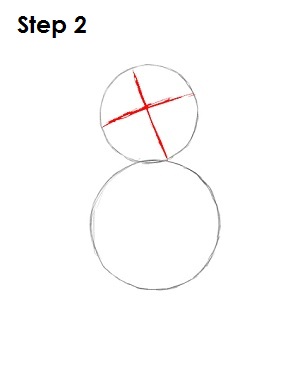
Step 2: Next, draw two intersecting lines in the head circle. First draw a vertical line dividing the circle perfectly in half. Angle it slightly from the top left to the bottom right. Draw another line, but make it horizontal and closer to the top of the circle, rather than directly in the middle of the head circle. These construction lines will help you place Winnie the Pooh's features later on.
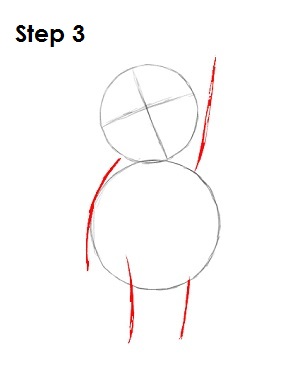
Step 3: To draw guides for Pooh's arms and legs, draw a line that starts at the lower left side of the head and comes down and grazes the body circle. Draw another line going straight up from the top right side of the circle. Under the body circle, draw two vertical lines. The leg on the left will cross his body circle, but the right will not.
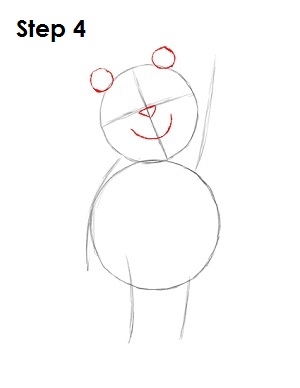
Step 4: On the head circle, right below the horizontal construction line and in between the vertical construction line, draw an upside-down triangle to create this cartoon character's nose. Below that triangle, draw a wide U-shaped curve for his mouth. On top of Winnie the Pooh's head on either, draw two small circles for his ears.
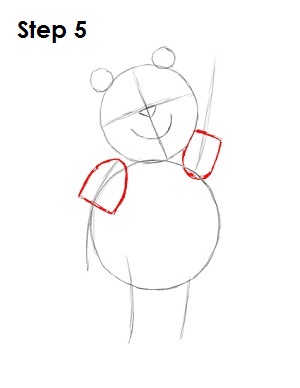
Step 5: Where Winnie the Pooh’s left arm begins, draw an upside-down U with a line connecting the open part of the U. Draw a similar shape on the other arm, only this time upside-down. These are the basic shapes for Winnie the Pooh's sleeves.


