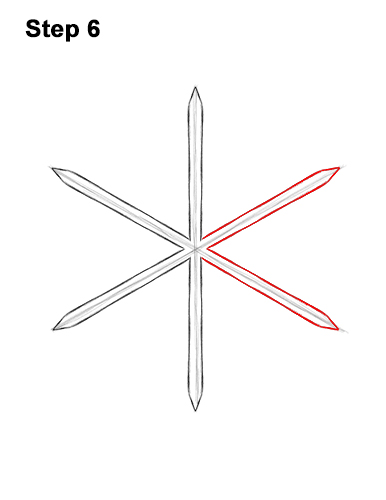
Step 6: Do the same thing to the lines on the right side. Make them thick and pointy. These new shapes should meet in the middle. The lines shouldn't overlap. The lines in the middle are only guidelines for the snowflake that will be erased later.
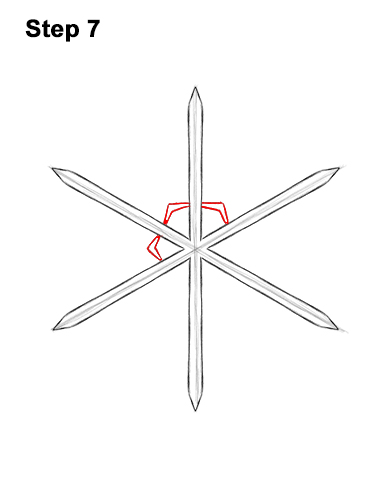
Step 7: Add a couple of angled lines in the wedges close to the center of the snowflake. You can decorate your snowflake differently if you'd like. Just make sure you do the same thing to all sides.
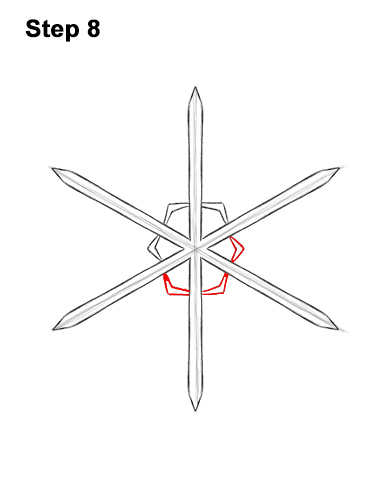
Step 8: Finish adding the angled lines to the center of the other wedges.
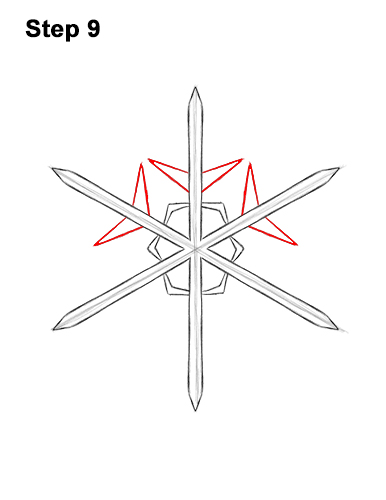
Step 9: Add a small triangle to the left side of the top "spoke." Now do the same on the right side. Try to make both of these spike-like triangles the same size. Now add a couple more of these triangles to the spoke on the top, left side. Draw the spike-like triangles on the spoke on the top, right side of the snowflake too.
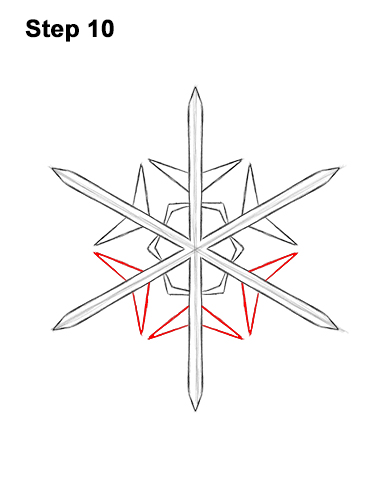
Step 10: Finish adding the spike- like triangles to the shapes at the bottom. Remember that whatever you do to one side of the snowflake you have to repeat on all the sides. The sides don't have to look exactly alike. As long as they look more or less the same, it should be fine.


