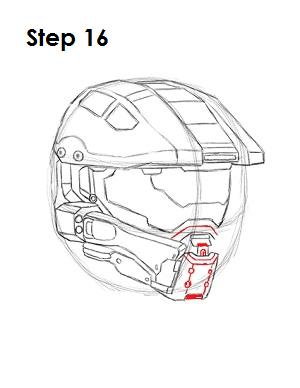
Step 16: Draw the extra detail inside and around Master Chief's mouthpiece. It's basically a few straight lines and tiny circles. Draw only as much detail as you want.
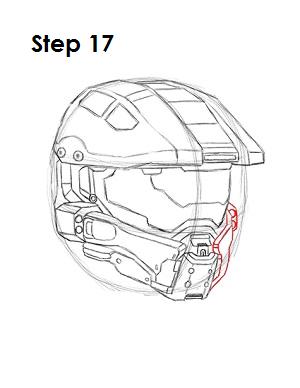
Step 17: Finish up drawing Master Chief's helmet by drawing the lower right section of it. Use the outer edge of the original circle as a guide. Sketch out the main shape lightly at first and darken it once you have the structure right. Then draw the detail inside.
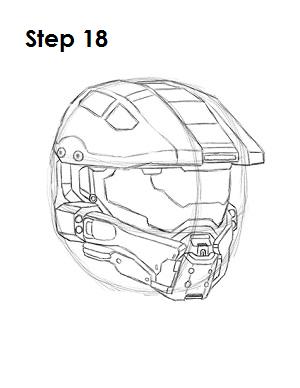
Step 18: That’s it! You now have a nice sketch of Master Chief's helmet. You can stop at this quick drawing for a rough, sketchy look or go for a more finished look by continuing to the step below.
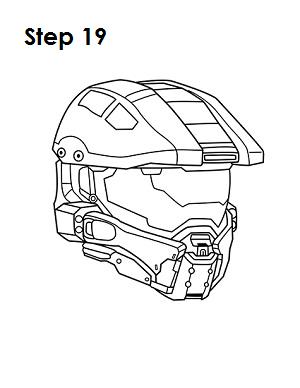
Step 19: For a more finished, inked look, carefully draw over the final sketch lines with a pen or marker. Wait for the ink to dry, and then get rid of every pencil mark with an eraser. You now have a finished inked drawing of Master Chief's helmet! You can stop here or go to the final step to complete your Master Chief drawing.
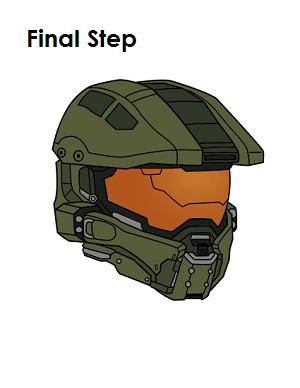
Final Step: For a completely finished Master Chief drawing, you have to color it. You can use markers, color pencils or even crayons! The main part of the helmet's color varies depending on which version of Halo you want to use. It can be green or grayish dark green. You can first add a light layer of gray, then add dark green. The bits of detail throughout the helmet are gray and black. Master Chief' face shield is yellow-orange. That’s it! You now have a completed drawing of Master Chief's helmet from the Halo video games.


