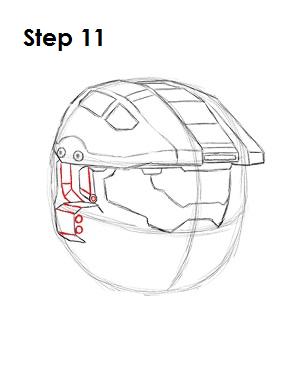
Step 11: Draw the extra detail inside the shapes you just created. The detail is comprised of a lot of lines and a few small circles. When it comes to the extra detail on Master Chief's helmet, you can add as much or as little as you want. Just make sure you have the main outer shapes. All the little extra lines inside are extra.
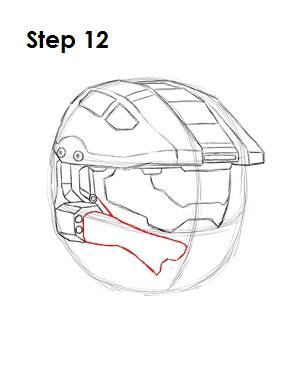
Step 12: Use the lower left shape created by the construction lines and original circle as a guide to draw the lower left section of Master Chief's helmet. This shape can be tough to draw, so be patient and sketch it out lightly at first. Darken it once you have the correct structure.
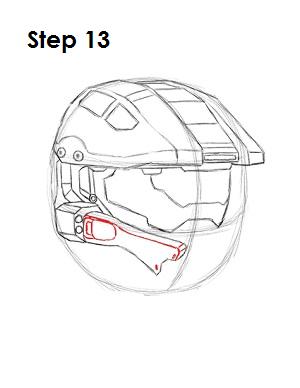
Step 13: Draw the detail inside this section. Draw a few small lines on the right side and a curved buckle-like shape on the left side.
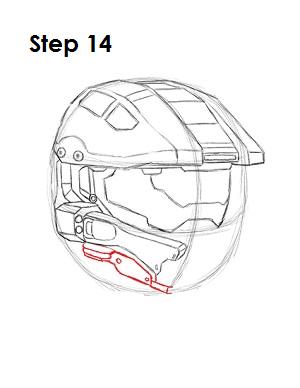
Step 14: Draw the lowest portion of Master Chief's helmet right below the shapes you just created. Remember to use the initial shapes as guides. Notice the space left between this shape and the outer edge of the original circle.
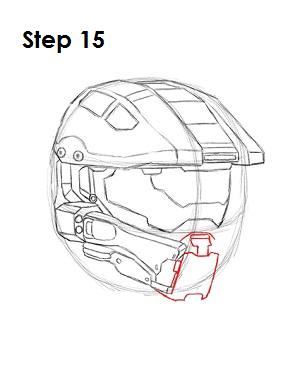
Step 15: Draw the mouthpiece of the helmet to the right of the shapes you just created and below Master Chief's face shield. The main shape resembles a square. Draw a few shapes above it that go up to the lower part of the shield.


