How to Draw Ursula

Use the video and step-by-step drawing instructions below to learn how to draw Ursula from Disney's The Little Mermaid. A new cartoon drawing tutorial is uploaded every week, so stay tooned!
Intro: Start Drawing Ursula with a pencil sketch. In the beginning stages, don't press down too hard. Use light, smooth strokes for sketching.
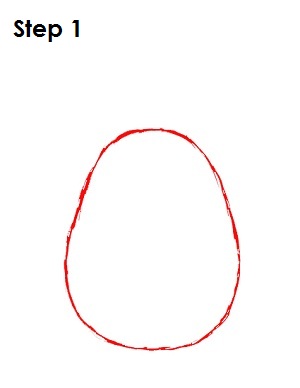
Step 1: To draw Ursula, start by drawing an egg shape near the bottom of the page. This will be the basic shape for Ursula's head.
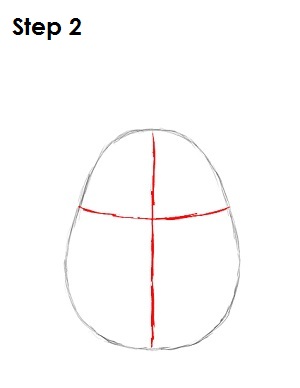
Step 2: Next, draw a vertical line across the dividing the egg shape in half, and then draw a horizontal line closer to the top of the egg that slightly bends down in the. These are construction lines that will help you place Ursula's features later on.
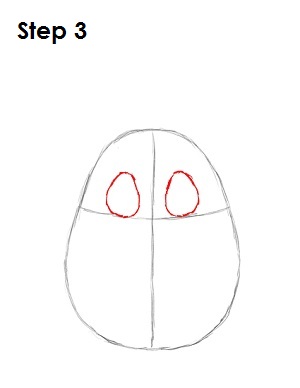
Step 3: Now draw two smaller egg shapes on either side of the vertical construction line that sit directly on top of the horizontal construction line. These will be Ursula's eyes.
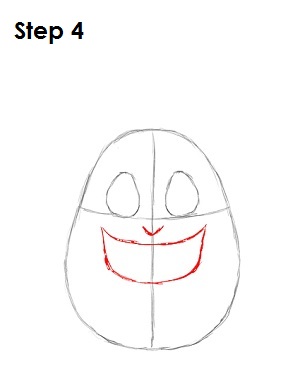
Step 4: Draw a wide V-shaped line underneath where the construction lines meet. This will be Ursula's nose. Under her nose, draw a line that curves up slightly and a wide U-shaped curve underneath it to represent this Disney villain's mouth.
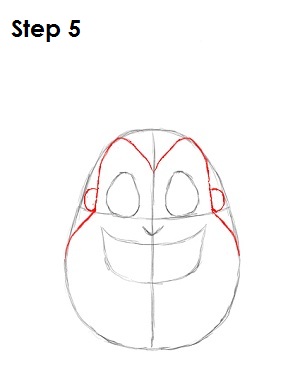
Step 5: Draw a rounded M-shape that sits on top of the horizontal construction line and grazes the top edge of the main egg shape. Draw two lines that connect the M-shape with the lower part of the main egg shape. This is the basic shape of Ursula's head. Draw two curves inside the space created by the M-shape and main egg shape. These are Ursula's ears. Create two outwardly curving lines below the horizontal construction line starting at the bottom of the M-shape. Stop just above the bottom of Ursula's mouth and at the outer egg shape. This will create the cheeks of this villain character from The Little Mermaid.
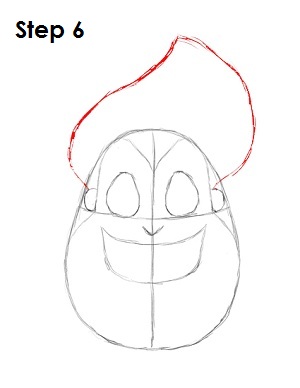
Step 6: Beginning at the top of the left ear, draw a wavy line that extends to the top of the page, and then draw another curved line from the end of that curvy line downward to the top of Ursula's right ear. This is the basic shape of Ursula's hair.
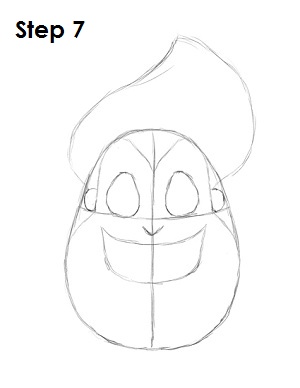
Step 7: That's it for the initial sketch of Ursula from The Little Mermaid! You have the basic Ursula shape. Now you will go in and tighten your drawing. From this point on, press harder with your pencil in order to get darker lines and a more defined sketch.
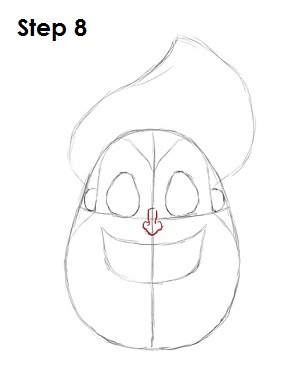
Step 8: Tighten the shape of Ursula's nose by drawing it similar to a downward-pointing arrow.
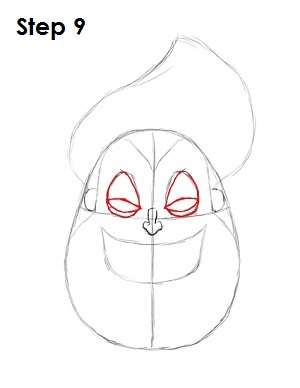
Step 9: Darken the shape of Ursula's eyes, making them pointier on top. Draw a curved line near the bottom half of her eyes to indicate her eyelid. Draw another curved line even lower than the first for Ursula's lower eyelids.
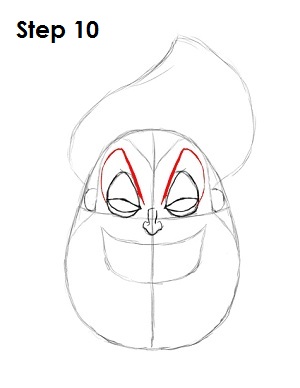
Step 10: Now draw in two thick angled lines over each eye to represent her eyebrows and have them continue around her eyes. End these lines touching the outsides of Ursula's eyes.
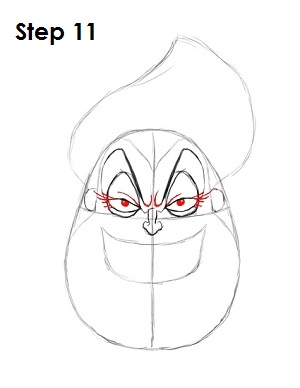
Step 11: Add in details on Ursula's eyes. Curve the inside ends of her eyebrows. Give her a few eyelashes. Add in wrinkles above this Disney cartoon character's eyelids that extend from top tips of her nose up to about halfway through each eyelid. Draw two small half-circles below Ursula's eyelids and shade them in to create her pupils.
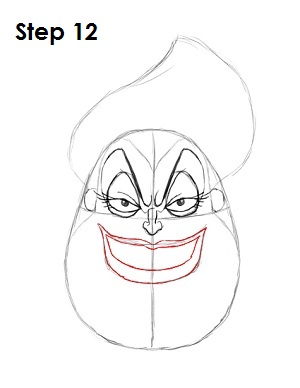
Step 12: Tighten the shape of Ursula's mouth by thickening the basic shape with lines to create lips. Dip the top middle part of her lips to give them a more organic feel.
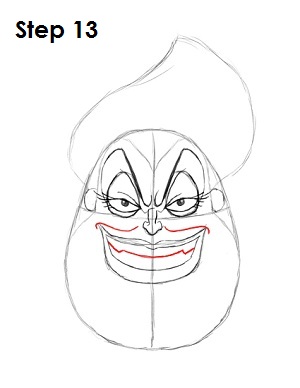
Step 13: Add a couple of smile lines above Ursula's lips by drawing two slight curves. Draw a line inside her mouth just below her top lip and draw in two jagged teeth on each side.
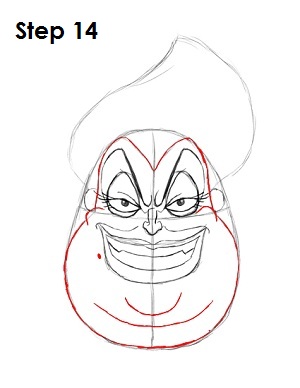
Step 14: Darken in the shape of Ursula's head. Draw a small curve on each side of her face near her ears to represent her cheeks. Draw a U-shaped curve under her mouth for her chin and a long curved line under that to create her double chin. Give her a small dot on the left side of Ursula's mouth to represent her mole.
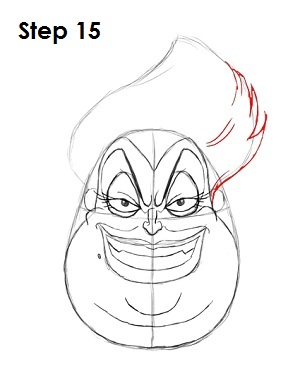
Step 15: Ursula's hair is a bit tricky to draw, so it's been broken down in three parts. Use the basic shape of it as a guide and start drawing in the right side of it by adding a few extra lines and tufts.
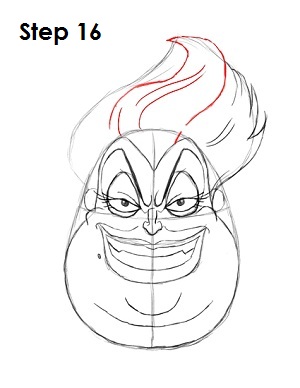
Step 16: Curve the lines even more for the middle part of Ursula's hair and give her a big spiky clump on top. Her hair isn't standing, but Ursula is under water, so it's flowing. This is the reason why it looks like her hair standing straight up.
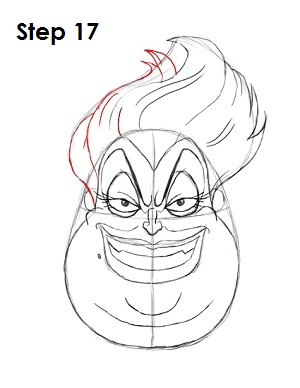
Step 17: Finish drawing the left side of Ursula's hair by adding more curved lines and clumps of spikes and connecting it to her face where her ear meets her cheek.
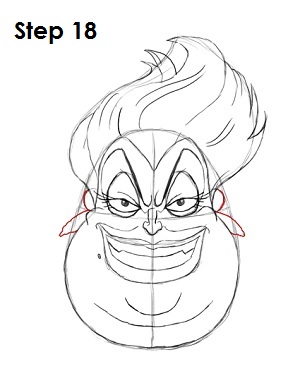
Step 18: Darken the shape of Ursula's ears. Below her ears draw a shape that resembles a pointy seashell. These are Ursula's earrings.
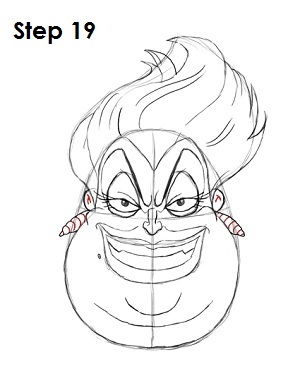
Step 19: Draw a couple of lines within each of Ursula's ears to represent the inside bends and shapes in her ear. Draw a series of curved lines inside each seashell earring.
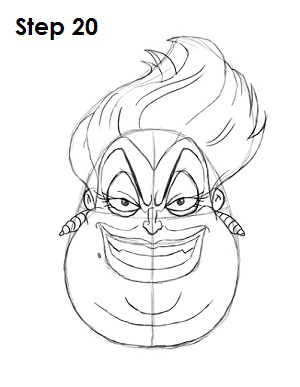
Step 20: That's it! You now have a nice sketch of Ursula from The Little Mermaid. You can stop at this step for a rough, sketchy drawing, or go for a more finished look by continuing to the step below.
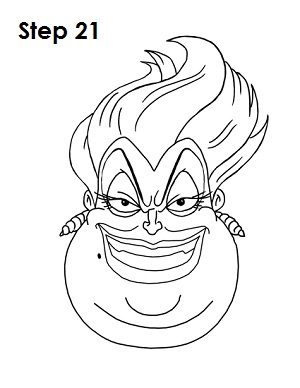
Step 21: For a more finished, inked drawing of Ursula from The Little Mermaid, carefully go over the final sketch lines with a pen or marker. Wait for the ink to dry, and then get rid of every pencil mark with an eraser. You now have a finished inked drawing of Ursula! You can stop here or go to the final step to complete your Ursula drawing.
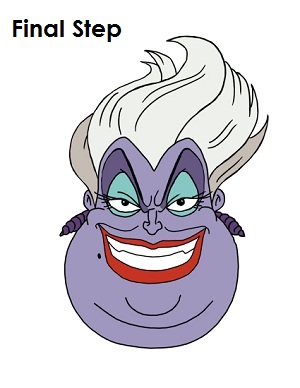
Final Step: For a completely finished Ursula drawing, you have to color it. You can use markers, color pencils or even crayons! Color Ursula's hair a light gray. If you just have gray, use it but don't press down too hard. The sides of Ursula's hair are dark gray. Again, if you just have gray, then press down harder here. Ursula's upper and lower eyelids are blue-green. The area below her eyebrows and her earrings are dark purple. The rest of her face is lighter purple, and her lips are red. That's it! You now have a complete drawing of Ursula from Disney's The Little Mermaid.
RELATED TUTORIALS
 |
 |
 |
 |
 |


