How to Draw Goofy
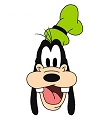
Use the video and step-by-step drawing instructions below to learn how to draw Goofy, the Disney cartoon character. A new cartoon drawing tutorial is uploaded every week, so stay tooned!
Intro: Start drawing Goofy with a pencil sketch. In the beginning stages, don't press down too hard. Use light, smooth strokes for sketching.
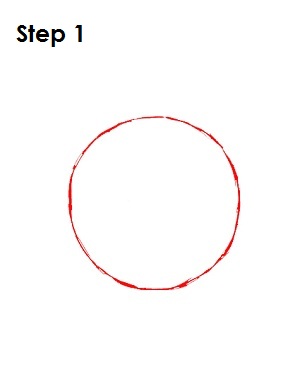
Step 1: To draw Goofy, start by drawing a circle near the bottom of the page. This will be the basic shape for Goofy's head.
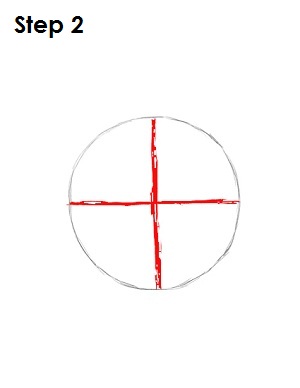
Step 2: Next, draw a vertical line and a horizontal line that intersect right in the middle of the circle. Your drawing at this point will look like crosshairs. These will be construction lines that will help you place Goofy's features later on.
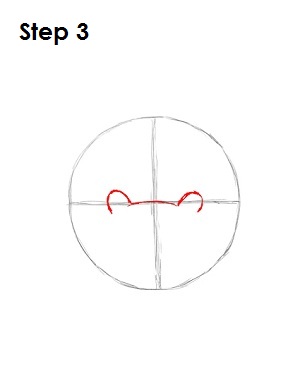
Step 3: Now draw the top part of this cartoon character's mouth. Draw a short, wide curve on top of the horizontal construction line. On either end of that curve, draw two upside-down, tilted U shapes.
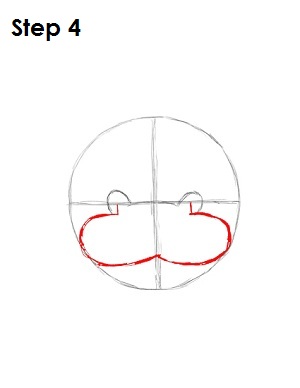
Step 4: Inside the small upside-down U you just drew on the left side, draw a very small line that starts at the horizontal construction line and goes down a bit. At the end of this line, draw a big C-shaped curve that extends out to the main circle and back in to the vertical construction line. Draw the same thing on the other side of the vertical construction line. This will be the top part of Goofy's mouth.
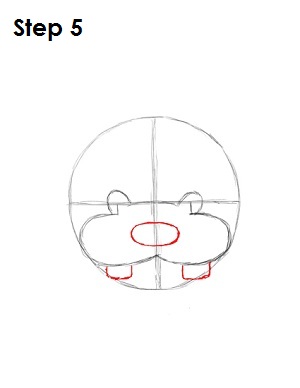
Step 5: Within the shape of Goofy's mouth, draw a wide oval below the intersection of the construction lines. This will be his nose. Draw two small rectangles below his mouth that just graze the outer edge of the main circle. These are Goofy's teeth.
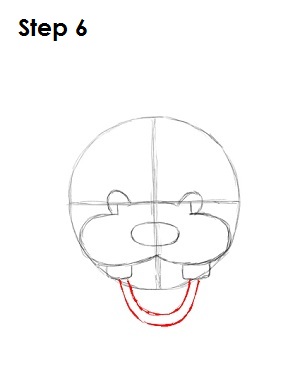
Step 6: Right underneath this Disney cartoon character's teeth, draw two U-shaped curves, one inside the other. These curves will be the lower part of Goofy's mouth.
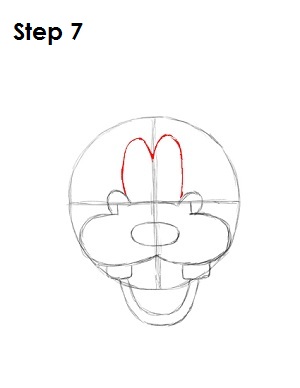
Step 7: Draw an upside-down W that starts at the top of Goofy's mouth and extends about three-fourths of the way to the main circle. This W shape will be Goofy's eyes.
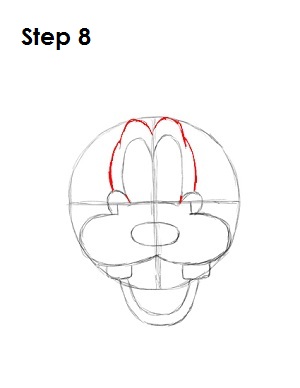
Step 8: Now draw another upside-down W above Goofy's eyes. Draw these curves so they just graze the top of the construction circle. These are Goofy's eyebrows. Finish drawing Goofy's head by connecting the top part of his mouth with his brow, using curved lines.
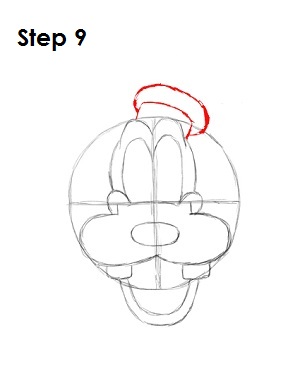
Step 9: Right on top of Goofy's brows, draw three sides of a rounded and slightly tilted rectangle. On top of this rectangle, draw an arc that somewhat surrounds the rectangle. This is the base of Goofy's hat.
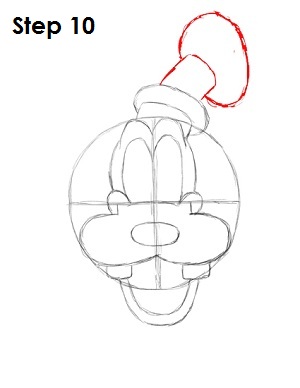
Step 10: To finish drawing Goofy's hat, draw a similar set of shapes on top of the base of the hat. This time the three-sided rectangle is slightly taller, and the arc will have more of an egg shape. This will be the top part of this Disney cartoon character's hat.
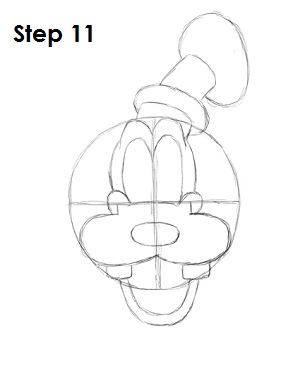
Step 11: That's it for the initial sketch of Goofy! You have the basic Goofy shape, and now you will go in and tighten your drawing. From this point on, press harder with your pencil in order to get darker lines and a more defined sketch.
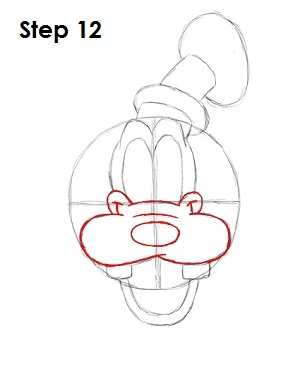
Step 12: Darken in the top part of his mouth, making all the lines rounder. Draw in two small arcs on the end of Goofy's smile (underneath the two small upside-down U shapes) to represent his laugh lines. Also draw a curve above Goofy's nose.

Step 13: Draw in Goofy's teeth. When you draw the lower part of Goofy's mouth, extend one of the left lines further down to make his chin. Also draw two curves inside his mouth to make his tongue.
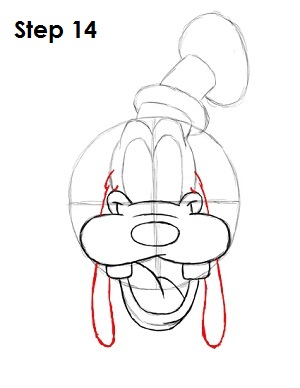
Step 14: Draw in Goofy's ears, which are basically two lines that come out of the side of his head. They droop down and continue below his mouth. To draw the lower part of them, just draw really long U-shaped curves below Goofy's mouth. Do not draw these loops over his snout. The ears are behind his snout, so these lines are not seen.
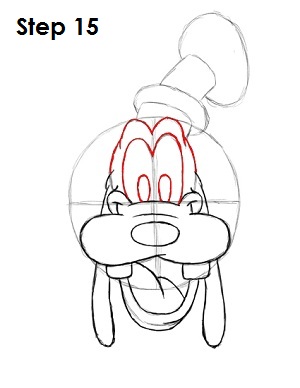
Step 15: Now darken in Goofy's head and his eyes. Draw in two ovals inside his eyes on either side of the vertical construction line. These are his pupils.
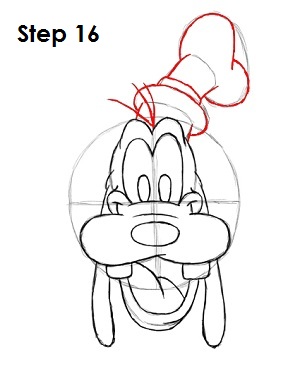
Step 16: Tighten Goofy's hat by darkening it in and drawing an extra line above the base of his hat. Give the top of the hat two curves that taper in slightly at the middle. Finally, using three quick strokes, draw in the hair that's in between his brows.
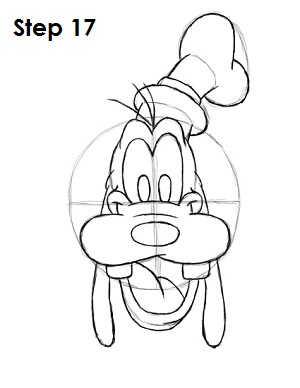
Step 17: That's it! You now have a nice sketch of Goofy. You can stop at this quick drawing for a rough, sketchy look or go for a more finished look by continuing to the step below.
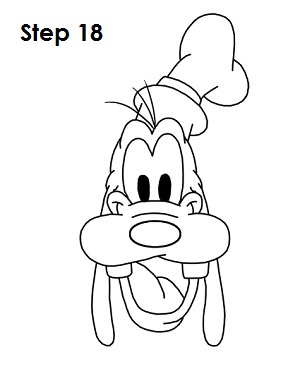
Step 18: For a more finished, inked look, carefully draw over the final sketch lines with a pen or marker and fill in Goofy's pupils. Wait for the ink to dry, and then get rid of every pencil mark with an eraser. You now have a finished inked drawing of Goofy! You can stop here or go for the final step and complete your Goofy drawing in its entirety by following the step below.
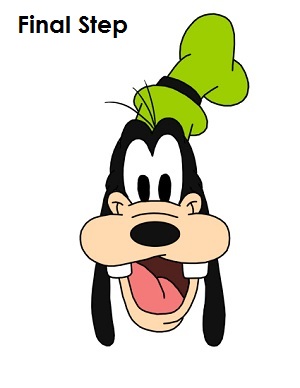
Final Step: For a completely finished drawing of Disney's Goofy, you have to color it. You can use markers, color pencils or even crayons! Goofy's hat is green is a light green color. The band on his hat is black, along with his head, ears and nose. His mouth is a peach color. If you don't have peach, improvise! Use light orange or pink, or anything that looks good. Experiment. Goofy's tongue is pink, and the inside of his mouth is a dark brown. That's it! You now have a completed drawing of Goofy.
RELATED TUTORIALS
 |
 |
 |
 |
 |


