How to Draw Wall-E
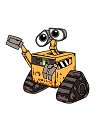
Use the video and step-by-step drawing instructions below to learn how to draw Disney/Pixar's Wall-E. A new drawing tutorial is uploaded every week, so stay tooned!
Intro: To draw Wall-E, start off with a pencil sketch. In the beginning stages, don’t press down too hard. Use light, smooth strokes for sketching.
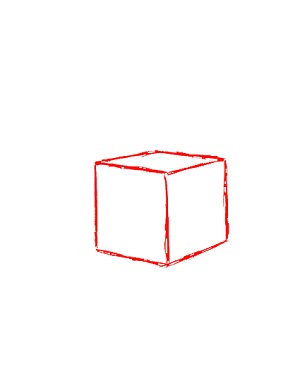
Step 1: Start by drawing a cube or box in the middle of the page. You can start with a square and extend the corners toward the back thus creating a cube. This will be a basic guide for Wall-E’s body.
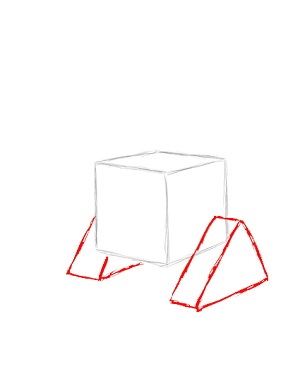
Step 2: On either side of the body, near the bottom, draw two thick triangle blocks. These will be guides for the track that Wall-E uses to roll around on. Make sure to draw the shapes parallel and make them align with each other at the front, otherwise the tracks will appear uneven.
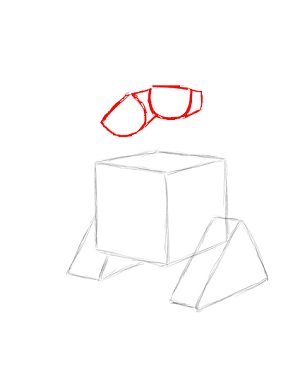
Step 3: Above the body, draw the guides for Wall-E's eyes. They are made up of two half circles that are a bit tilted to the left. Then extend the sides of the circles toward the back to make them thicker and three-dimensional.
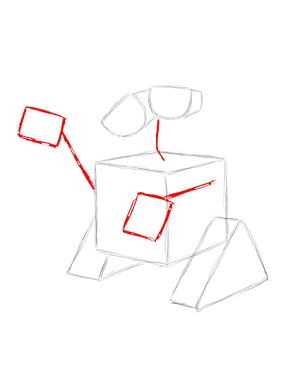
Step 4: Draw an angled line below Wall-E's eyes as a guide for the neck. On the sides of the body, draw two straight lines for the arms. At the end of each arm draw a square/rectangle for Wall-E's hands.
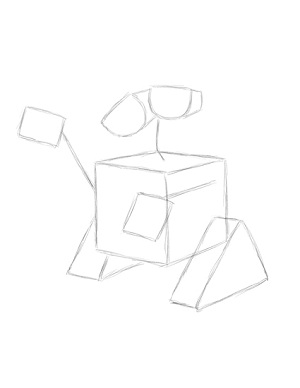
Step 5: That's it for the initial sketch of Wall-E! You have the basic Wall-E shape, so now go in and tighten your drawing. From this point on, press harder with your pencil in order to get darker lines and a more defined sketch.
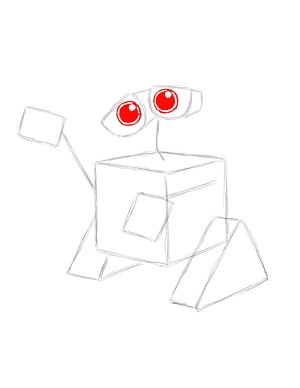
Step 6: Draw a big circle inside each of the half circles that make up Wall-E's eyes. Draw another circle inside each of those circles for the pupil. Shade in the inner circle except for another small circle on the upper right side that represents glare.
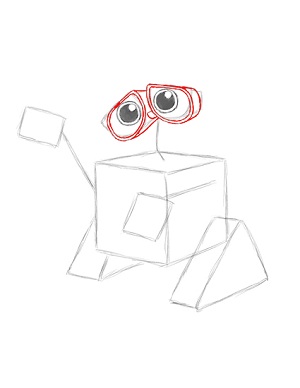
Step 7: Use the guide lines to help you give Wall-E's eyes a more round shape without so many angles and sharp corners. They kind of look like binoculars. Draw a small half circle in between them to connect the eyes.
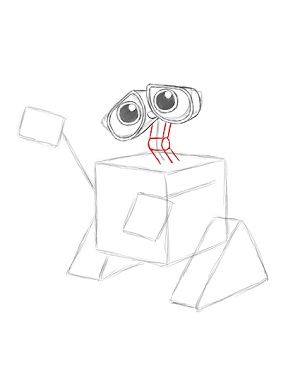
Step 8: Below the eyes draw Wall-E's neck using the initial line as a guide. Draw a small cylinder shape as a hinge where Wall-E's neck bends, then use a series of lines above and below the hinge to make the neck thicker.
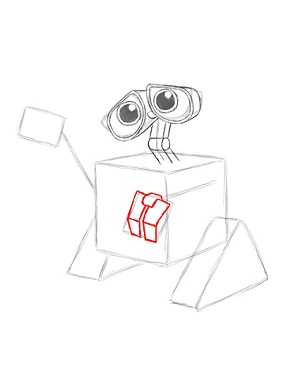
Step 9: Draw the right hand by using the initial square as a guide. The hand consists of two rectangles that make up Wall-E's flat fingers on a hinge.
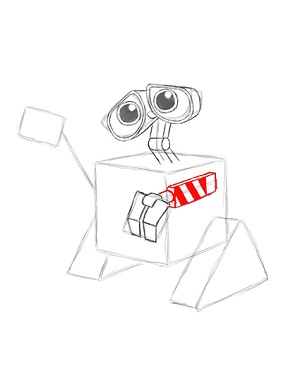
Step 10: Use the line as a guide to draw the rest of Wall-E's arm. Draw a rectangle extending back toward the body. Draw the sides of the arm more or less parallel to the sides of Wall-E's body. Inside the arm draw a few stripes for Wall-E’s design.
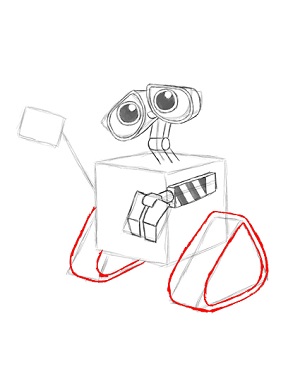
Step 11: Wall-E’s track can be a little tricky, so the instructions for how to draw it are split up into two steps. First use the initial shapes as a guide to draw the basic outline for the track. Make the track more round and lose the sharp corners and angles.
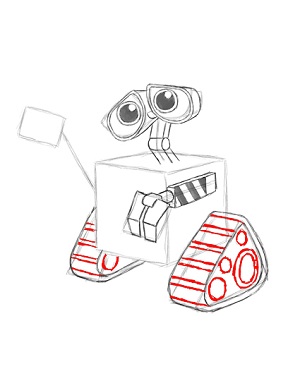
Step 12: Draw small horizontal lines that surround the track to make it bumpier and more track-like. Finish up Wall-E's track by drawing a few circles of different sizes inside the shape to represent the mechanical gears that drive him.
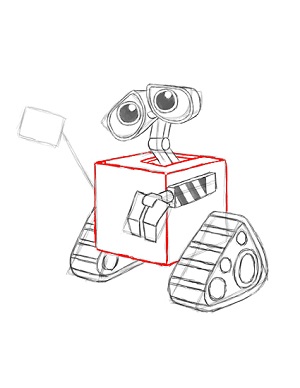
Step 13: Darken the shape that makes up Wall-E's body. Draw a square at the base of his neck using a series of lines to create an opening.
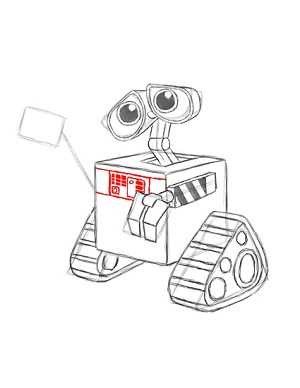
Step 14: On the front of Wall-E's body draw a panel using squares and rectangles of different sizes to represent buttons and overall extra detail.
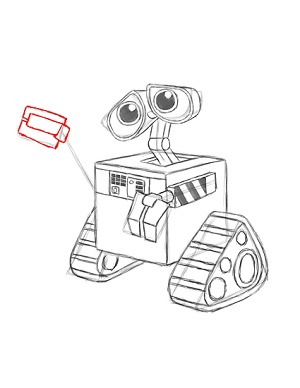
Step 15: Draw the left had using the initial square shape as a guide. Wall-E's hand consists of three rectangles that make up his flat fingers on a small rectangle for the hinge.
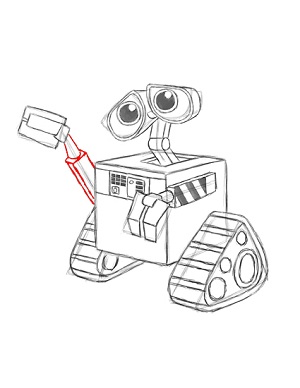
Step 16: Draw a cylinder that connects Wall-E's hand to his arm. The arm is basically one long rectangle, but most of it is hidden behind the body.
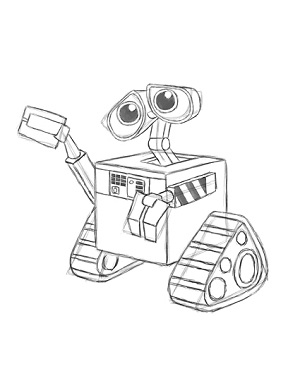
Step 17: That’s it! You now have a nice sketch of a Wall-E. You can stop at this quick drawing for a rough, sketchy look, or continue to the step below to go for a more finished look.
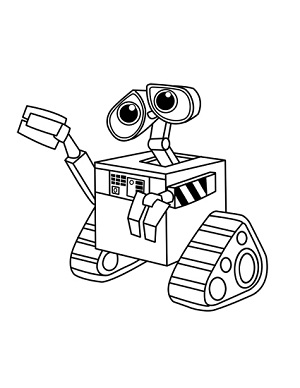
Step 18: For a more finished, inked look, carefully draw over the final sketch lines with a pen or marker. Wait for the ink to dry and then erase your pencil marks. You now have a finished inked drawing of Wall-E! You can stop here or go to the final step to complete your Wall-E drawing.
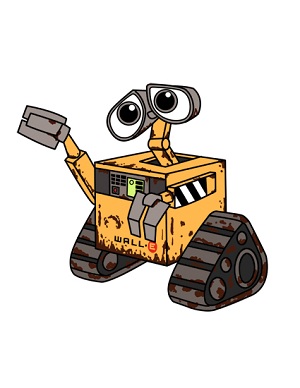
Final Step: For a completely finished Wall-E drawing, you have to color it. You can use anything you want: markers, color pencils or even crayons! To create his logo, write WALL and a dot in black on the lower right side of his body. Then with red draw a circle that encompasses the letter E. Wall-E is an old robot that picks up garbage, so color some splotches of brown all over his body to represent rust and dirt. It doesn’t have to be exact; just add the brown randomly. Color Wall-E's eyes, hands, tracks and the panel on his chest different shades of gray. Add some red and yellow-green on the panel for extra detail. Wall-E's body, neck and arms are yellow-orange. That’s it! You now have a completed drawing of Disney/Pixar's Wall-E.


