How to Draw a Rose
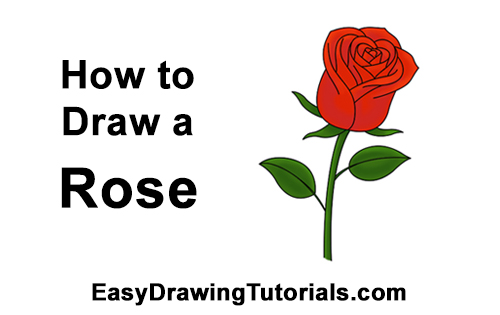
Use the videos and step-by-step drawing instructions below to learn how to draw a Rose. Stay tooned for more tutorials!
The written step-by-step video tutorial:
Intro: Start off with a pencil sketch. In the beginning stages, don’t press down too hard. Use light, smooth strokes for sketching.

Step 1: Start by drawing a small curved line for the first petal in the middle of the rose flower. This line should be similar to a letter U that's almost upside-down.

Step 2: For the next petal, first draw a diagonal line that closes the bottom end of the first petal. Then curve the top end of this line to the right and down so that it meets the first petal at the top. Add a small line on the left side to complete the shape of the second rose petal.
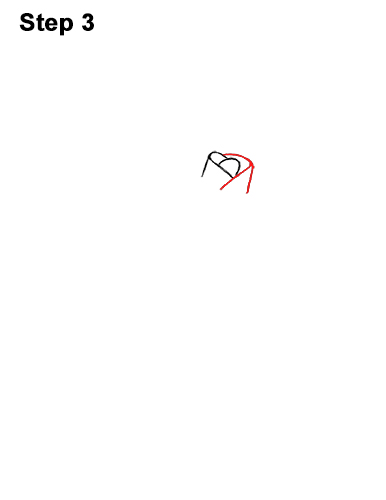
Step 3: For the third flower petal, draw another curved line on the right side to completely surround the first petal. Add a small vertical line on the right to finish up the shape of the third folded rose petal.
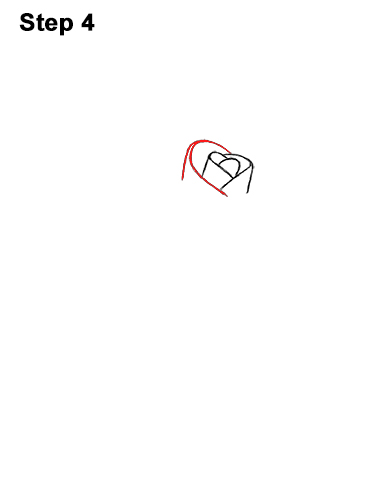
Step 4: For the next rose petal, draw another curved line on the left side like in step 2 but make it bigger. Add a small vertical line on the left side to complete the shape of the folded petal.
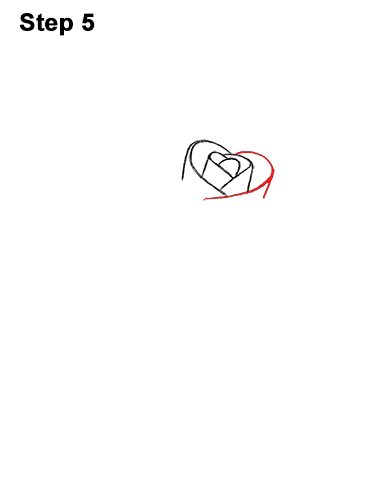
Step 5: Now add another curved line on the right like you did in step 3 for the next flower petal. You can actually continue adding curved lines on the sides like this as long as you want and make a giant rose!
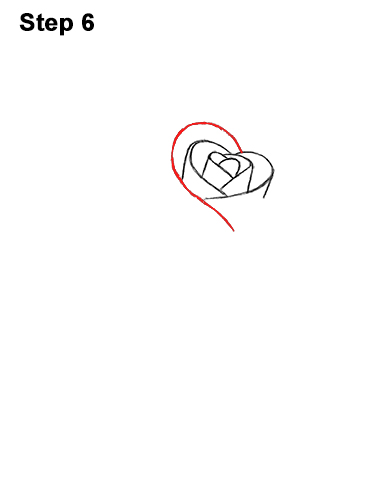
Step 6: Add a hidden heart in the rose by drawing a long curved line on the left side. This will be the left half of the heart shape. Sketch the petal/left side of the heart lightly at first so that you get the shape right.
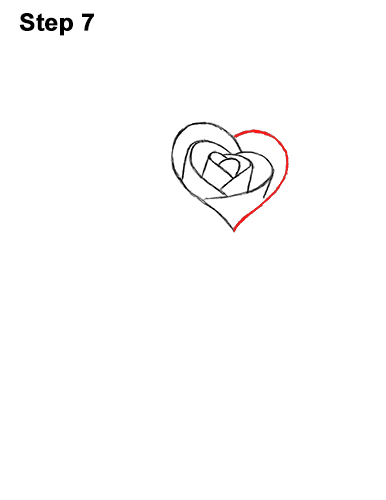
Step 7: Now draw the next rose petal/right side of the heart as a curved line on the the right. The sides of a heart basically consist of a curved line at the top and a diagonal line at the bottom.
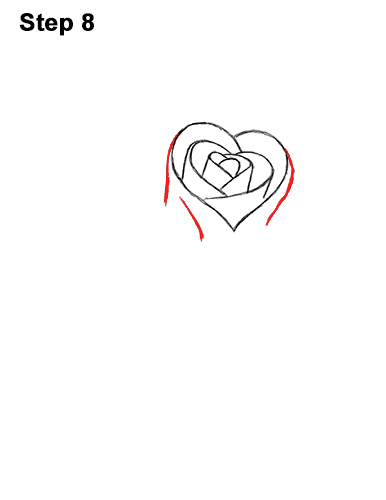
Step 8: Add a couple of lines on the sides of the heart shape to make them look more like rose petals.
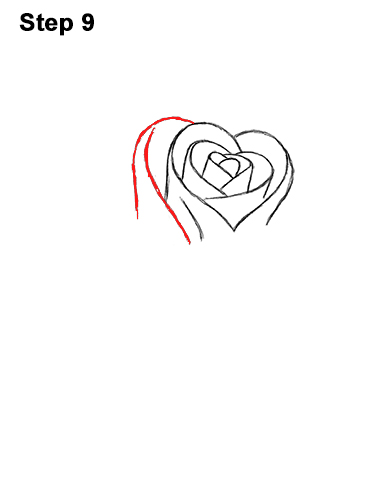
Step 9: Draw a wavy line on the left side for the next flower petal. This line shouldn't curve too much. It should almost be straight but just slightly wavy. Add another line that starts at the left side of the heart and curves down to complete the folded petal.
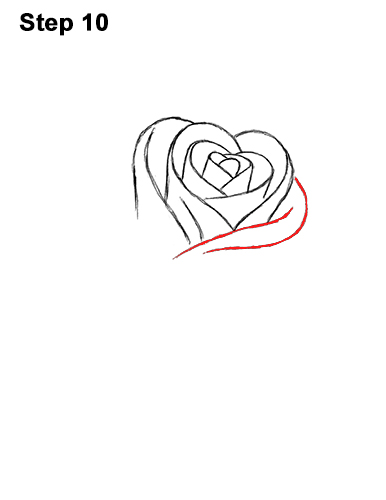
Step 10: Draw another slightly wavy line on the lower, right side that closes off the previous shapes at the bottom. Add a curved line to the right for the top edge of the rose petal.
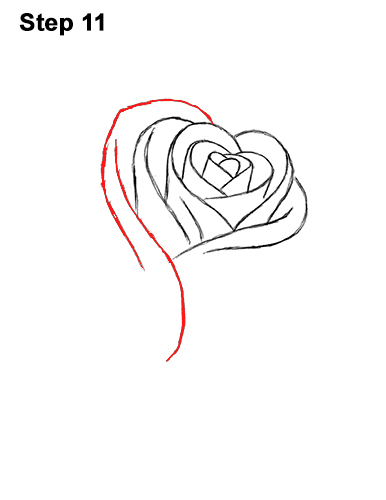
Step 11: Draw a long, wavy line on the lower right side for the inner edge of the next petal. This line starts way at the bottom, then moves up and curves to the left before curving upward again. The length of the line at the bottom will determine how long the base or cup of the rose will be. Now draw another curved line on the top, left side for the top edge of the flower petal. Give this line a bit of a point near the middle for extra detail on the petal.
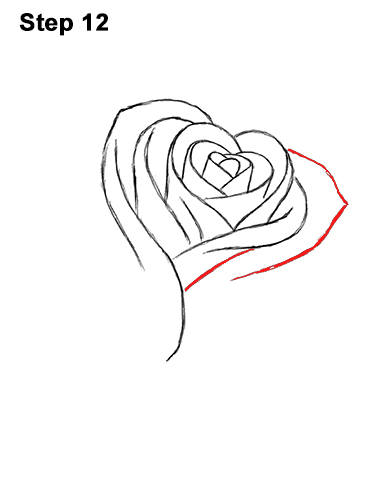
Step 12: Add the last rose flower petal by first drawing a short, curved line on the lower right side. Now add a curved line on the right side with a little spike in the middle like the previous petal.
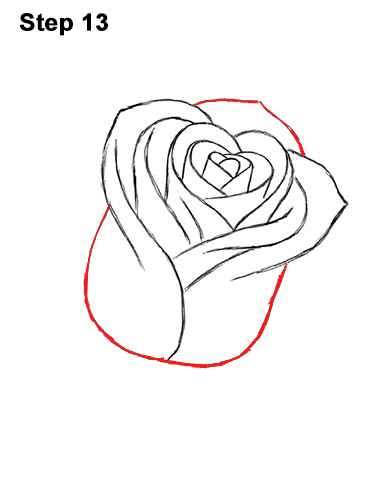
Step 13: Draw a long, curved line to create the cup-like sides and bottom of the rose. This line should be similar to a very big, slightly tilted letter U. At the top, draw another curved line with a pointed tip in the middle for a petal peeking from behind.
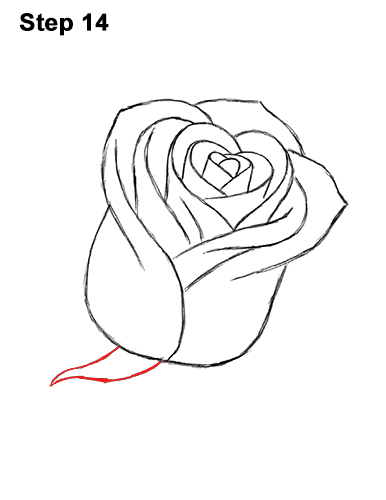
Step 14: At the bottom of the rose , draw two wavy lines that come to a point for the green leaf-like bit called a sepal.
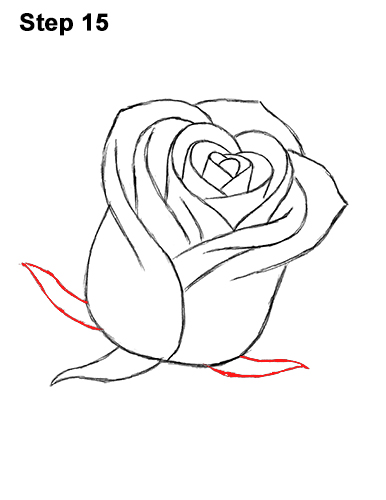
Step 15: On the sides of the rose, at the bottom, draw two more sepals using wavy lines. Don't draw the sepals too long. You can also skip them altogether if you'd like.
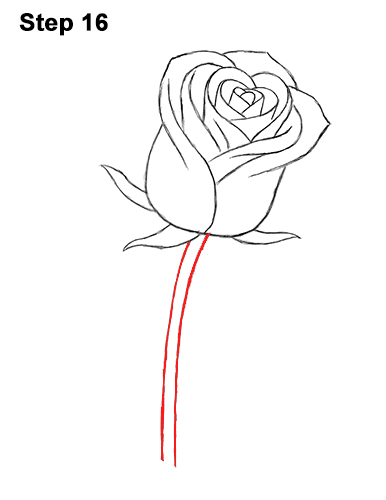
Step 16: Under the rose, draw two long, curved vertical lines for the stem. Don't place the lines too far apart, otherwise the stem will be too thick. You can make them longer for a longer flower stem.
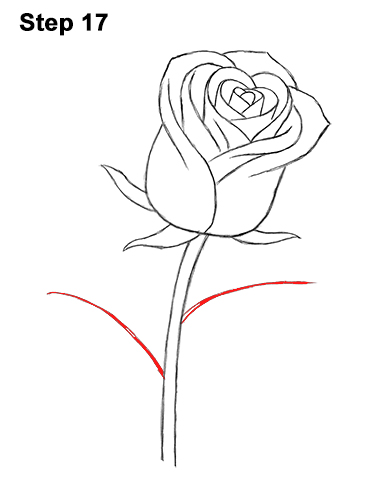
Step 17: On either side of the stem, draw a long, curved line for the base of the rose's leaves. Try not to place the lines directly across from each other. Stagger them a bit for a bit of asymmetry.
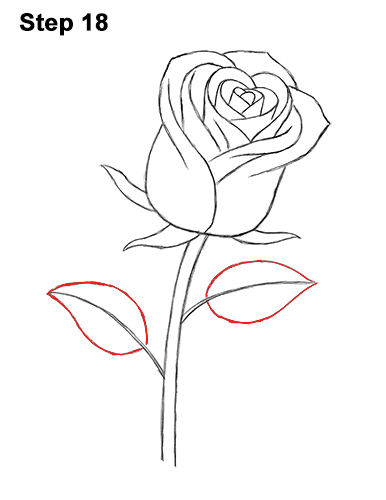
Step 18: Now draw the rose's leaves by first drawing a wavy line at the bottom of the line on the left. Draw a curved line at the top that creates a point on the left side to finish off the first leaf. Draw the other leaf the same way: a wavy line at the bottom and a curved line at the top that come to a point on the right.
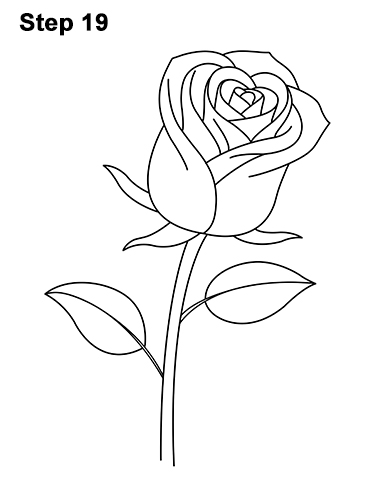
Step 19: Using a pen or marker, carefully go over the lines to make your rose drawing permanent. After inking, get rid of every pencil mark with an eraser.
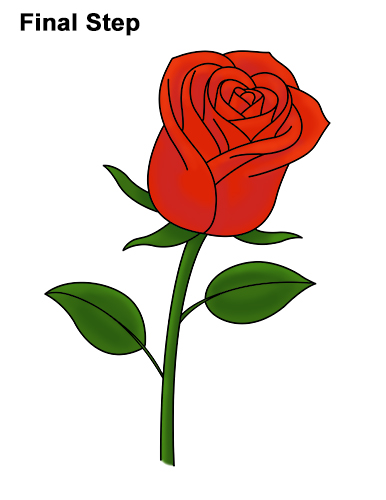
Final Step: Color your rose drawing using color pencils, markers or even crayons! Use red for a classic rose flower. Roses can be a variety of colors like pink, yellow, even white! Color yours however you'd like. Use a bit of dark red between the petals and at the bottom of the rose to create a few shadows. Add some red- orange at the tips for highlights.
You can also just use a single shade of red for easier coloring. Use green for the stem and leaves. You can also use a lighter shade of red for the heart shape in the rose to make it stand out more. Add dark green for the shadows and yellow for the highlights. Don't forget to pause the video to draw at your own pace.


