How to Draw a Skull for Halloween
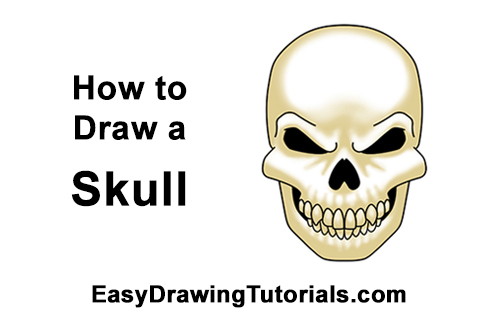
Use the videos and step-by-step drawing instructions below to learn how to draw a scary Halloween Skull. Stay tooned for more tutorials!
The written step-by-step video tutorial:
Intro: Start off with a pencil sketch. In the beginning stages, don’t press down too hard. Use light, smooth strokes for sketching.
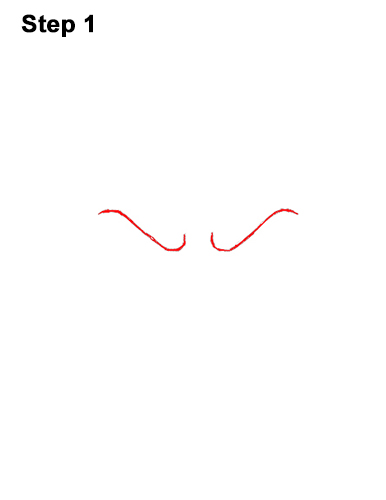
Step 1: Draw two curved diagonal lines for the top part of the skull's eyes. The curved lines should curve up like a hook in the middle. Sketch lightly at first to get all the shapes right and pause the video to draw at your own pace.
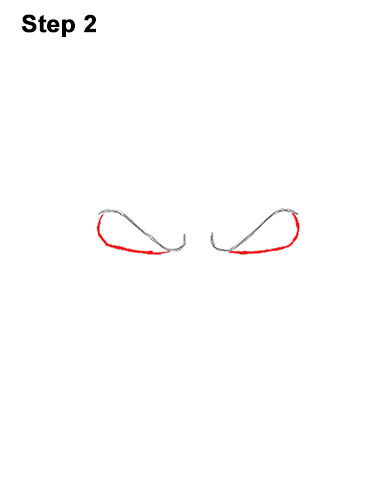
Step 2: Draw another curved line under each diagonal line for the bottom part of the skull's eyes. The eyes should be pretty symmetrical but it's okay if they're not exactly the same.
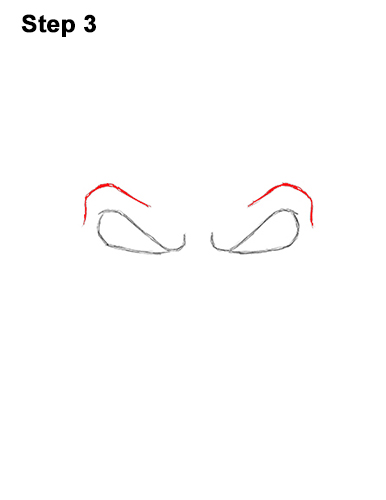
Step 3: Draw a curved line above each eye for the bony structre of the brow. These lines shouldn't be long enough to meet in the middle, and they should curve down on the sides a bit.
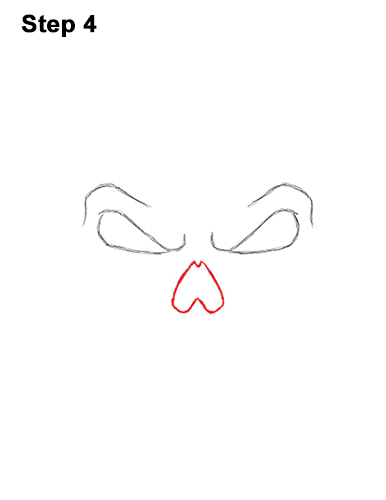
Step 4: Draw the nose under the eyes, in the middle. The shape of the nose is similar to an upside-down heart. Add a little spike that points down at the top tip of the skull's nose.
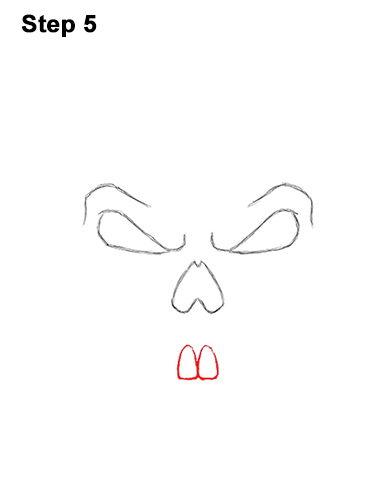
Step 5: Under the nose, draw the two front teeth. Try not to draw them too close to the skull's nose. Start with a couple of lines similar to an upside-down letter T, then add the curved tops. The shape of each tooth should be similar to a triangle with a rounded top, like candy corn.
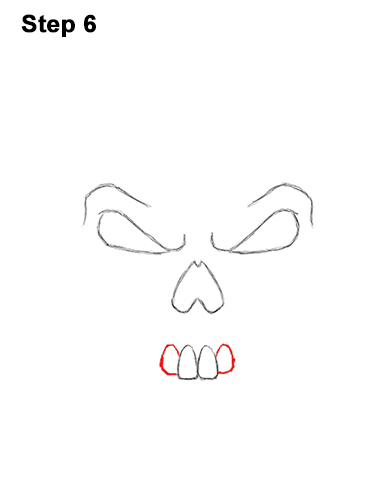
Step 6: Draw the skull's teeth on the sides of the front teeth using the same shapes but smaller.
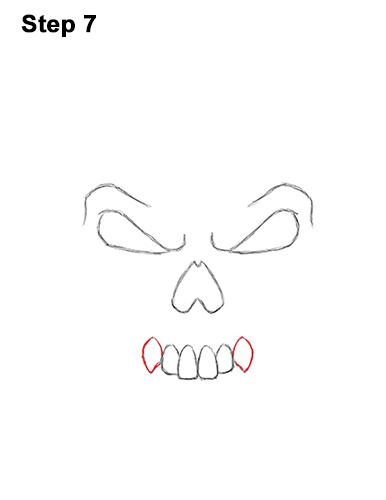
Step 7: Now draw the skull's canine teeth on the sides. These teeth should be a bit bigger and pointier at the bottom. You can draw yours pointier if you'd like.
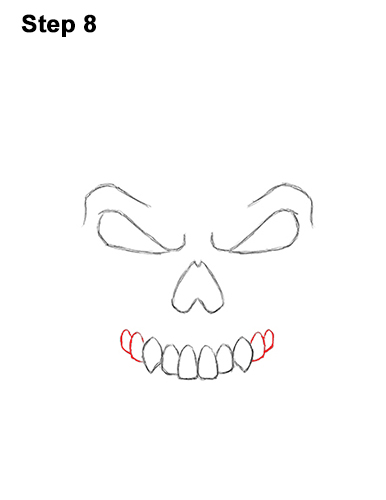
Step 8: Draw two more teeth on each side. The shapes of these should be the same as the front teeth, flat bottoms and rounded tops. Skulls have more molars, but they're hiding behind the first set, and it'll look too crowded if we add any more.
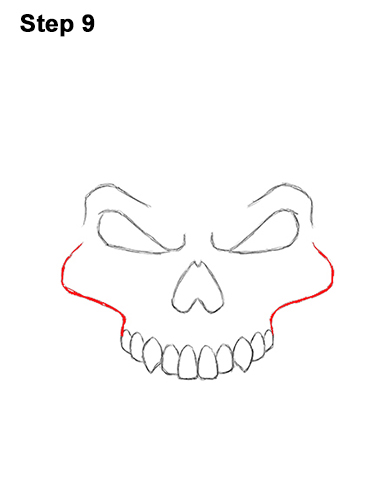
Step 9: Draw long curved line on each side for the cheekbones. These lines should go from the last tooth, then curve outward and should almost touch the skull's brow line at the top.
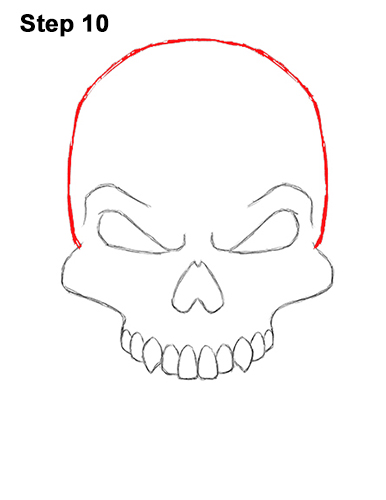
Step 10: Draw a big, long dome-like line at the top for the head. First indicate how tall the head will be with a short line. Then add the sides of the head. The top of the head should be high up. Try not to draw it too close to the eyes. You can actually stop here if you just want the top of the skull.
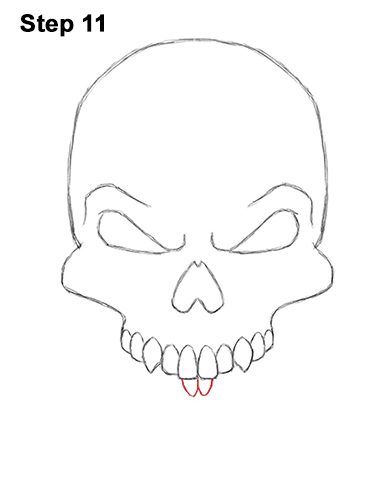
Step 11: Draw the skull's two lower front teeth. The shapes are like the top ones but smaller and upside-down.
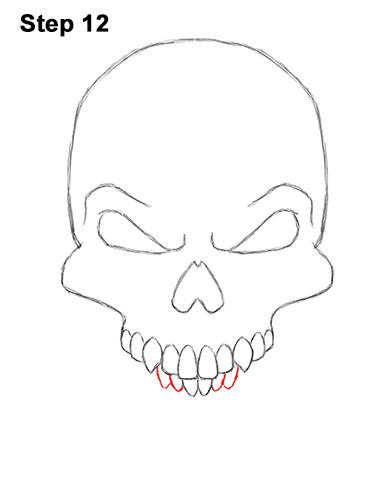
Step 12: Add two more teeth on each side. Remember to make them smaller. The shape of the teeth at the bottom is similar to the letter U because the top row of teeth overlap the bottom row.
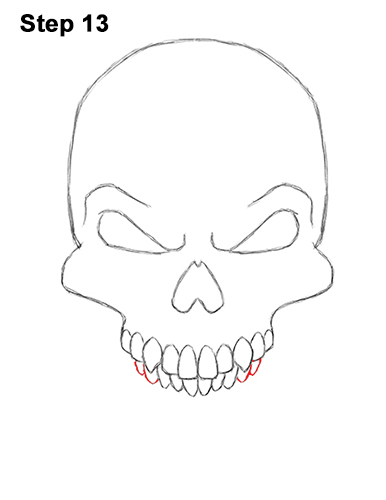
Step 13: Add two more small U-shaped lines on each side for the last set of teeth.
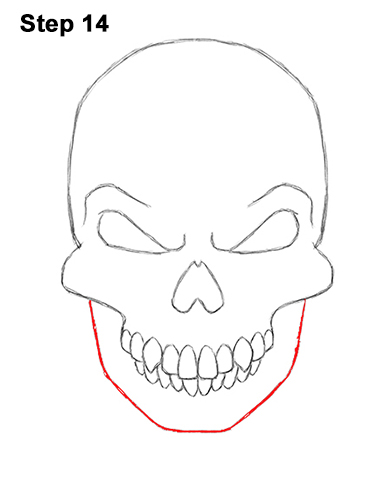
Step 14: Draw a long curved line at the bottom for the skull's lower jaw. Draw the sides first as diagonal lines then the bottom part as a horizontal line.
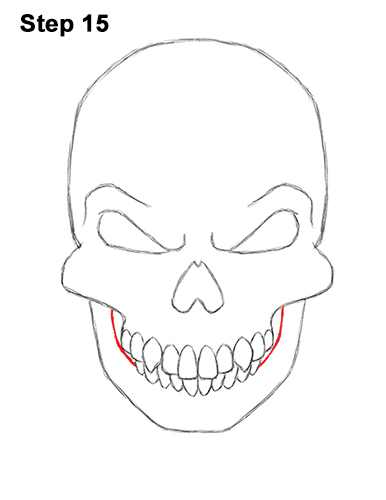
Step 15: Draw short curved line on either end of the row of teeth for the inner section of the lower skull's jaw.
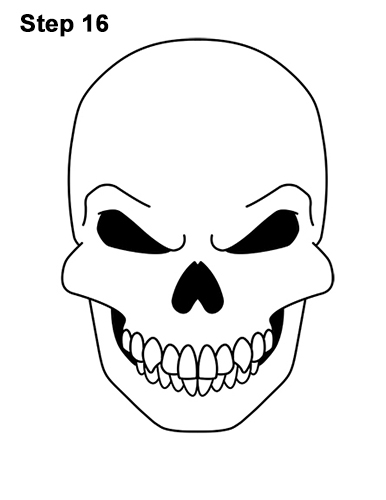
Step 16: Using a pen or marker, carefully go over the lines to make your drawing permanent. After inking, get rid of every pencil mark with an eraser.
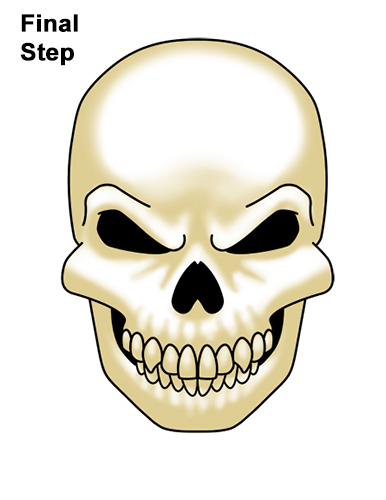
Final Step (optional): If you'd like, you can add a bit color to your drawing using color pencils, markers or even crayons. Use light brown to the inked edges to give the drawing more dimension and volume. Skulls are mainly white, so you can leave yours blank for an easier drawing. Don't forget to pause the video to draw at your own pace.
Thanks for visiting! Subscribe to the EasyDrawingTutorials YouTube Channel for a new tutorial every Sunday.
To learn how to draw animals, visit How2DrawAnimals.com.
RELATED TUTORIALS
 |
 |
 |


