How to Draw Santa Claus
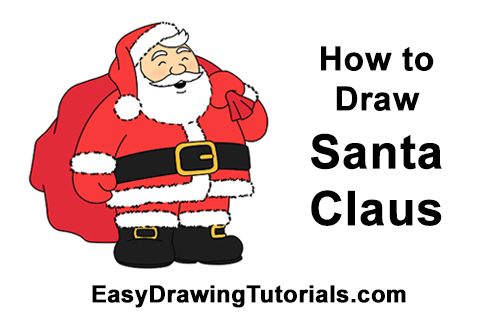
Use the videos and step-by-step drawing instructions below to learn how to draw Santa Claus. Stay tooned for more tutorials!
The written step-by-step video tutorial:
Intro: Start off with a pencil sketch. In the beginning stages, don’t press down too hard. Use light, smooth strokes for sketching.
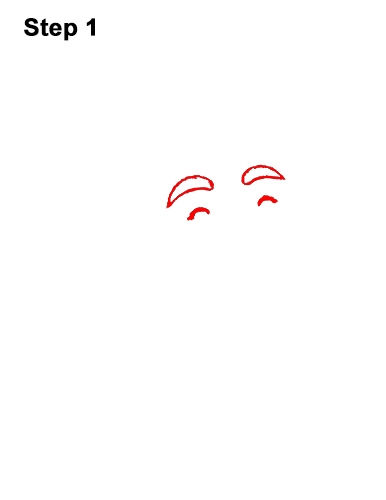
Step 1: Draw two very small arcs for Santa Claus' closed eyes. Make the lines thick. Throughout the drawing, sketch lightly at first , then darken when you like what you have. Above each closed eye, draw a thick arched shape for the eyebrows. Pay attention to the distance between all of the shapes.
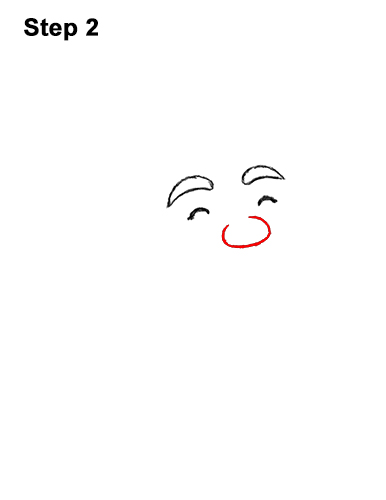
Step 2: Below the eyes, draw a curved line for the nose. The nose should be similar to the letter C on its side.
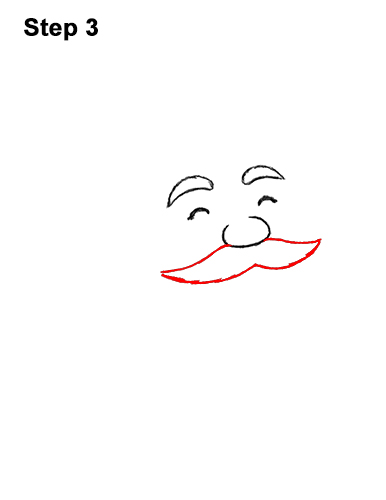
Step 3: Draw the big mustache under the nose. First draw a long line on either side of the nose. Then draw two curved lines underneath that meet at a point in the middle.
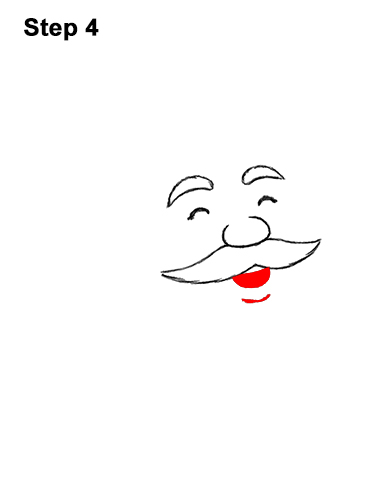
Step 4: Under the mustache, draw a U-shaped line for the mouth. Shade the inside of the mouth except for the top part for the teeth.
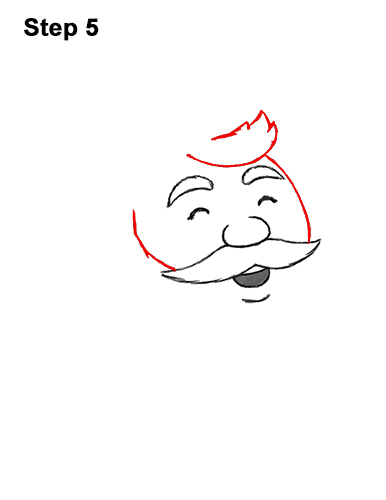
Step 5: To the right of the eyes, draw a curved line for the side of the face. Above the eyebrows, draw a curved line with a few spikes on the right side for the hair. To the left of the eyes, draw another curved line for the inside of the beard.
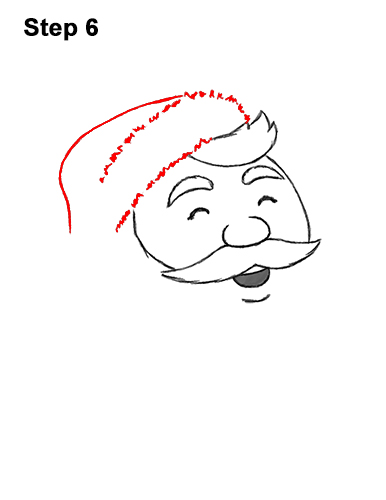
Step 6: On the left, draw a sloping line that's made up of short strokes for the fluffy base of the hat. Curve the strokes up and to the left so that you have two sloping, parallel lines that are made up of short strokes. At the top, draw a long, curved line for the top part of the hat that's folded over.
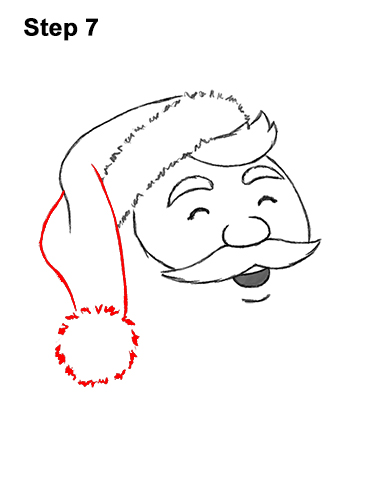
Step 7: To the left of the face, draw a long, vertical line for the first part of the drooping hat. Add a curved line farther left for the edge of the folded hat. At the bottom, draw a circle that's made up of short strokes for the fluffy ball at the tip of the hat.
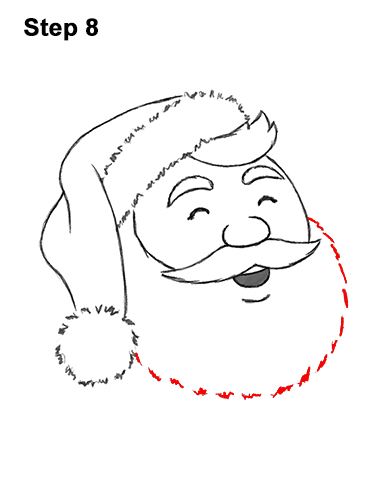
Step 8: Starting on the right side of the face, draw a curved line that's made up of short strokes for the beard. The line should end next to the hat's fluffy ball. You can make the beard longer if you'd like.
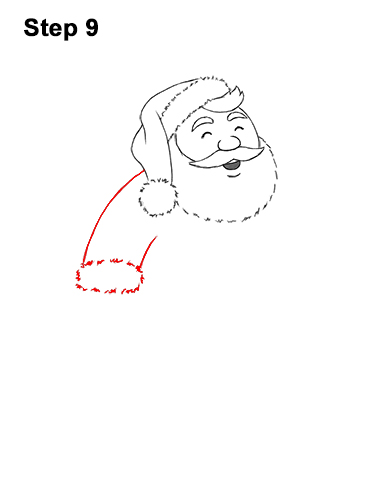
Step 9: To the left of the hat, draw a long, curved line for the first arm. Add a shorter line to the right for the inner edge of the arm. At the bottom, draw an oval-like shape that's made up of short strokes for the fluffy cuffs.
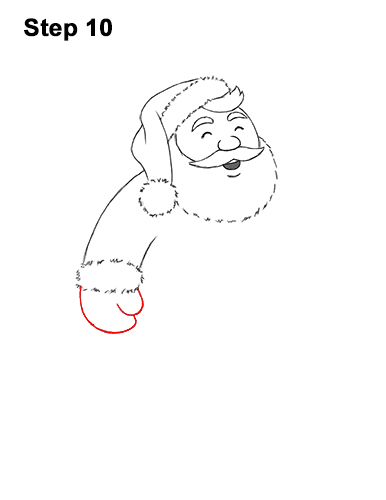
Step 10: Below the cuff, on the right side, draw a short U-shaped line for the thumb. Now add a longer, curved line to the left for the hand/mitten.

Step 11: Below the beard, add the belt buckle by first drawing a few short marks. Connect the marks using curved lines to create a rectangular shape with rounded corners. Inside the shape, off to the right, draw a smaller rectangle for the prong. Now draw a smaller rectangle- like shape inside for the buckle's inner edge.
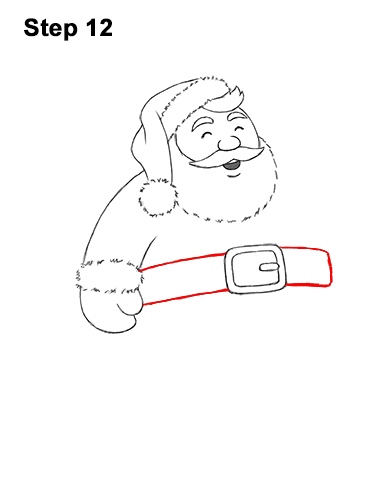
Step 12: On either side of the buckle, draw long, horizontal lines for the actual belt. You can make these lines longer or shorter depending on how big you want your Santa to be.
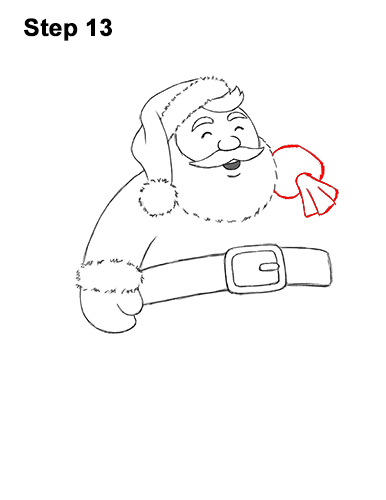
Step 13: To the right of the beard, draw a couple of curved lines for the hand clasping the toy sack. At the bottom of the hand, draw a triangle-like shape for the toy sack's pinched opening. Add a couple of lines inside the shape for the folds of cloth on the toy sack.
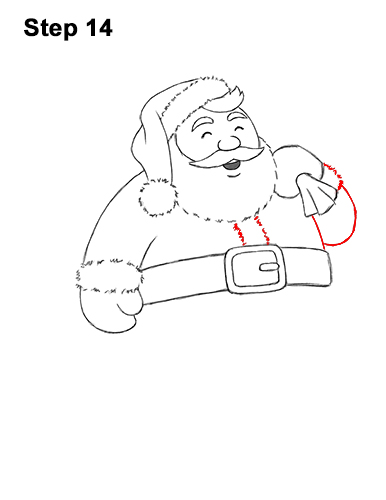
Step 14: Below the hand, draw a curved line for the side of the body. To the right of the hand, draw short strokes for the fluffy cuff. Add a curved line below for the forearm. Below the beard, draw more short strokes for the coat's opening.
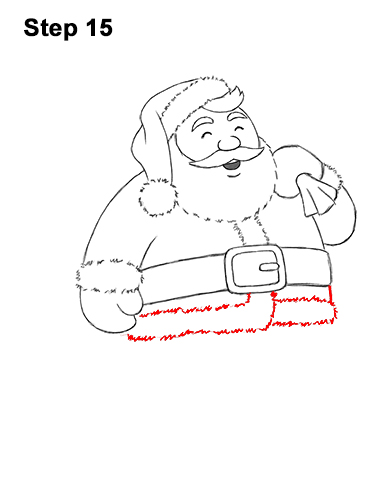
Step 15: Below the belt, draw lines that are made up of short strokes for the bottom edge of the coat. Curve the path of the strokes up in the middle, toward the buckle. To make it easier, first lightly sketch straight lines, then darken them using short strokes.
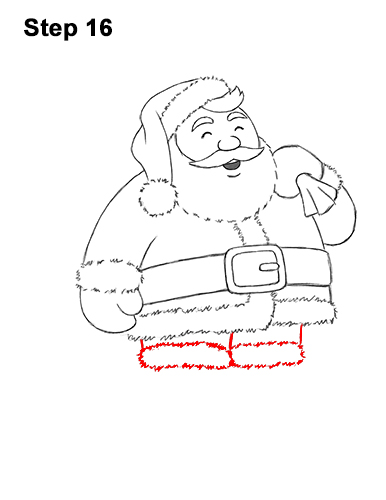
Step 16: Below the coat, draw two more thin shapes made up of short strokes for each leg of the pants. If you want your Santa to be taller, draw the short, vertical lines above the pant cuffs longer. Place the legs slightly off to the left instead of right in the middle.
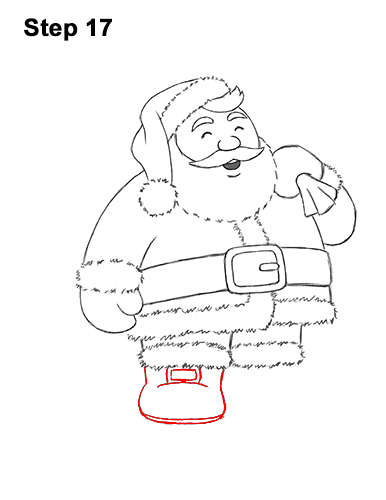
Step 17: Add the first boot by drawing a couple of wavy lines on the left side. Curve the bottom edge and add an extra line for the boot's sole. Add a curved line inside for the front of the boot and a rectangle- like shape on top for the buckle.
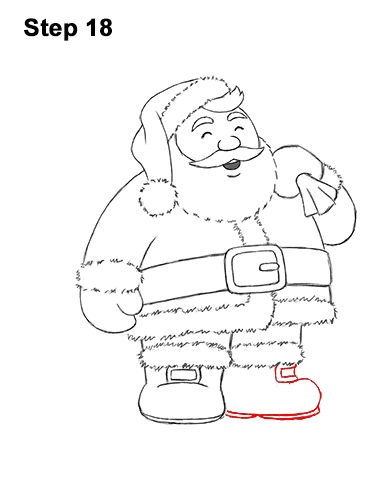
Step 18: Draw a curved line on the right side so that the second boot faces sideways. Add a horizontal line for the bottom and draw the heel and sole too. Draw a square- like shape at the top for the boot buckle.
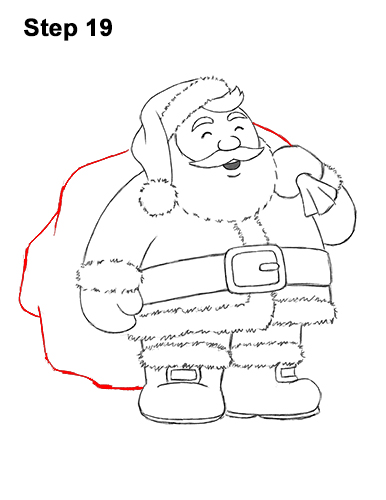
Step 19: Draw a short, curved line above the hand on the right for the first part of the toy sack. On the left side of the body, draw a series of lines for the toy sack hanging over his back. Curve and angle the lines to represent toys inside the sack.
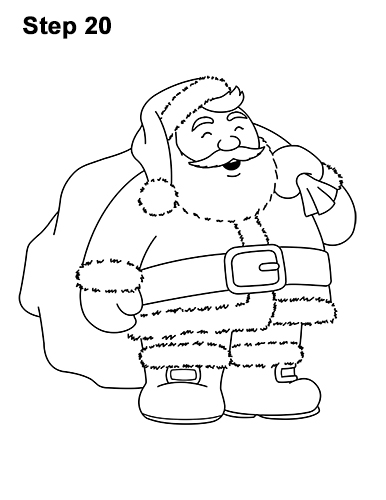
Step 20: Using a pen or marker, carefully go over the lines to make your drawing permanent. After inking, get rid of every pencil mark with an eraser.
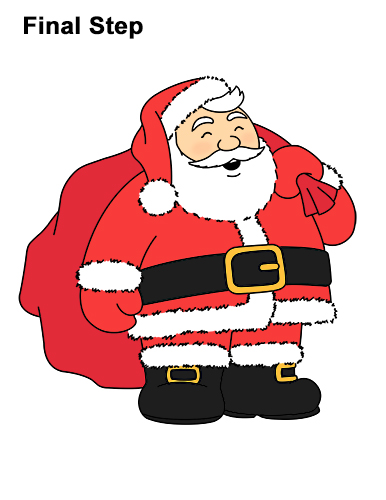
Final Step: Color your drawing any way you want using color pencils, markers or even crayons! Use red for the suit (except the fluffy parts) and the toy sack. Color lightly at first, then gradually go darker. Color the belt and the boots black. Use yellow for the buckles and peach for the face. Don't forget to pause the video to draw at your own pace.
Thanks for visiting! Subscribe to the EasyDrawingTutorials YouTube Channel for a new tutorial every Sunday.
To learn how to draw animals, visit How2DrawAnimals.com.
RELATED TUTORIALS
 |
 |
 |
 |
 |


