How to Draw a Snowman
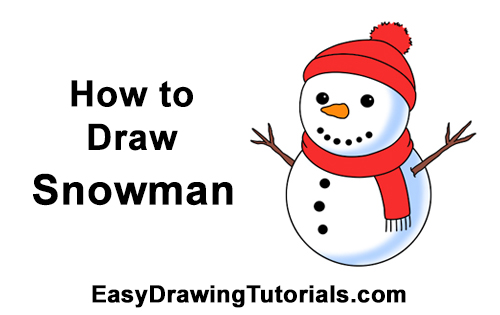
Use the videos and step-by-step drawing instructions below to learn how to draw Santa Claus. Stay tooned for more tutorials!
The written step-by-step video tutorial:
Intro: Start off with a pencil sketch. In the beginning stages, don’t press down too hard. Use light, smooth strokes for sketching.
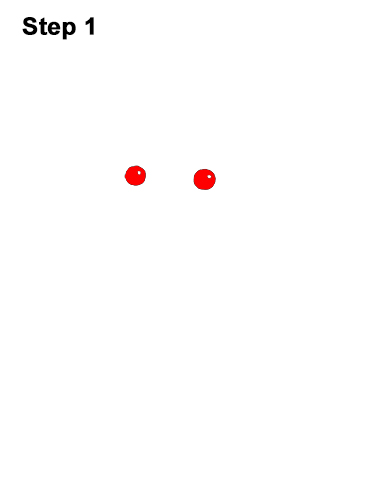
Step 1: Draw two small circles for the snowman's eyes. Sketch lightly at first so that it's easy to erase if you make a mistake. Shade in the circles except for a tiny circle off to the side to represent glare. Use these steps as guidelines and modify your snowman however you'd like. For example, give him bigger eyes!
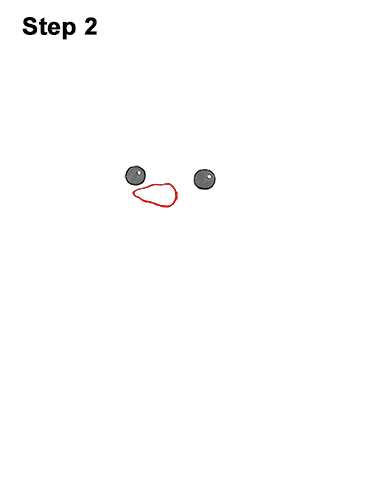
Step 2: Add the snowman's carrot nose by first drawing a line similar to a less-than sign (<) under the eyes. Then draw a curved line on the right to close off the carrot shape.
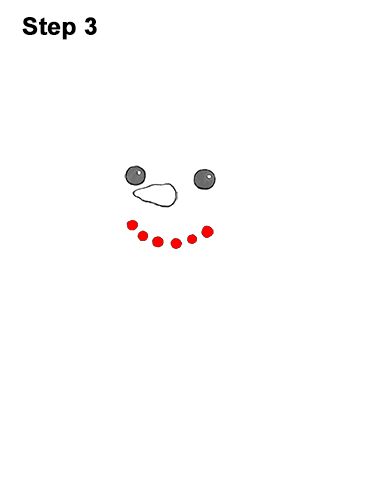
Step 3: Under the nose, draw a series of dots arranged in a curved pattern for the mouth. Add around six dots. Any more and they'll start to look crowded.
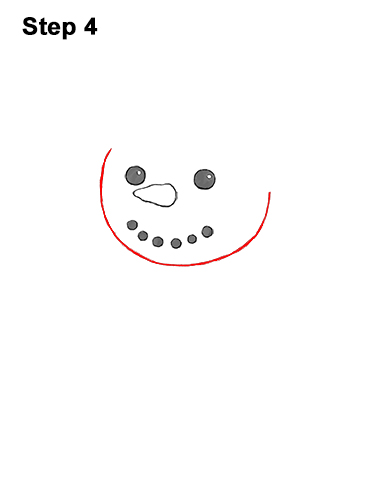
Step 4: Draw the snowman's head by first adding a mark below the smile and a mark on either side of the face. Now connect the marks using curved lines to form the round head. Don't draw the top part of the head yet; that's where the hat will go.
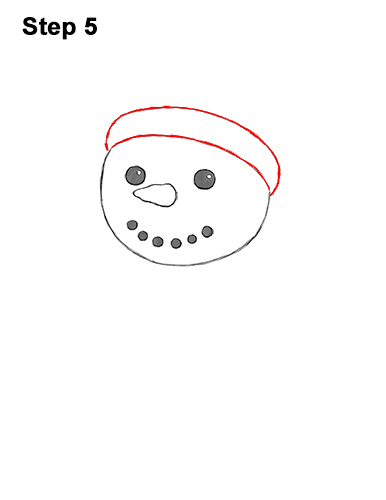
Step 5: Add the base of the hat by first drawing a long, curved line on top of the head. Now draw another curved line at the top, parallel to the first one. Close off the sides of the base of the hat by drawing short, curved lines.
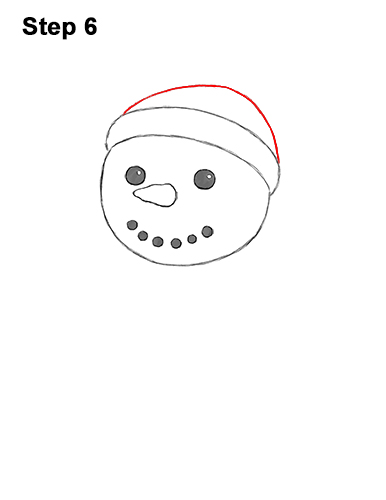
Step 6: Add a long, curved line above the base for the top portion of the snowman's hat.
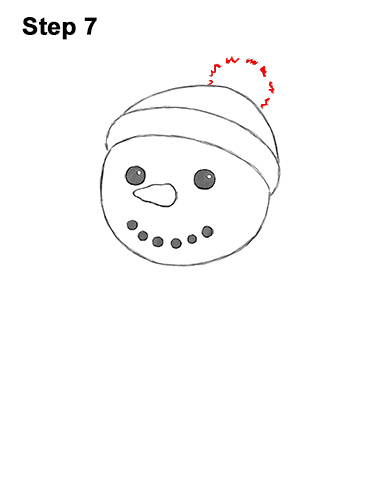
Step 7: At the top, draw a half- circle made up of short strokes for the hat's pom-pom.
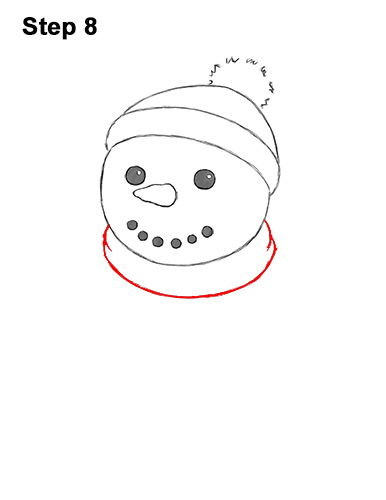
Step 8: Under the head, draw a long, curved line for the first part of the snowman's scarf. Close off the shape of the scarf by adding a couple of lines to the sides.
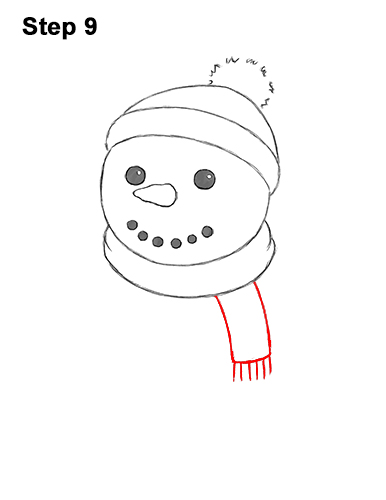
Step 9: Add the end of the scarf by first drawing a couple of long vertical lines on the bottom, right side. Close off the shape at the bottom and add a few short lines for the tassels.
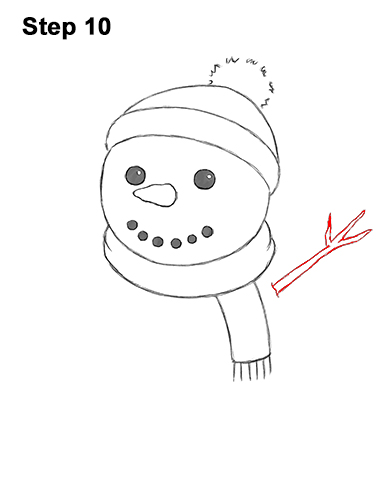
Step 10: To the right of the scarf, add the snowman's stick hand by drawing two long, sloping lines that come to a point. At the end, draw a couple more pointy shapes for the other fingers/branches.
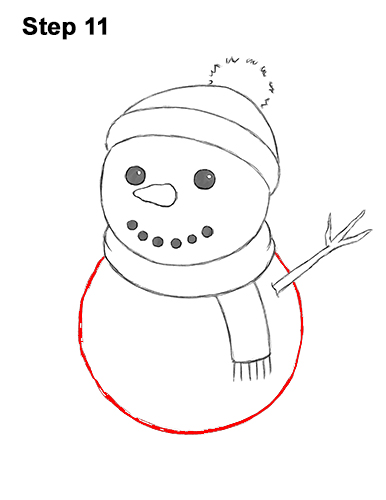
Step 11: Draw the snowman's body by first making a small mark at the bottom, below the scarf. Add marks on the sides and connect the marks using curved lines to form the circular body. As you connect the curved lines, make sure to not overlap the stick hand.
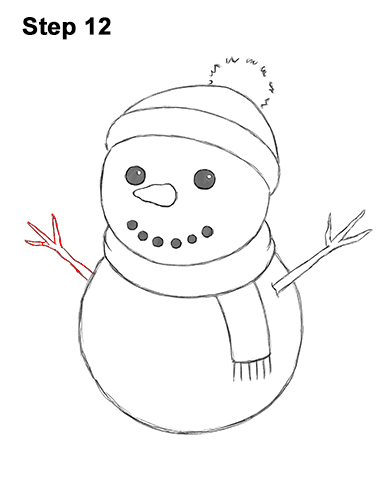
Step 12: Draw the stick hand on the left side the same way as the first one. Use two sloping lines that come to a point for the main part and smaller lines for the snowman's fingers.
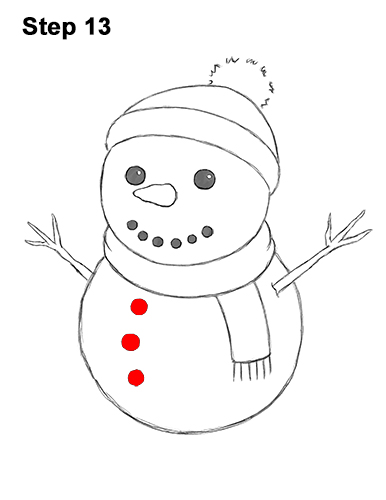
Step 13: Add three small circles on the snowman's body and shade them in for the buttons. You can make the buttons bigger or smaller, or add more or fewer.
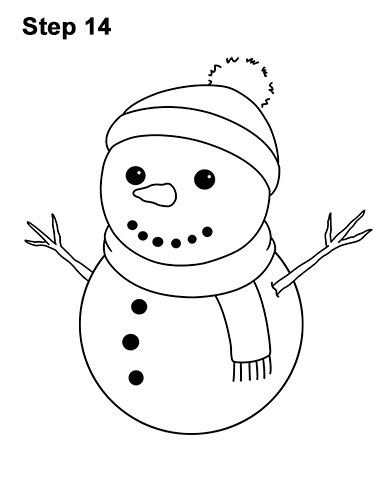
Step 14: Using a pen or marker, carefully go over the lines to make your snowman drawing permanent. After inking, get rid of every pencil mark with an eraser.
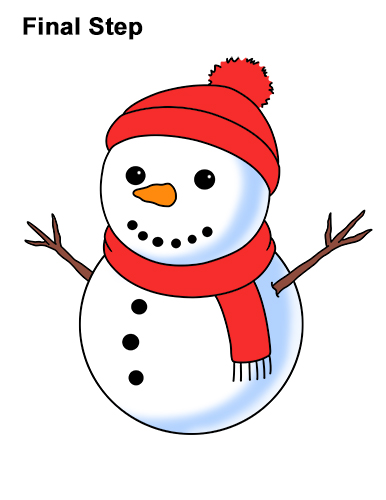
Final Step: Color your snowman drawing using color pencils, markers or even crayons! Use red for the beanie and scarf, and orange for carrot nose. Use brown for the stick arms. Use light blue on the sides of the body to give the snow more detail.
Thanks for visiting! Subscribe to the EasyDrawingTutorials YouTube Channel for a new tutorial every Sunday.
To learn how to draw animals, visit How2DrawAnimals.com.
RELATED TUTORIALS
 |
 |
 |
 |
 |


