How to Draw Hulk
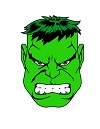
Use the video and step-by-step drawing instructions below to learn how to draw Hulk from Marvel Comics. A new cartoon drawing tutorial is uploaded every week, so stay tooned!
Intro: Start drawing Hulk with a pencil sketch. In the beginning stages, don't press down too hard. Use light, smooth strokes for sketching.
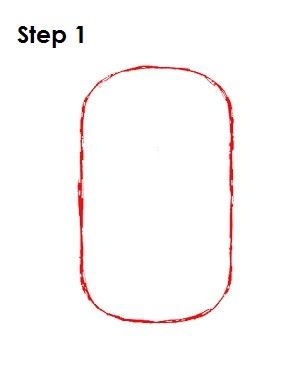
Step 1: To draw Hulk, start with a long oval with somewhat squared sides. This will be the basic shape for Hulk's head.
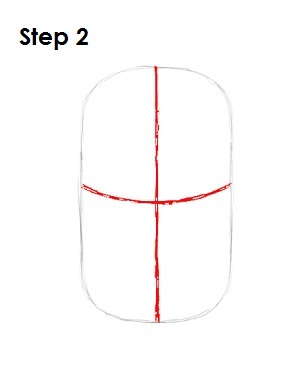
Step 2: Inside the oval draw two intersecting lines, one vertical and one horizontal. When drawing the horizontal line, bend it a bit to contour to the oval's shape. These will be construction lines that will help you place Hulk's features later on.
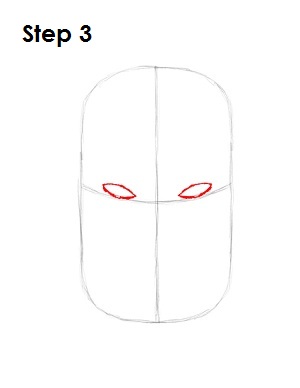
Step 3: Right on top of the horizontal line and on either side of the vertical line, draw Hulk's eyes, which are two small football shapes.
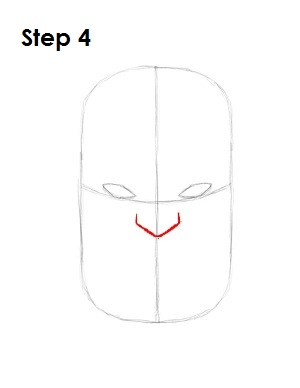
Step 4: Below the horizontal construction line, draw a curved line that looks like a wide letter V for Hulk's nose.
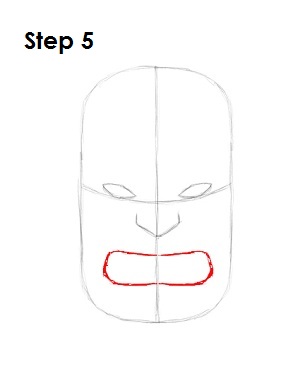
Step 5: Below that V shape, draw a long rectangle with rounded corners for Hulk's mouth.
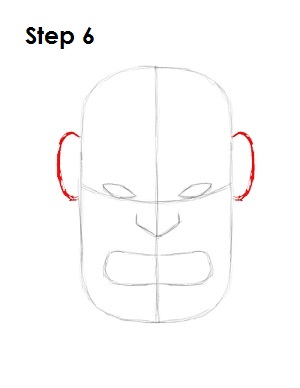
Step 6: Draw a curved line that looks like the letter C on either side of Hulk's head for his ears. Draw Hulk's ears a bit higher than the horizontal construction line because he's going to be looking down menacingly.
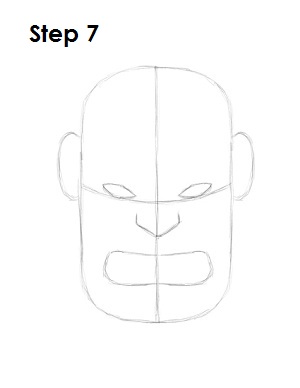
Step 7: That's it for the initial sketch of Marvel Comics' Hulk! You have the basic Hulk shape, so now go in and tighten your drawing. From this point on, press harder with your pencil in order to get darker lines and a more defined sketch.
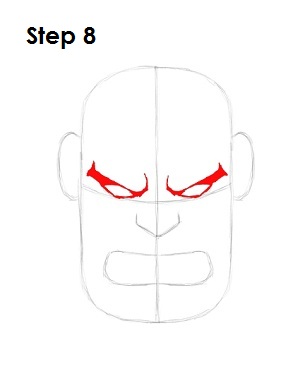
Step 8: Tighten the shapes surrounding Hulk's eyes by darkening them. The shapes wrap around his eyes and tilt up toward his ears.
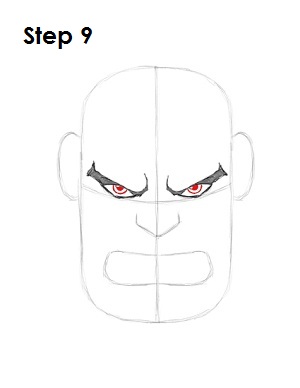
Step 9: Finish Hulk's eyeballs, which are a series of circles. Draw a small shaded circle for his pupil, a bigger circle around that represents his iris and a small circle in the corner of the eye to represent glare.
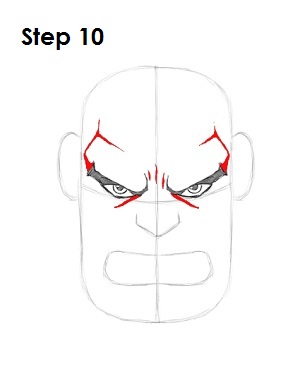
Step 10: Hulk is always angry (which is why Bruce Banner transforms into Hulk!), so give him a scowl. Draw lines around Hulk's eyes for detail on his brow.

Step 11: Darken in Hulk's nose and draw the bridge of it, which comes down as lines from the inner corners of his eyes. Give Hulk some frown lines that extend to the sides of his mouth.
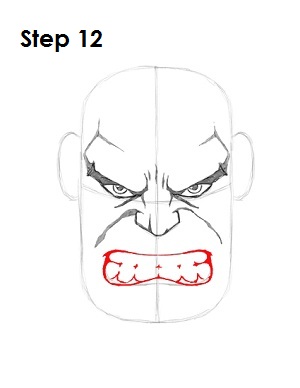
Step 12: Tighten the shape of Hulk's mouth. He's going to be gritting his teeth, so draw some shading to the sides of his mouth and tiny lines that look like plus signs to show where his teeth come together. Draw his gums as a series of curves (like connected U shapes) below his teeth.
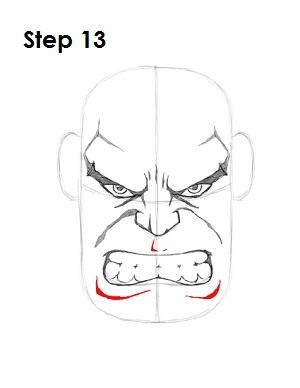
Step 13: Add two lines below Hulk's mouth to indicate his lips. Also draw in a couple of lines above his mouth for detail.
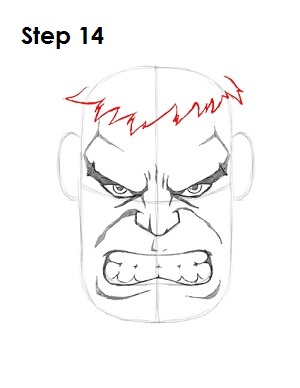
Step 14: Hulk's hair looks like a toupee on his head. The hair is a bit tricky, so this section about how to draw Hulk's hair is broken down into four parts. First draw the bit of hair that comes over his forehead. It's basically a bunch of curved triangles of different sizes. It doesn't have to be perfect; his hair is messy, so just draw them randomly. Use the image above for reference when drawing Hulk's hair.
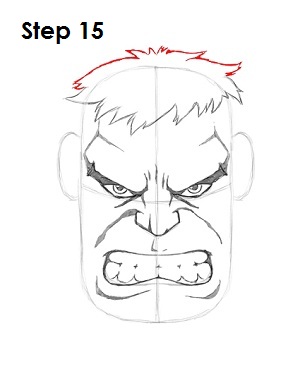
Step 15: Now draw the back portion of Hulk's hair, which is essentially the same thing: random curved triangles.
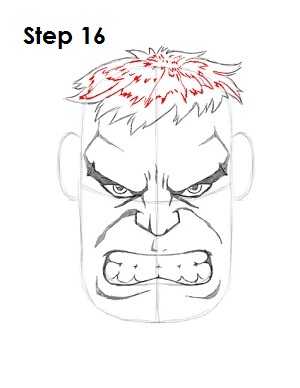
Step 16: The next two steps for drawing Hulk's hair are a bit tricky and can be skipped if you want. Add a few sets of jagged lines around his hair to represent shine. They are pretty random and form somewhat of a circle shape on Hulk's head.
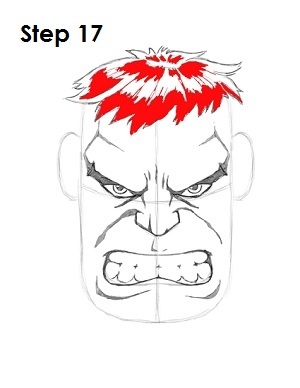
Step 17: Shade in the shapes you've created to give the illusion of shimmer and volume on Hulk's hair.
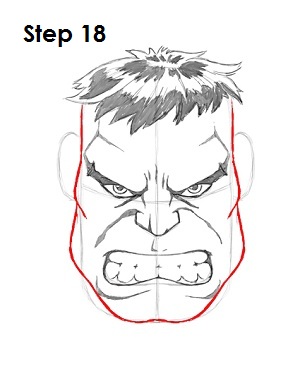
Step 18: Using the main oval as a guide, draw in the rest of Hulk's face. Give him cheekbones around where his ear is, a massive jaw that bulges out and a somewhat parted chin.
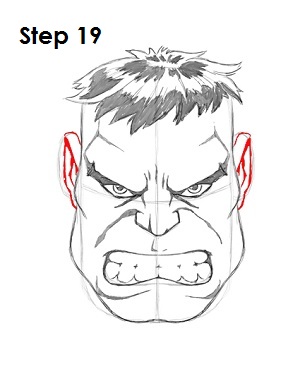
Step 19: Finish drawing Hulk by defining the shapes of his ears. Draw a couple of lines within the shape of his ears to indicate the inside of them. Use the above image for reference when drawing Hulk's ears.
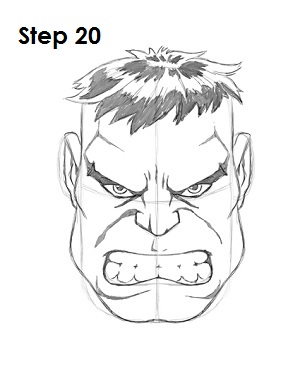
Step 20: That's it! You now have a nice sketch of Bruce Banner after he transforms into Hulk. You can stop at this quick drawing for a rough, sketchy look or go for a more finished look by continuing to the step below.
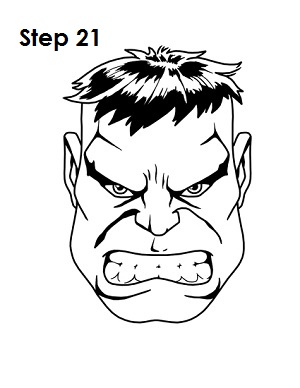
Step 21: For a more finished, inked look, carefully draw over the final sketch lines with a pen or marker. Wait for the ink to dry, and then get rid of every pencil mark with an eraser. You now have a finished inked drawing of Hulk! You can stop here or go to the final step to complete your Hulk drawing.
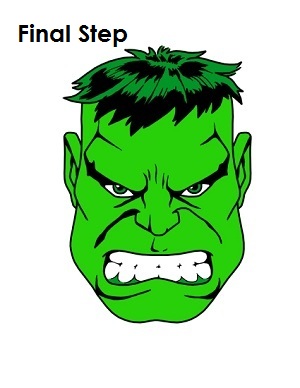
Final Step: For a completely finished Hulk drawing, you have to color it. You can use markers, color pencils or even crayons! Hulk is very easy to color. The non-shaded part of his hair, his eyes and his gums are dark green. The rest of Hulk is light green. That's it! You now have a completed drawing of Hulk from Marvel Comics.
RELATED TUTORIALS
 |
 |
 |
 |
 |


