How to Draw Wendy Darling (Peter Pan)
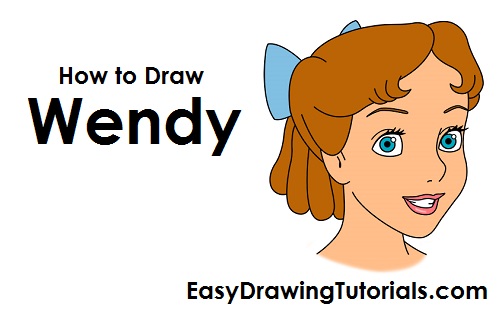
Use the video and step-by-step drawing instructions below to learn how to draw Wendy Darling from Walt Disney's Peter Pan. A new cartoon drawing tutorial is uploaded every week, so stay tooned!
Intro: Start off with a pencil sketch. In the beginning stages, don’t press down too hard. Use light, smooth strokes for sketching.
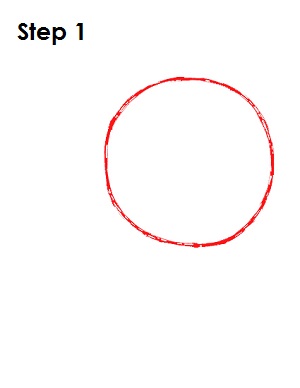
Step 1: Start by drawing a circle near the top of the page. It doesn’t have to be perfect. It’s just a guide for the top part Wendy Darling's head.
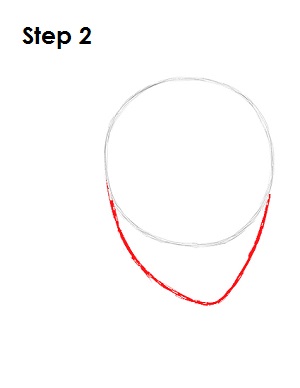
Step 2: Draw a line similar to the letter V under the circle as a guide for Wendy Darling's jaw and chin. The sides of the line should be curved. These two combined shapes make the guide for the head.
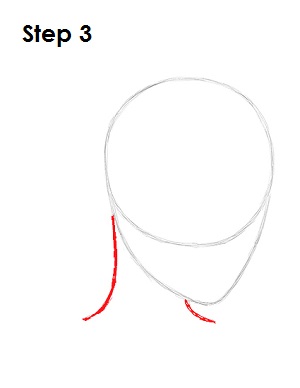
Step 3: Under the head, draw two curved lines as guides for Wendy Darling's neck. The line on the right should be a lot smaller than the one on the left.
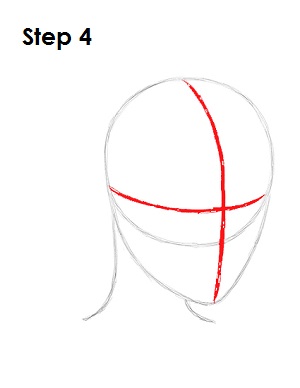
Step 4: Next, draw two intersecting lines across the entire head, one vertical and one horizontal. Bend the lines a bit so that they contour to the shape of the head. These will be construction lines that will help you place Wendy Darling's facial features later on.
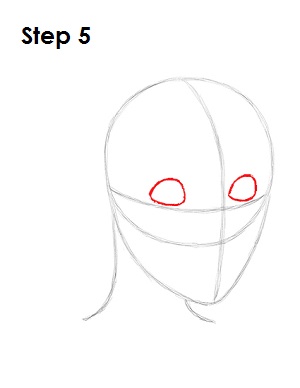
Step 5: Draw two small shapes that kind of look like half-circles as guides for Wendy Darling's eyes. Draw them sitting on top of the horizontal construction line and on either side of the vertical construction line. The shape on the right should be a bit smaller because of perspective.
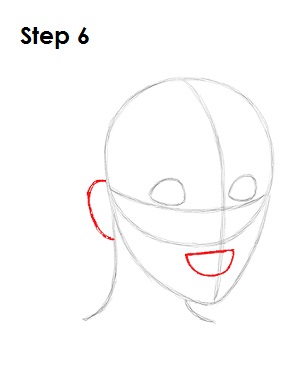
Step 6: Under the main circle and within the shape of the chin and jaw, draw a small shape similar to a letter D on its side as a guide for the mouth. On the left side of the head, draw a small curved line similar to the letter C as a guide for Wendy Darling's ear.
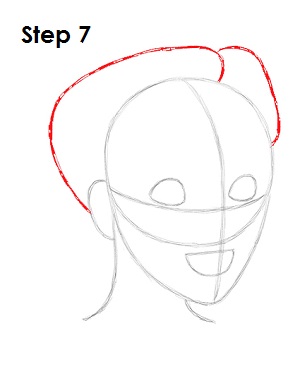
Step 7: Now draw a couple of lines as guides for Wendy Darling's hair. First draw a long line that starts on top of the ear, then curves up and over the head. End the line on top of the head, on the right side of the vertical construction line. To the right of this line, draw another curved line for the right part of the hair. This line should be a lot smaller.
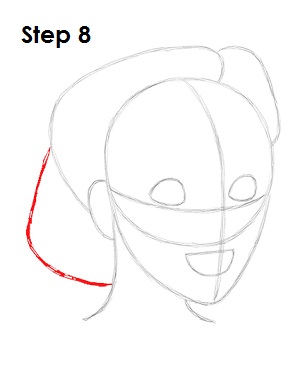
Step 8: Draw the final guide for Wendy Darling's hair as a line on the left side of the head. This line should be wide and should extend from the first hair guide down to the neck.
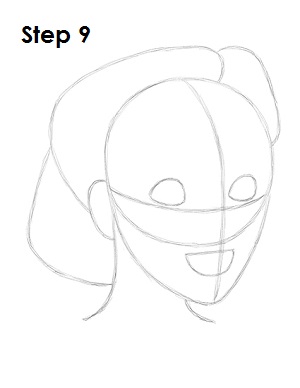
Step 9: That’s it for the initial sketch! You have the basic shape of Wendy Darling from Walt Disney's Peter Pan. Now go in and tighten your drawing. From this point on, press harder with your pencil in order to get darker lines and a more defined sketch.
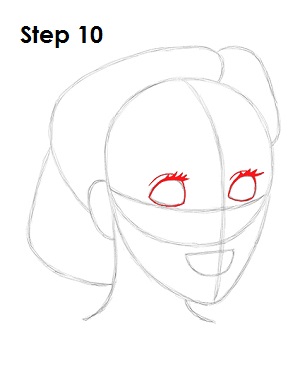
Step 10: Draw Wendy Darling's eyes by using the initial half-circle shapes as guides. Follow the basic path of the guides, but make the lines thicker. Add a few pointy shapes at the top of the eyes for the eyelashes and an extra curved line for the eyelids.
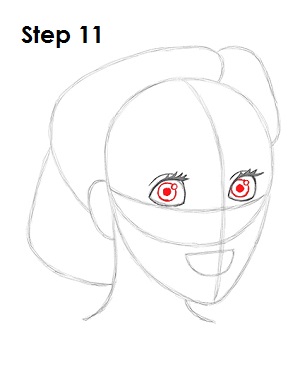
Step 11: Inside each eye, draw a circle for the irises. Inside each iris, in the middle, draw another circle and shade it in for the pupils. Draw a tiny circle inside each of Wendy Darling's eyes, off to the side, to represent glare.
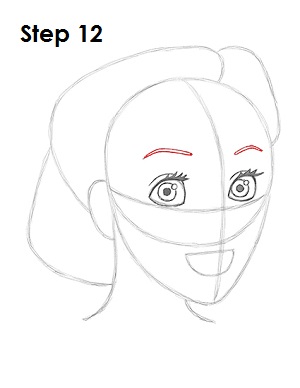
Step 12: Above each eye, draw a curved line for Wendy Darling's eyebrows. The eyebrows should angle a bit near the middle. The eyebrow on the right should be a bit smaller because of perspective.
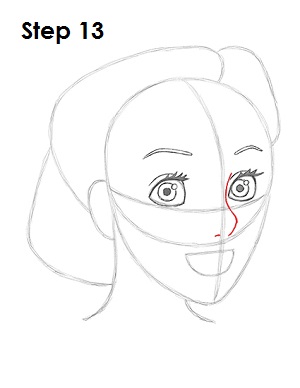
Step 13: Use the construction lines as guides to draw Wendy Darling's nose. The nose consists of a line that starts at the eye on the right then curves to the right, and then down. The line ends on top of the bottom edge of the main circle. Add the nostril as a tiny line on the left side too.
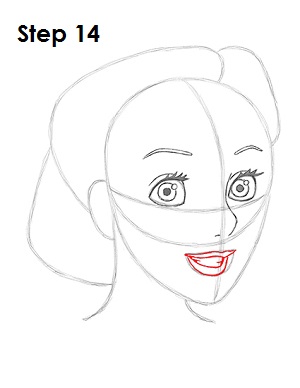
Step 14: Now draw Wendy Darling's lips by using the initial sideways D shape as a guide. The top lip is a thick, wavy shape with the sides coming to a point. The lower lip is a couple of curved lines under the top lip. Draw two short lines inside the shape on the sides for Wendy's teeth.
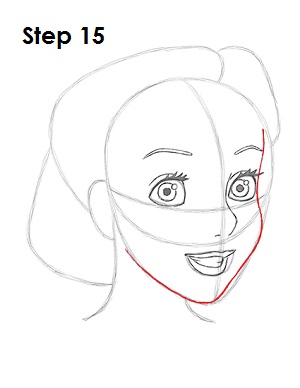
Step 15: Use the initial shapes as guides to draw Wendy Darling's face. Darken the lines as you follow the basic path of the guides to create the side of the face, chin and jaw. Draw the line close to the eye on the right to create the cheekbone.
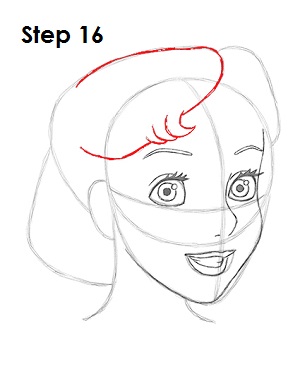
Step 16: Wendy Darling's hair is a bit tricky, so it's divided into four parts. First draw the top left part of the hair by using the initial line as a guide. The line should extend to just above the eyebrows. Draw three small curly chunks of hair using curved lines that come to a point above the eyebrow as well.
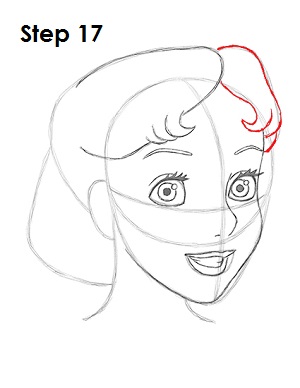
Step 17: Now draw the top right part of Wendy Darling's hair by using the other line as a guide. Draw only one curl above the eyebrow, as the other two are hiding behind the head.
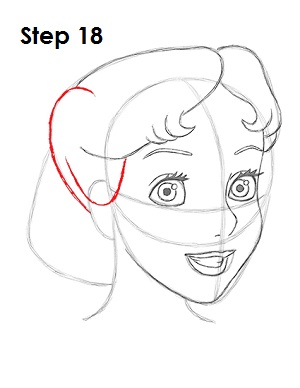
Step 18: Add the left part of the hair over the ear using the initial line as a guide. Draw a long curved line over Wendy Darling's ear, then another curved line to the left of it as you follow the guide.
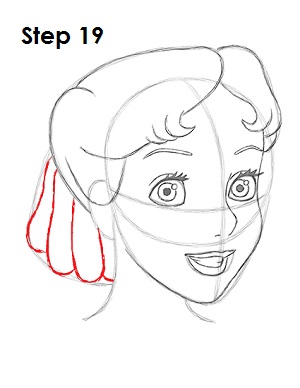
Step 19: The final part of the hair is Wendy Darling's curls in the back. Draw them as long, thin, curved lines within the shape you previously drew. These shapes should be similar to sausages. There should be three main ones, with the bottom part of the fourth one barely visible.
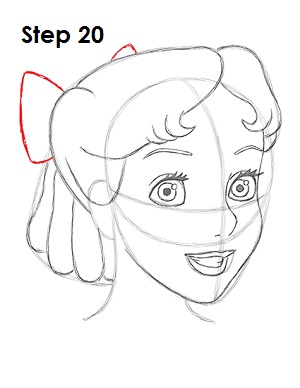
Step 20: On the back of the head above the curls, draw a couple of angled lines for the bow in Wendy Darling's hair.
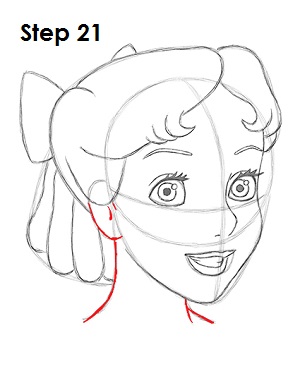
Step 21: Darken the initial lines to create Wendy Darling's ear and neck. Draw a small curved line within the shape of the ear to represent structure.
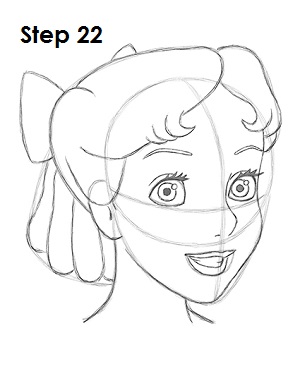
Step 22: That’s it! You now have a nice sketch of Wendy Darling from Walt Disney's Peter Pan. You can stop at this quick drawing for a rough, sketchy look, or continue to the step below to go for a more finished look.
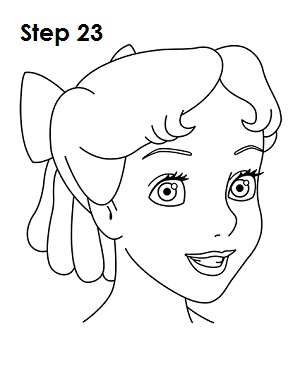
Step 23: For a more finished, inked look, carefully draw over the final sketch lines with a pen or marker. Wait for the ink to dry, and then erase all of the pencil marks. You now have a finished inked drawing of Wendy Darling! You can stop here or go to the final step to complete your Wendy drawing in its entirety.
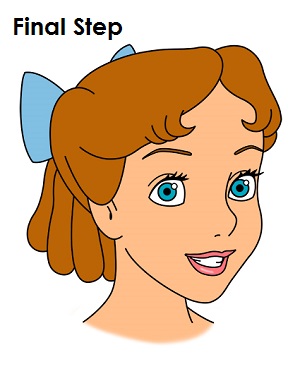
Final Step: For a completely finished Wendy drawing, you have to color it. You can use anything you want: markers, color pencils or even crayons! Color her hair and eyebrows light brown. Her bow and eyes are blue. Her skin is peach. If you don't have peach, improvise and use yellow-orange or light brown. Her lips are pink. Leave a small line on Wendy's lips blank to represent shine. That’s it! You now have a completed drawing of Wendy Darling from Walt Disney's Peter Pan.


