How to Draw Finn (Adventure Time)

Use the video and step-by-step drawing instructions below to learn how to draw Finn from Adventure Time. A new cartoon drawing tutorial is uploaded every week, so stay tooned!
Intro: Start drawing Finn from Adventure Time with a pencil sketch. In the beginning stages, don’t press down too hard. Use light, smooth strokes for sketching.
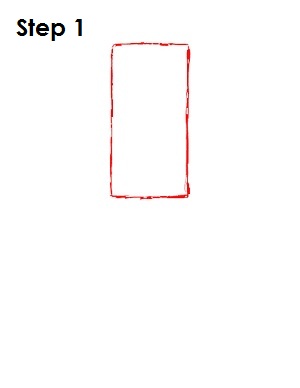
Step 1: To draw Finn, start with a long rectangle near the top of the page. This will be the basic shape for Finn’s head and body.
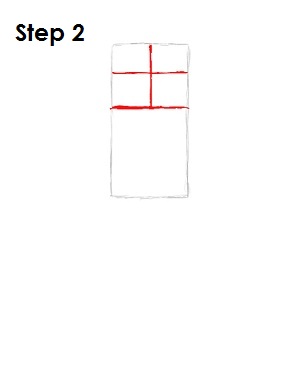
Step 2: Next, draw a horizontal line somewhat above the middle of the rectangle to form a square. Inside this square, draw two intersecting lines, one vertical and one horizontal. These will be construction guides that will help you place Finn's features later on.
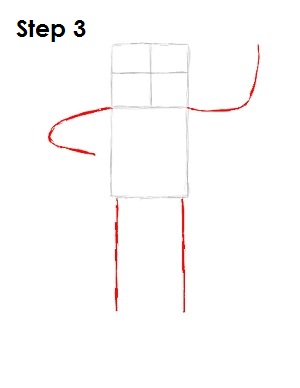
Step 3: Draw in guides for Finn's arms and legs. Draw his arms as two curved lines on the sides of the rectangle that come out of the ends of the lowest horizontal line. Finn's legs are two vertical lines at the bottom of the main rectangle.
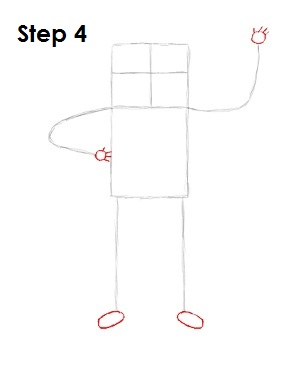
Step 4: On the ends of each guide for Finn’s arms, draw small circles. On each circle draw in four small lines. These are basic construction guides for Finn’s hands and fingers. At the end of each leg line, draw two small ovals. These will be Finn’s feet.
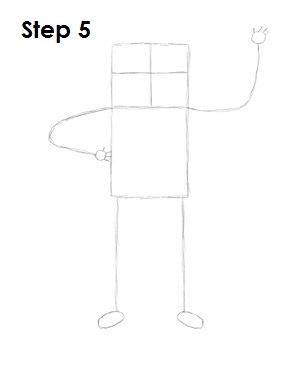
Step 5: That's it for the initial sketch of Finn from Adventure Time! You have the basic Finn shape. Now go in and tighten your drawing. From this point on, press harder with your pencil in order to get darker lines and a more defined sketch.
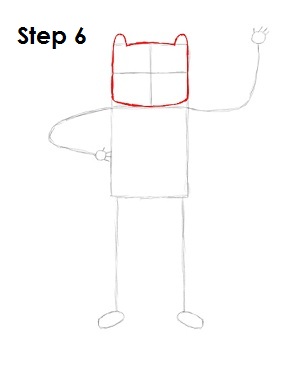
Step 6: Start by drawing in Finn's awesome hat. Using the top square as a guide, draw the lines so they curve more and round out the bottom corners. Add two small curves on the top corners that look like little upside-down U shapes.
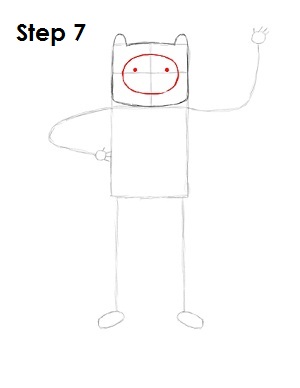
Step 7: Using the intersecting lines as a guide, draw Finn's head as an oval. The end result should look like a telescope's crosshairs. Above the horizontal line on either side of the vertical line, draw two dots for Finn's eyes.
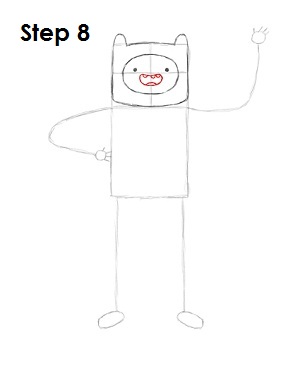
Step 8: To draw Finn's mouth, draw a shape that is similar to a kidney bean or an oval with that top part bent inward toward the middle. Inside this shape at the top, draw in three teeth as little U-shaped lines and another curve at the bottom for Finn's tongue.
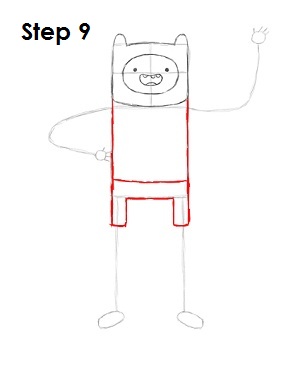
Step 9: Tighten Finn's torso by darkening the lines and drawing the legs of his skinny shorts. Above the legs, draw a horizontal line to indicate where his shirt meets his shorts.
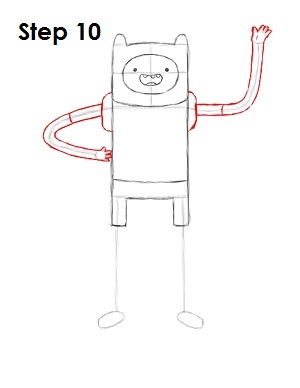
Step 10: For the straps of Finn's backpack, draw two curved lines at the sides of his body where his arms begin. To draw Finn's arms and hands, make the arm and hand guide lines thicker. His arms are curvy, so don't draw sharp angles for his elbows. They should look like noodles.
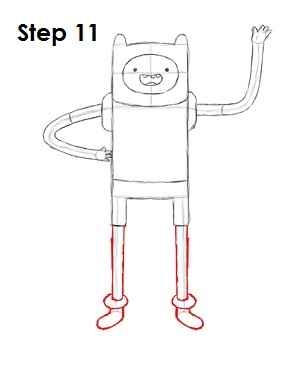
Step 11: Darken in Finn's legs by thickening the initial guidelines. At the bottom of his legs, draw a thick curved line for his socks. Below the socks, use the ovals as guides and draw his shoes.
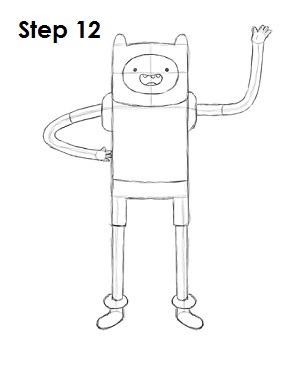
Step 12: That's it! You now have a nice sketch of Finn from Adventure Time. You can stop at this quick drawing for a rough, sketchy look or go for a more finished look by continuing to the step below.
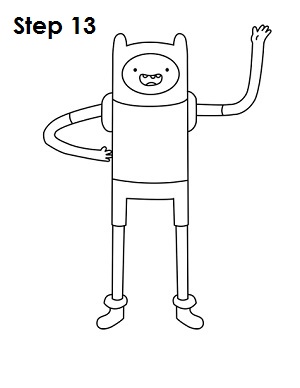
Step 13: For a more finished, inked look, carefully draw over the final sketch lines with a pen or marker. Wait for the ink to dry, and then get rid of every pencil mark with an eraser. You now have a finished inked drawing of Finn! You can stop here or go to the final step to complete your Finn drawing.
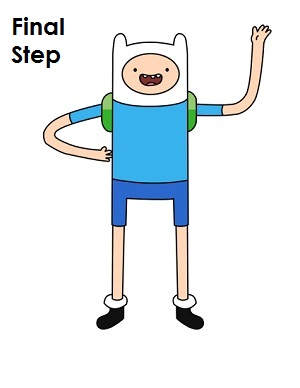
Final Step: For a completely finished Finn drawing, you have to color it. You can use markers, color pencils or even crayons! Color Finn's skin a peach or light pink color. His backpack is two shades of green, light on top and dark at the bottom. Same with his clothes; his shirt is light blue, and his pants are dark blue. Finn's shoes are black, and don't color his hat or socks. That's it! You now have a completed drawing of Finn, the human boy from Adventure Time.
RELATED TUTORIALS
 |
 |
 |
 |
 |


