How to Draw Charizard
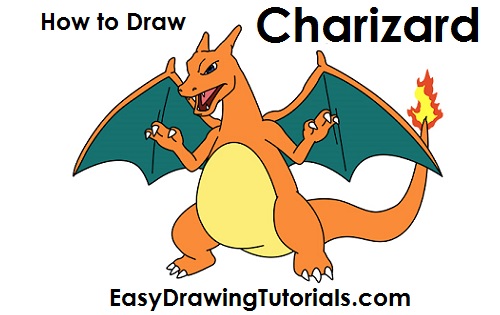
Learn how to draw Charizard from Pokemon with this step-by-step tutorial and video. A new cartoon drawing tutorial is uploaded every week, so stay tooned!
Intro: Start off with a pencil sketch. In the beginning stages, don’t press down too hard. Use light, smooth strokes for sketching.
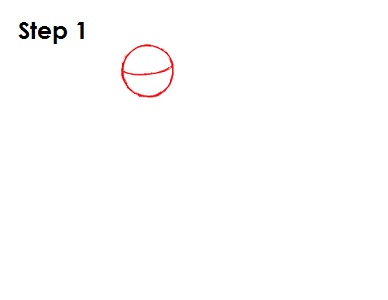
Step 1: Start by drawing a small circle near the top of the page as a guide for Charizard's head. The circle doesn't have to be perfect. It's just a guide. Draw a curved horizontal line that splits the circle in half. This is a construction line that will help you place Charizard's facial features later on.
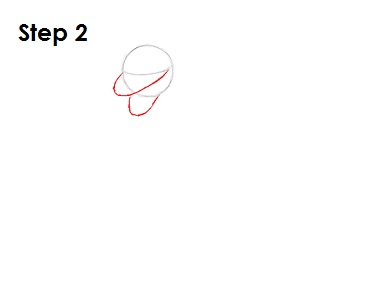
Step 2: Now draw two curved lines as guides for Charizard's top and bottom jaw. The top curved line starts on one end of the horizontal construction line, comes outside of the circle and ends on the other end of the construction line. The bottom curved line should be shorter and be placed under the circle.
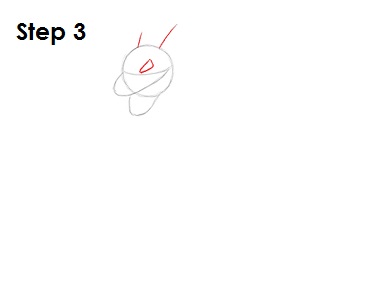
Step 3: Next, draw a triangle-like shape sitting on top of the horizontal construction line near the middle of the circle. This will be a guide for Charizard's eye. The other eye will be on the other side of the head and will not be visible from this perspective. On top of the head, draw two small lines as guides for this Pokemon's horns.
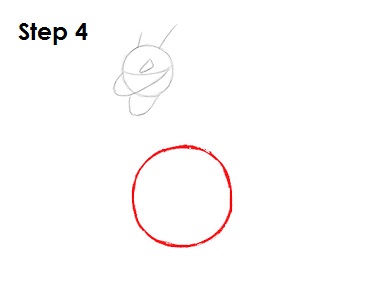
Step 4: Below Charizard's head, draw a big circle as a guide for the bottom part of the body. This circle should be about four times the size of the first circle for the head. Pay attention to the distance between the two circles or your Charizard drawing can end up too long or too short.
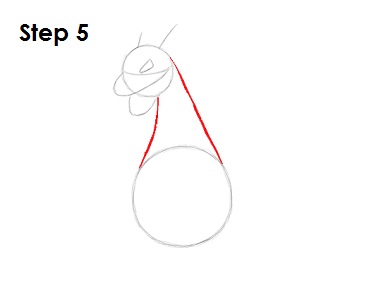
Step 5: Draw two long lines that connect Charizard's head and the body to form the top part of the body and the neck. Notice how the two lines are closer together at the top than at the bottom.
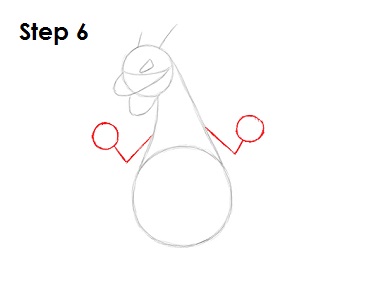
Step 6: On either side of the top part of the body, draw an angled line as a guides for Charizard's arms. At the end of each line, draw small circle as a guide for this Pokemon's hands.
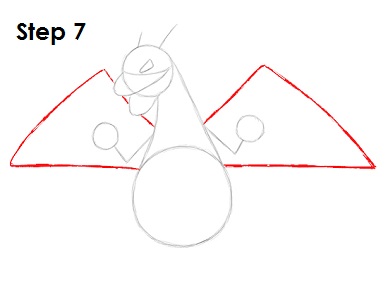
Step 7: Now draw two big triangle-like shapes on either side of the body as guides for Charizard's wings. The edges of these shapes should be behind the first shapes created, and the lines should not overlap. You can make these shapes bigger to form bigger wings.
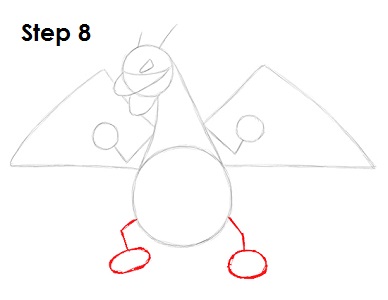
Step 8: Draw two short angled lines under Charizard's body as a guide for the legs. At the end of each line, draw a small oval as a guide for the feet.
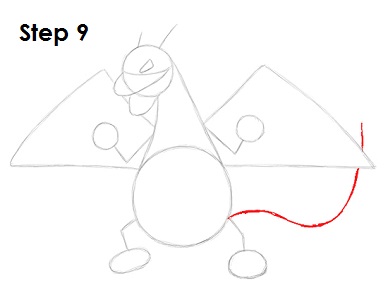
Step 9: On the right side of the body, draw a long curved line as a guide for Charizard's tail. You can also make this line longer if you want a longer tail. If you draw it long, make sure it goes behind the shape for the wings and that it doesn't overlap the lines.
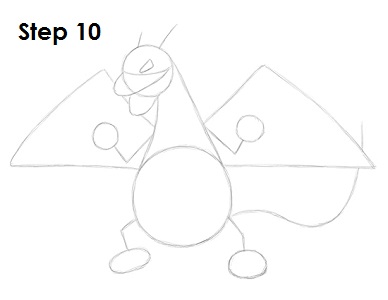
Step 10: That’s it for the initial sketch! You have the basic Charizard shape. Now go in and tighten your Pokemon drawing. From this point on, press harder with your pencil in order to get darker lines and a more defined sketch.
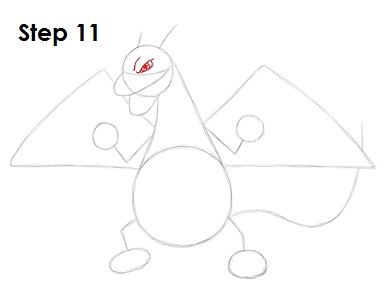
Step 11: Use the initial triangle-like shape inside Charizard's head as a guide to draw the eye. Darken the shape of the triangle and draw a line above it for the brow. Draw a small circle inside for this Pokemon's eyeball. Add a big dot inside the eyeball for the pupil.
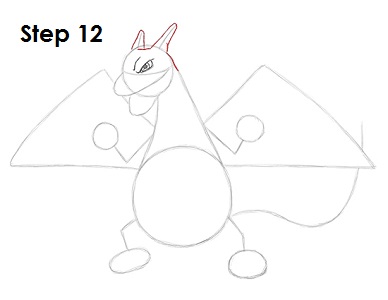
Step 12: Draw Charizard's horns on top of the head by following the basic path of the short guide lines. Make the horns thicker at the bottom. Draw the top and right side of the head too.
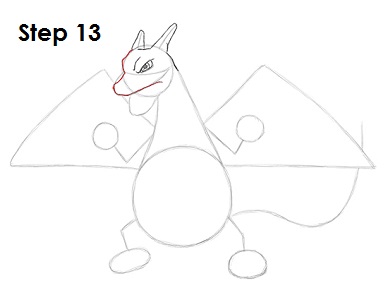
Step 13: Use the initial shapes as guides to draw the left side of Charizard's head and top jaw. Follow the basic path of the guides, but make the shapes more angular.
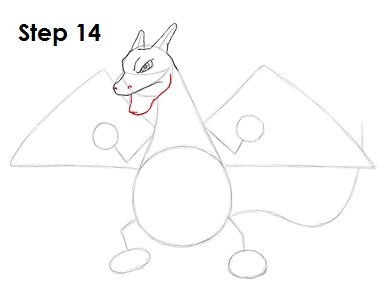
Step 14: Darken the lines under the head to create this Pokemon's lower jaw, but make these angular as well. Draw a couple of tiny circles on the tip of the top jaw for Charizard's nostrils.
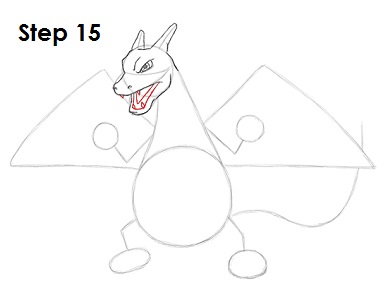
Step 15: Inside the shape of the lower jaw, draw a triangle-like shape for Charizard's tongue. Draw two tiny triangle-like shapes on the top and bottom jaw for the pointy teeth.
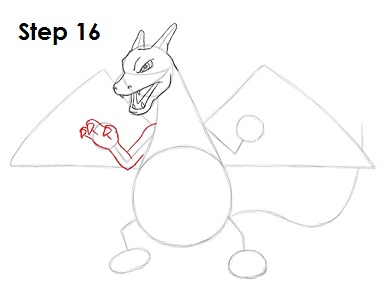
Step 16: Draw this Pokemon's arm on the left by using the initial lines as guides. Follow the basic path of the angled line but make the shape thicker to create the arm. Draw Charizard's fingers where the small circle is using a series of curved lines. At the end of the fingers, draw a triangle-like shapes for the claws.
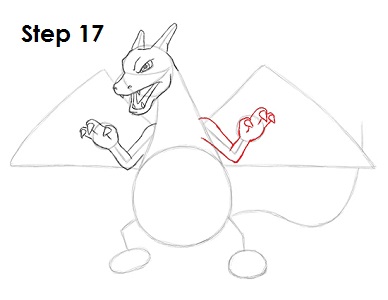
Step 17: Draw the arm on the right side the same way as the arm on the left. Follow the path of the angled line to create Charizard's arm, then add the hand and claws where the circle is.
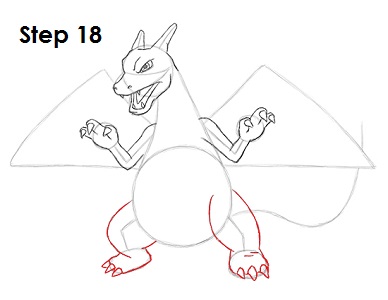
Step 18: Use the guides under the body to draw Charizard's legs and feet. Follow the path of the lines but make the legs rounder and thicker. Use the circle under them as guide to draw the feet. At the tips of the feet, draw three triangle-like shapes for the claws.
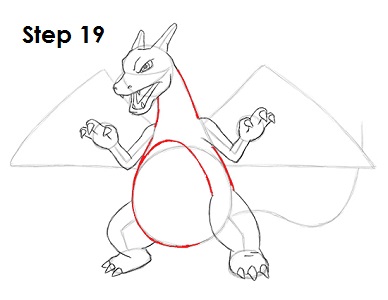
Step 19: Darken the initial guide lines to create the main shape of this Pokemon's body. Draw a curved line on the top part of Charizard's body for the color separation.
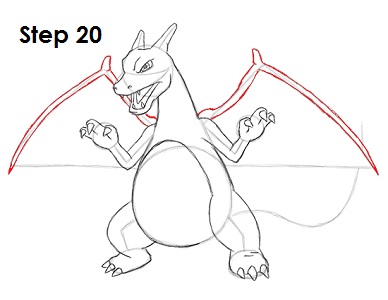
Step 20: Use the top part of the initial triangle-like shapes as guides to draw the base of Charizard's wings. Follow the path of the lines and add a bump to the top section of each wing. The outer tip of each wing should end in a sharp point.
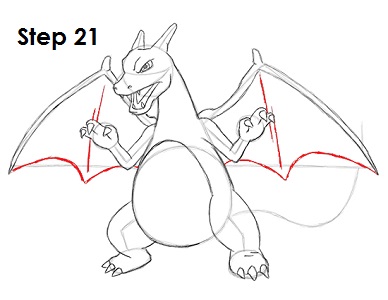
Step 21: Use curved lines to create the bottom part of Charizard's wings as you follow the initial lines as guides. Make the wings seem almost bat-like. Draw a couple of lines in the middle of this Pokemon's wings to give them more structure.
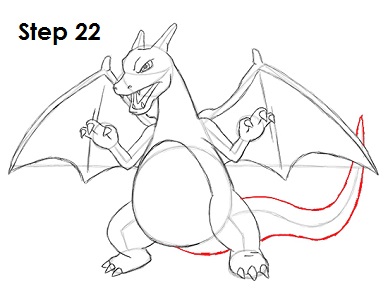
Step 22: Follow the path of the guide line to create the shape of the tail. Make Charizard's tail thick at the base and have it come to a point on the end.
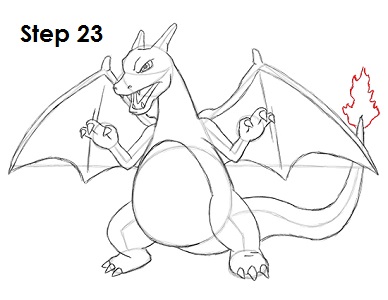
Step 23: Draw Charizard's flame at the end of the tail using a series of curved lines. The base of the flame should be wider, and it should be pointy at the top.
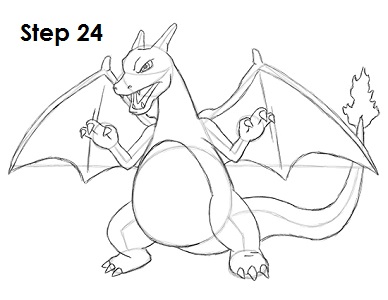
Step 24: That’s it! You now have a nice sketch of Charizard. You can stop at this quick drawing for a rough, sketchy look or go for a more finished look by continuing to the step below.
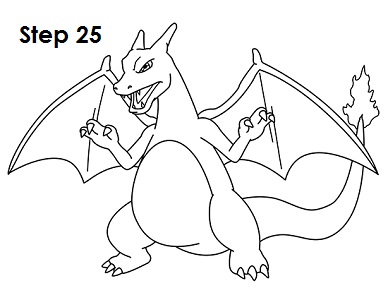
Step 25: For a more finished, inked look, carefully draw over the final sketch lines with a pen or marker. Wait for the ink to dry, and then get rid of every pencil mark with an eraser. You now have a finished inked drawing of Charizard from Pokemon! You can stop here or go to the final step to complete your Charizard drawing.
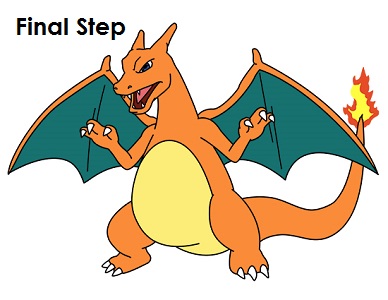
Last Step: For a completely finished Charizard drawing, you have to color it. You can use markers, color pencils or even crayons! Charizard's main color is orange. His eyes are blue, his tongue is pink ,and the inside of his mouth is brown. The inside of his wings are blue-green, and the lower section of the body is light yellow. The flame should be yellow with red on the edges. That’s it! You now have a completed drawing of Charizard from Pokemon.


