How to Draw Batman (Mini)
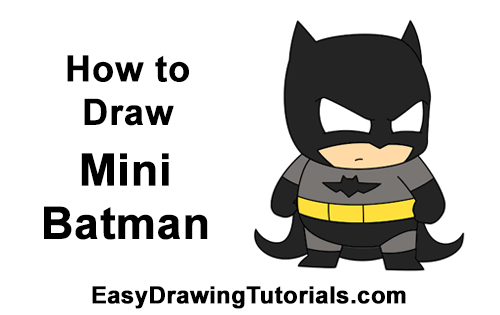
Use the videos and step-by-step drawing instructions below to learn how to draw a Mini or Chibi version of Batman. Stay tooned for more tutorials!
The written step-by-step video tutorial:
Intro: Start off with a pencil sketch. In the beginning stages, don’t press down too hard. Use light, smooth strokes for sketching.
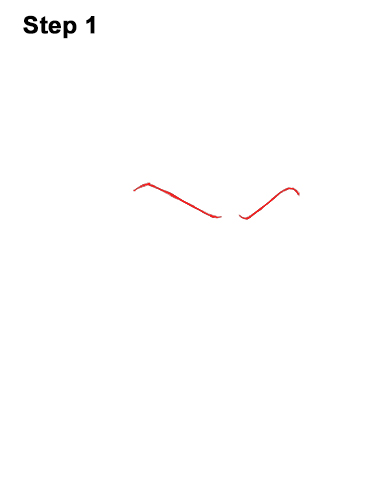
Step 1: Draw two diagonal lines for the top part of mini Batman's eyes. The lines should almost touch in the middle. The line on the left should be slightly smaller. Curve the outer tips of the lines down and the inner tips up to create a furrowed brow.
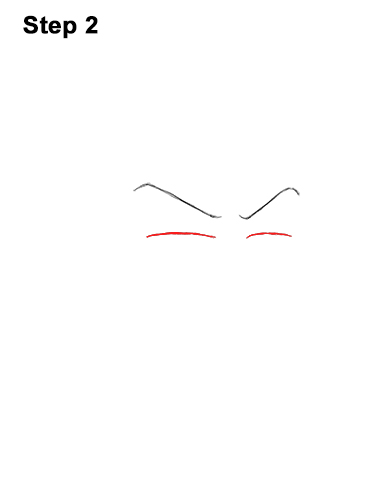
Step 2: Below each diagonal line, draw a curved horizontal line for the bottom part of Batman's eyes. The line on the right should be a bit smaller because of perspective.
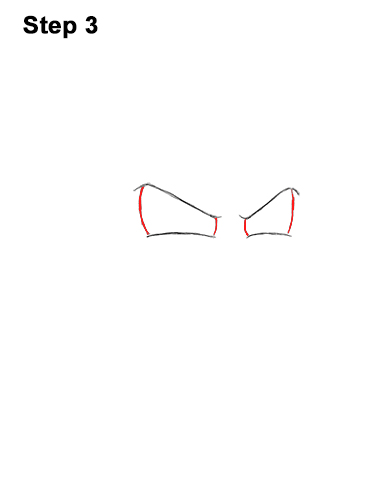
Step 3: Add the sides of Batman's eyes by drawing a series of vertical lines that connect the top lines to the bottom.
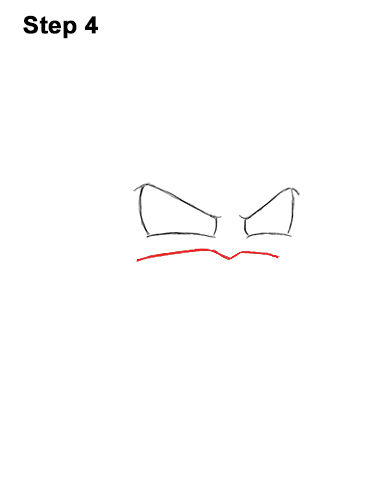
Step 4: Under the eyes, near the middle, draw a small V- shaped line for the nose on Batman's mask. On either side of the nose, draw a long curved horizontal line for the mask's opening.
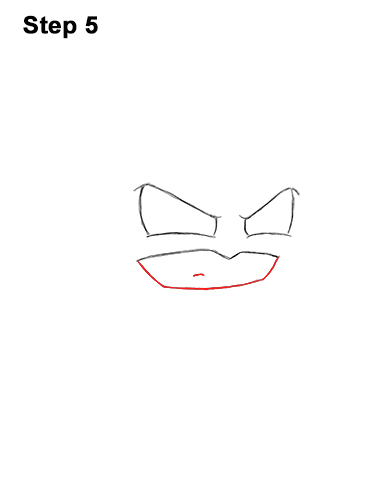
Step 5: Below the nose, draw a long, curved horizontal line for the bottom of the head. The space between the nose and bottom of the head should be small. Add the sides of the mask's opening using vertical lines. Within the shape you created, off to the side, draw a small line for mini Batman's mouth.
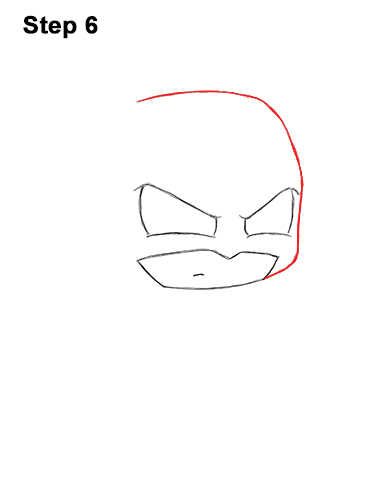
Step 6: High above the eyes, make a small mark to indicate where the top of the head will be. When you get the mark on the right spot, draw a long curved horizontal line for the top of chibi Batman's head. Curve the line down toward the eye on the right to create the side of the head. The line should curve in a bit and almost touch the eye. The line should then curve back out to create the cheek and connect to the bottom.
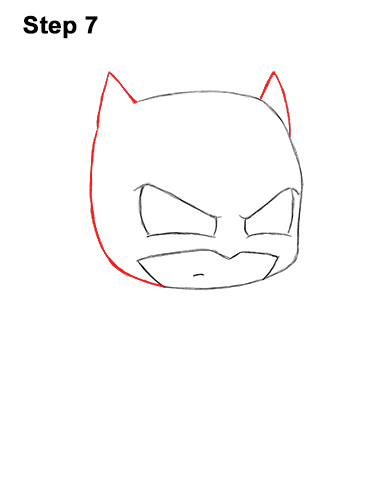
Step 7: Make a small mark on the left to indicate where the side of the head will be. Draw a long, curved vertical line that conects to the bottom. Pay attention to the distance from the eye. On the upper, left side of the head, draw the first ear as an angled line similar to an upside- down letter V. Add another line that resembles an upside-down letter V on the right side for the other ear.
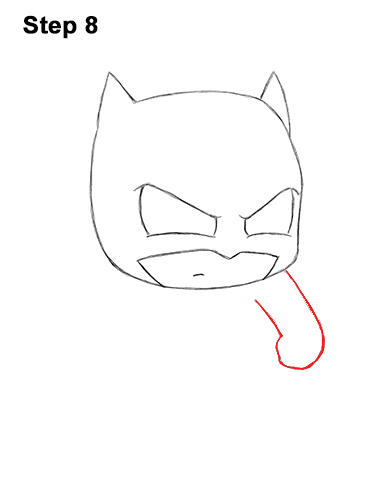
Step 8: Draw two short, curved diagonal lines on the lower right side of the head for Batman's first arm. At the end of the lines, at the bottom, draw a circle-like shape for the fist.
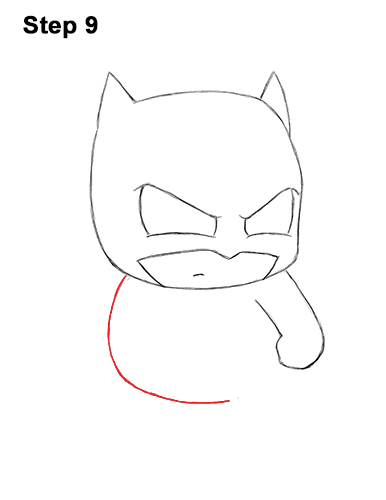
Step 9: Draw a long, curved vertical line that starts on the lower left side of the head for mini Batman's body. Curve the line to the right toward the arm to create the bottom of the body.
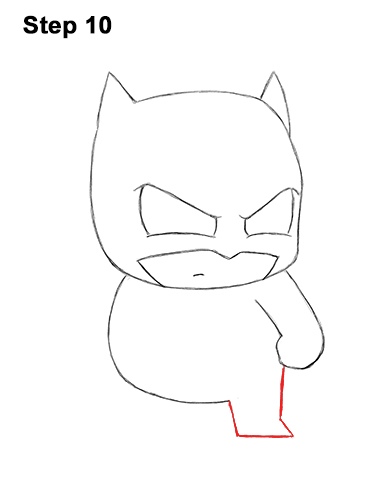
Step 10: Draw the leg on the lower, right side of the body using two short vertical lines. Add chibi Batman's foot at the bottom using an angled line similar to a greater- than sign (>).
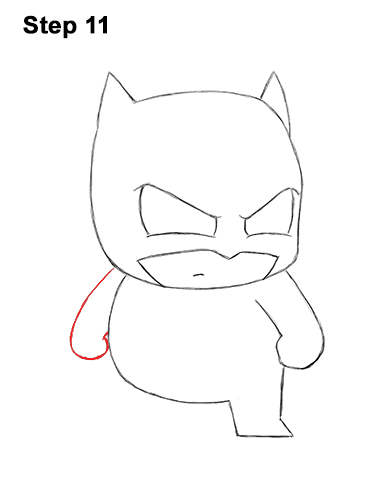
Step 11: On the top, left side of Batman's body, draw a curved, diagonal line for the other arm. Draw a circle-like shape at the bottom for the fist. Part of it will be hidden behind the body.
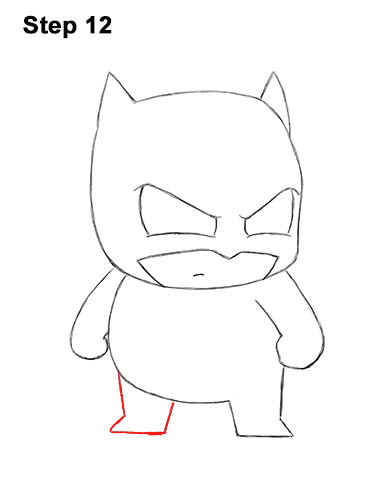
Step 12: Draw Batman's leg on the lower, left side using two short, vertical lines and an angled line for the foot.
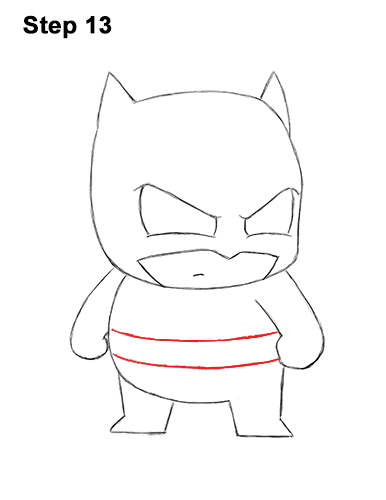
Step 13: Draw two long, curved horizontal lines across the belly for mini Batman's utility belt. Don't place these lines too close together, otherwise the belt will be too thin.
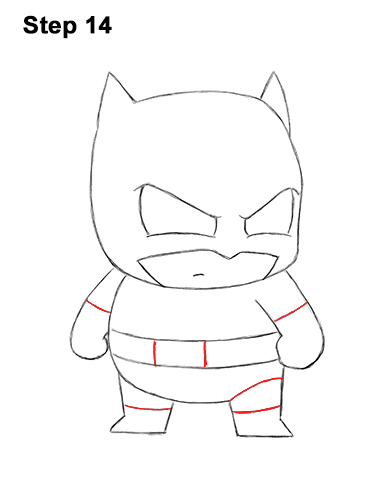
Step 14: Draw two short, vertical lines inside the belt for the buckle and a short diagonal line inside each arm for the gloves. Add a short line inside each leg for the boots and one on the top part of the leg on the right for mini Batman's underoos.
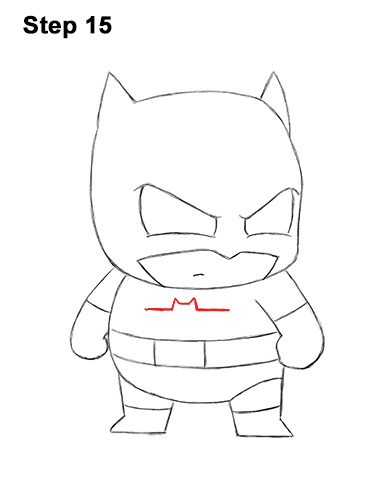
Step 15: Inside the chest, draw the first part of the Batman logo as two tiny triangle- like bat ears and a short line for the head. On either side of the ears, draw a long horizontal line for the top part of the wings.
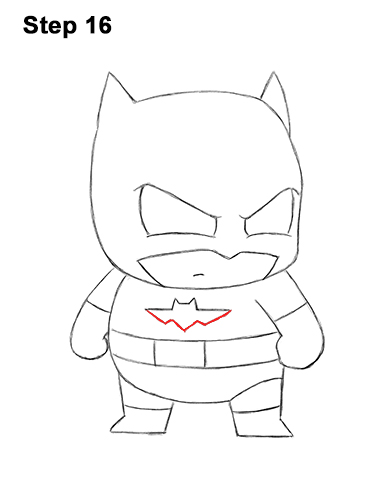
Step 16: Below the logo's head, draw a V-shaped line for the bottom part of the Batman logo. Add a wider V- shaped line on either side that connects to the top to finish the simplified logo.
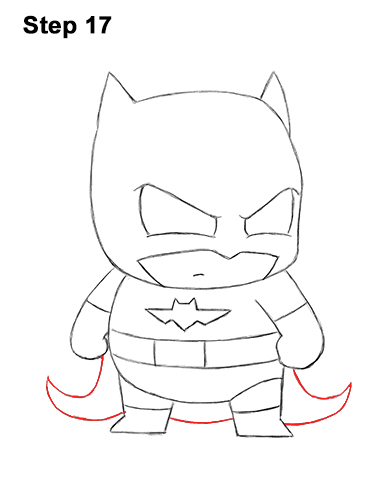
Step 17: On the left side of the body, draw a J-shaped line for the first part of chibi Batman's cape. Add a curved line underneath for the bottom part of the cape. Draw a similar curved, pointy shape on the right side and a curved line between the legs to finish the cape.
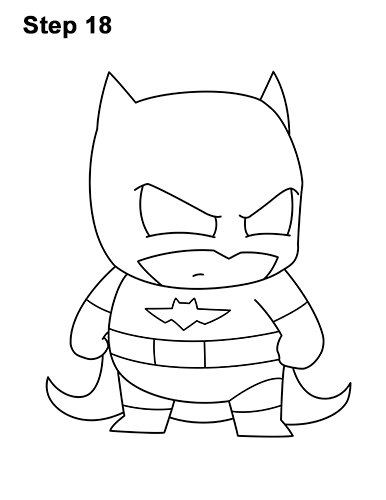
Step 18: Using a pen or marker, carefully go over the lines to make your chibi Batman drawing permanent. After inking, get rid of every pencil mark with an eraser.
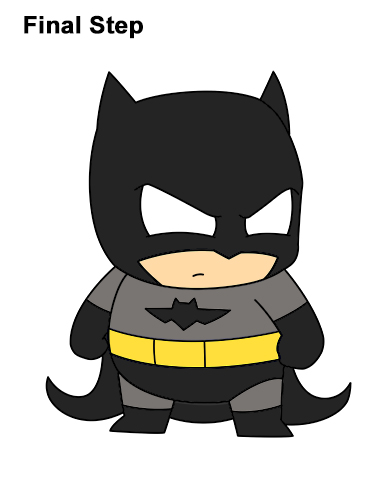
Final Step: Color your mini Batman drawing using color pencils, markers or even crayons! Color his mask, logo, gloves, boots, underpants and cape black. Use gray for his arms, legs and torso. Use peach for his face. If you don't have peach, use yellow-orange or light brown. Color his belt yellow. Don't forget to pause the video to draw Batman at your own pace.
Thanks for visiting! Subscribe to the EasyDrawingTutorials YouTube Channel for a new tutorial every Sunday.
To learn how to draw animals, visit How2DrawAnimals.com.
RELATED TUTORIALS
 |
 |
 |
 |
 |


