How to Draw Bambi
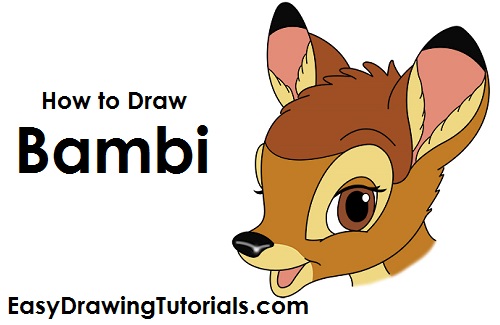
Use the video and step-by-step drawing instructions below to learn how to draw Walt Disney's Bambi. A new cartoon drawing tutorial is uploaded every week, so stay tooned!
Intro: Start off with a pencil sketch. In the beginning stages, don’t press down too hard. Use light, smooth strokes for sketching.
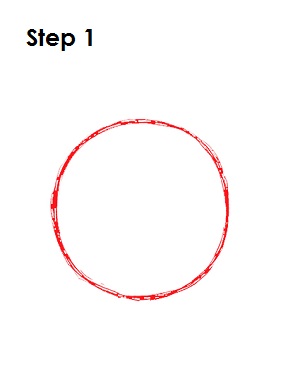
Step 1: Start by drawing a circle near the bottom of the page. Leave enough room at the top for Bambi's ears. This will be the basic shape for Bambi's head. It doesn’t have to be perfect. It’s just a guide.
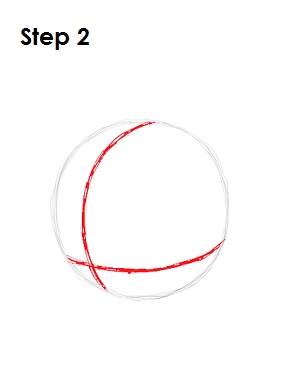
Step 2: Next, draw two intersecting lines across the circle, one vertical and one horizontal. Bend the lines so that they contour to the shape. The horizontal line should be close to the bottom edge of the circle, and the vertical line should be close to the left edge. These will be construction lines that will help you place Bambi's facial features later on.
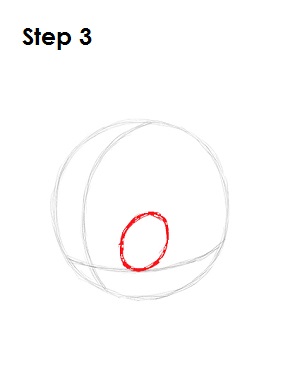
Step 3: Draw a small oval as a guy for Bambi's eye. Draw it sitting on top of the horizontal construction line and right side of the vertical construction line. Tilt the shape of the oval a bit so that it has a diagonal orientation. Bambi's other eye will be on the other side of the head and therefore not visible.
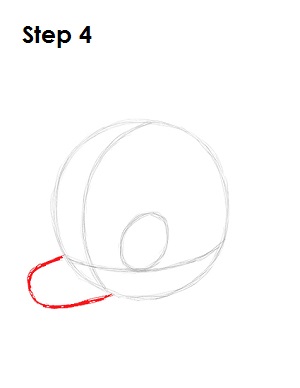
Step 4: Draw a U-shaped arc on the lower left side of Bambi's head as a guide for the top part of the muzzle. Notice that the line for the guide starts on the left side of the horizontal construction line and ends at the bottom of the vertical construction line.
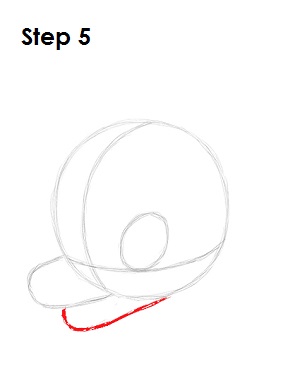
Step 5: Right under the U-shaped arc, draw another curved line as a guide for the lower part of Bambi's muzzle. This line should stretch back toward the right side of the head.
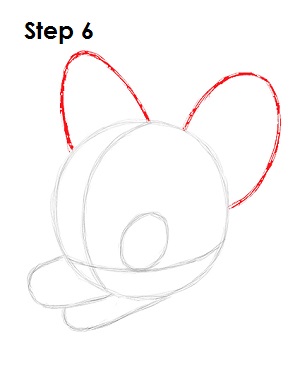
Step 6: Draw two big arcs on top of Bambi's head as guides for his ears. The arc on the left side should be a bit thinner because of the perspective.
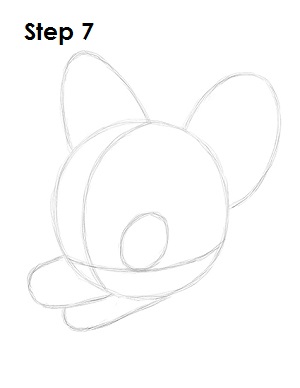
Step 7: That’s it for the initial sketch! You have the basic Bambi shape. Now go in and tighten your drawing. From this point on, press harder with your pencil in order to get darker lines and a more defined sketch.
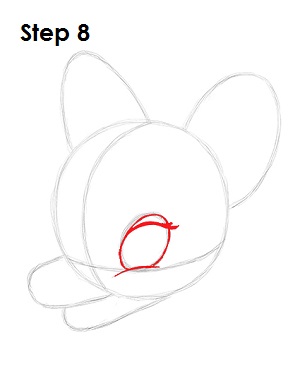
Step 8: Darken the shape of Bambi's eye and draw a curved line at the bottom for his cheek. Near the top of the eye, draw a thick curved line for the eyelashes.
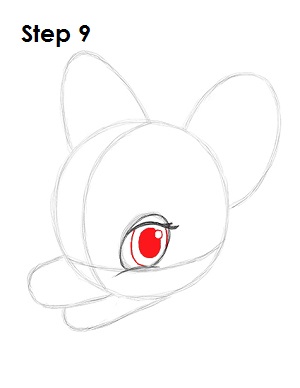
Step 9: Inside the eye, draw an oval for the iris. Inside the iris, off to the side, draw a tiny circle to represent glare. In the middle of the iris, draw another oval and shade it in for Bambi's pupil.
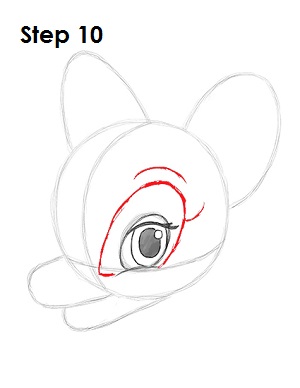
Step 10: Draw a big arc surrounding the eye and a curved line above it for Bambi's brow. Also draw a small line on the upper right side.
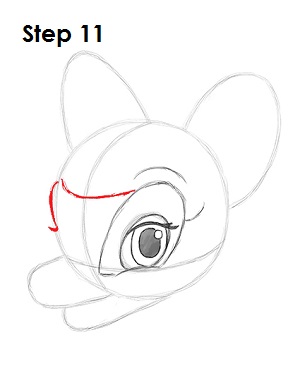
Step 11: Draw a curved line across Bambi's forehead for the detail on the head. Draw a small curved line on the outer edge of the head for the brow and eyelashes on the other side.
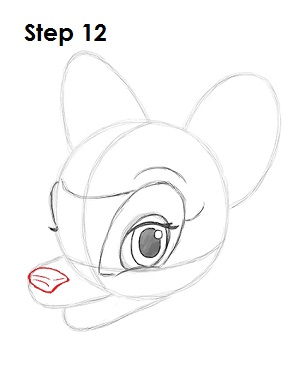
Step 12: At the tip of the arc, draw a small shape for Bambi's nose. The shape of the nose is similar to a flat square with the lower right side bent inward. Draw a couple of lines within the shape to represent shine.
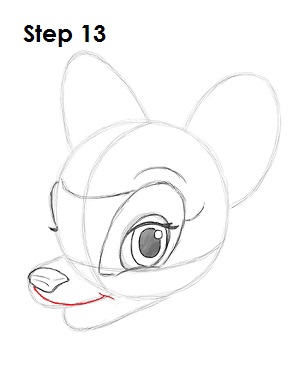
Step 13: Use the lower part of the initial arc as a guide to draw the top part of Bambi's mouth. The line starts below the nose, then extends to just outside the edge of the circle. Draw a small smile line at the end.
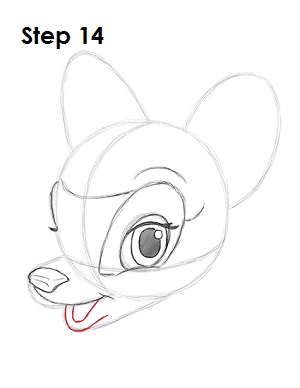
Step 14: Draw the bottom part of Bambi's mouth by using the line under the arc as a guide. Draw a U-shaped arc for the bottom lip and another U-shaped arc for the inside of the mouth.
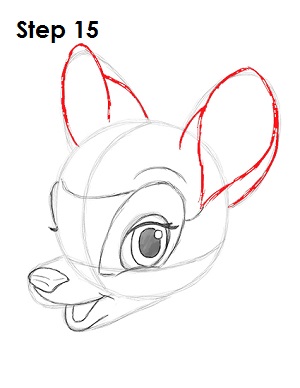
Step 15: Use the arcs on Bambi's head as guides to draw the first part of the ears. Follow the basic path of the guides as you darken the lines and shape the ears. The left ear is narrower than the right. Draw curved line on the right for the back part of the ear. The right ear is wider, and the bottom ends at a point next to the eye. Draw a curved line on either side for the outer portions of the ear.
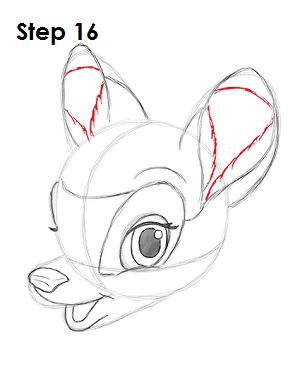
Step 16: Add the detail within Bambi's ears. Draw a line near the tip of the each ear for the color separation. Add a few curved lines along the sides of the ears for the fluffy fur inside.
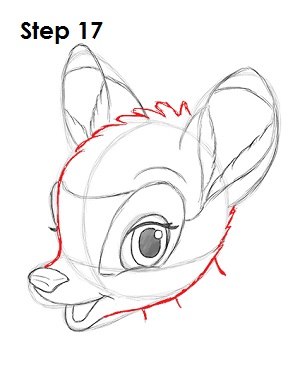
Step 17: Use the initial lines and shapes as guides to draw the rest of Bambi's head. Draw a series of curved lines on top of the head for the fur. Draw three small lines on the lower right side for the neck.
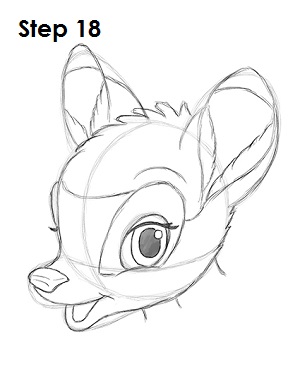
Step 18: That’s it! You now have a nice sketch of Walt Disney's Bambi. You can stop at this quick drawing for a rough, sketchy look or go for a more finished look by continuing to the step below.
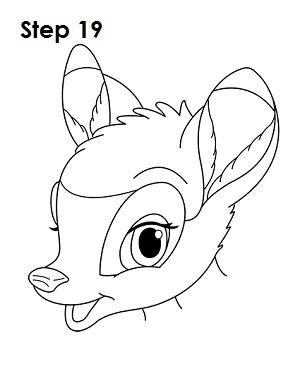
Step 19: For a more finished, inked look, carefully draw over the final sketch lines with a pen or marker. Wait for the ink to dry, and then get rid of every pencil mark with an eraser. You now have a finished inked drawing of Bambi! You can stop here or go to the final step to complete your Bambi drawing.
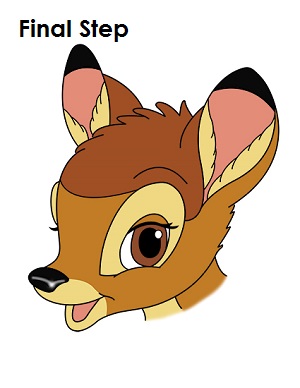
Final Step: For a completely finished Bambi drawing, you have to color it. You can use markers, color pencils or even crayons! Color the top part of his head and his eye brown. The tips of the ears and nose are black. Leave a section on the nose blank to represent shine. The inside part of the ears and the mouth should be pink. The main part of Bambi's head should be light brown. The fur in the ears, the shape around the eye, the muzzle and the neck should be yellow. That’s it! You now have a completed drawing of Walt Disney's Bambi.


