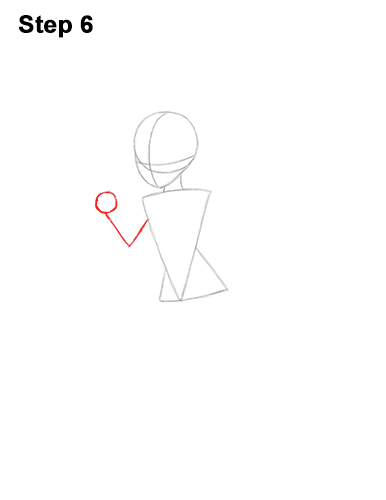
Step 6: On the upper left side of the body, draw a V-shaped line as a guide for Tinker Bell's first arm. At the end of the line, draw a small circle as a guide for the hand.
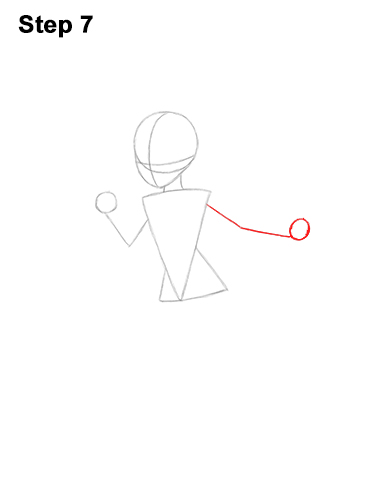
Step 7: On the upper, right side of Tinker Bell's body, draw a long line that bends slightly in the middle as a guide for the other arm. At the end of the line, draw a small circle as a guide for the other hand.
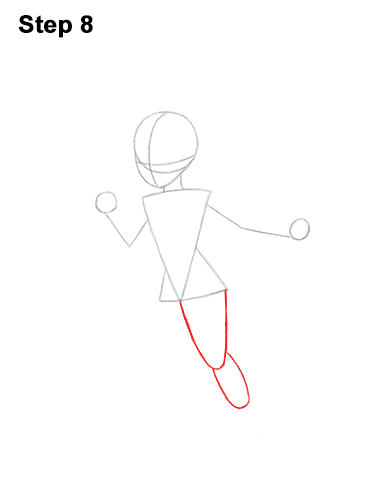
Step 8: On the lower, right side of the body, draw a long U-shaped line as a guide for the top part of the first leg. Make a small mark at the bottom to indicate the length of this guide, then connect it to the body at the top. Underneath, draw another U-shaped line, only smaller and thinner, as a guide for the middle part of the leg. Pay attention to the length and width of these guides in relation to each other and to Tinker Bell's body.
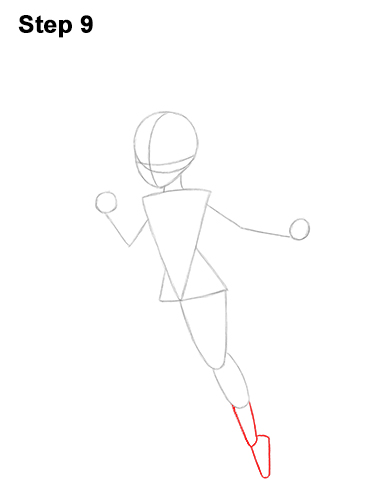
Step 9: Draw the guide for the lowest part of the leg using a couple of short vertical lines. The end result should be similar to a thin, long cylinder. Add the guide for Tinker Bell's foot at the bottom using a couple of angled lines.
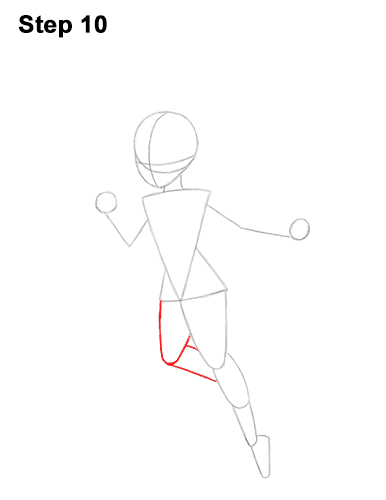
Step 10: On the left side, draw a smaller U-shaped line as a guide for Tinker Bell's other leg. This leg will be behind the first leg, so don't overlap the lines. Add a couple of diagonal lines on the lower, right side of the U-shaped line for the middle section of the leg.


