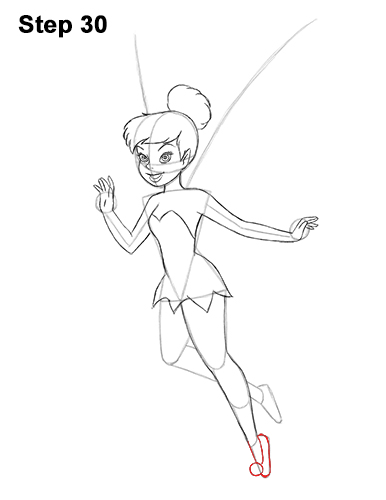
Step 30: Use the triangle-like shape at the bottom as a guide to draw Tinker Bell's foot. First draw a small circle on the left side of the foot for the puff on her slipper. Add a curved line for the slipper's opening and darken the outer edges of the guide to complete the shoe.
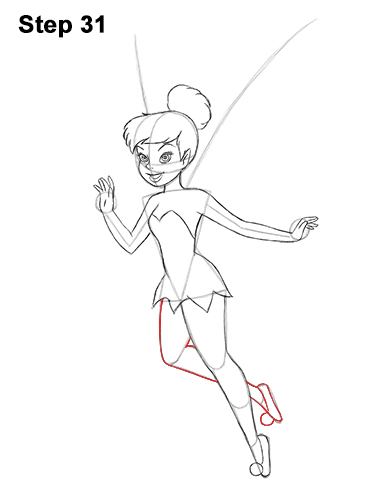
Step 31: Use the remaining lines as guides to draw the other leg the same way. Darken the outer edges of the initial guides to create the shape of the leg. Then draw Tinker Bell's other shoe the same way. Start with a small circle on the left side. Then draw a curved line for the slipper's opening and darken the outer edges of the guide.
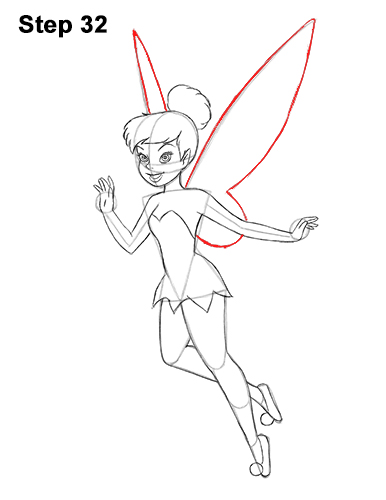
Step 32: Use the long, curved lines at the top as guides to draw Tinker Bell's wings. Darken the initial line, then add another long curved line on the right to create a long, thin arc-like shape. The top of the wing should be pointy. This line should almost touch the shoulder on the right. Now draw the bottom half of the wing as a shorter curved line. Don't overlap the arm. Add the other wing the same way. Because of the angle, only draw the top of it and make it thinner.
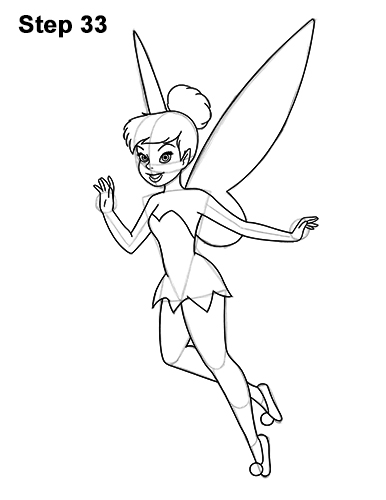
Step 33: For a more finished look, carefully go over the final sketch lines with a pen or marker.
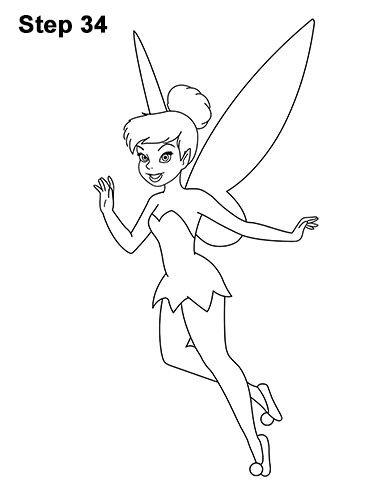
Step 34: After inking, get rid of every pencil mark with an eraser for a cleaner drawing.
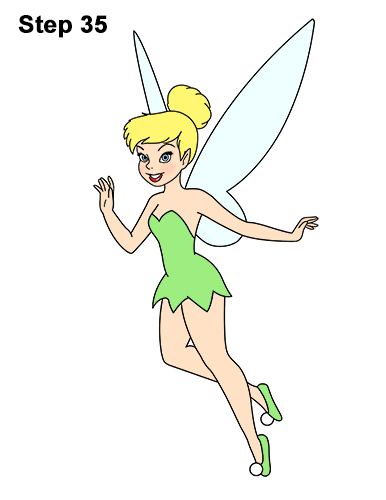
Final Step: Color your Tinker Bell drawing using color pencils, markers or even crayons! Use yellow for the hair. Use light blue for the wings and peach for the skin. If you don't have peach, improvise and use yellow- orange or light brown. Use light green or yellow-green for the dress. Use light blue for Tinker Bell's eyes, red for the lips and a bit of pink for the cheeks. Color the shoes yellow-green too.
Thanks for visiting! Subscribe to the EasyDrawingTutorials YouTube Channel for a new tutorial every Sunday.
To learn how to draw animals, visit How2DrawAnimals.com.
RELATED TUTORIALS
 |
 |
 |
 |
 |


