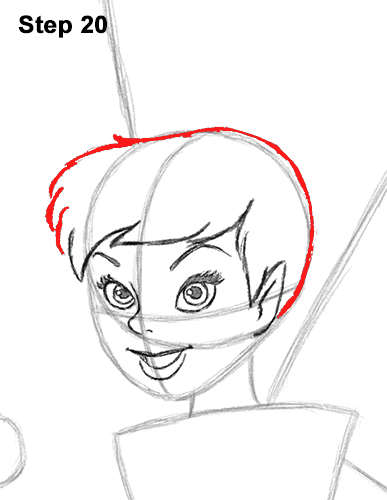
Step 20: Draw the top of Tinker Bell's head using the initial circle as a guide. Follow the basic path of the circle but extend the shape of the hair farther to the left. Darken the right side of the initial circle to finish the shape of the head.
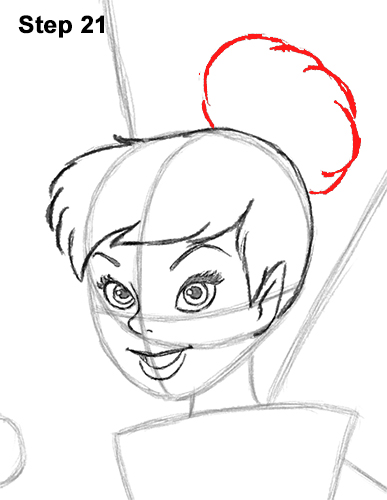
Step 21: Draw Tinker Bell's bun as a semi-circle on the top, right side of the head. The overall shape of the bun should be made up of short, curved lines to represent hair.
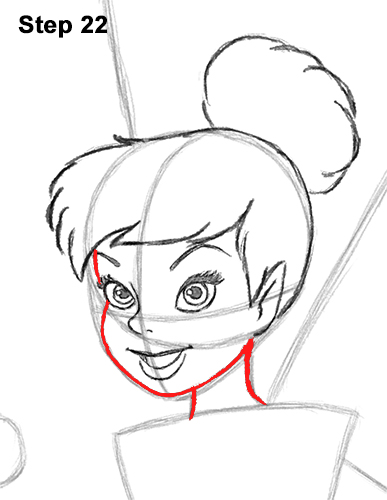
Step 22: Draw the shape of Tinker Bell's face using the remaining lines and shapes as guides. Draw a line right next to the eye for the side of the face. Then curve the line below the eye outward for the cheek. Darken the bottom part of the initial guides to create the chin, jaw and neck.
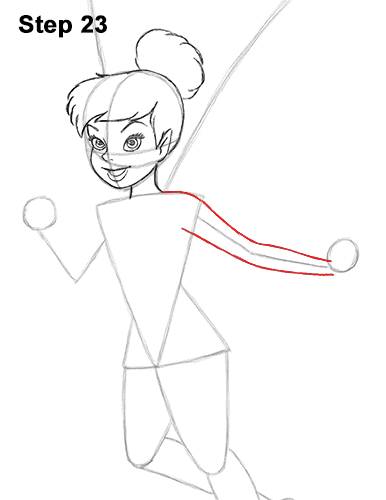
Step 23: Use the angled line on the right side of the body as a guide to draw Tinker Bell's first arm. Make the shape of the arm thicker as you follow the basic path of the initial guide line. The line for the neck should continue toward the right to create the shoulder. Sketch lightly at first to get the structure of the arm right. Use a curved line for the forearm. The shape of the arm should be narrower closer to the small circle to create the wrist.
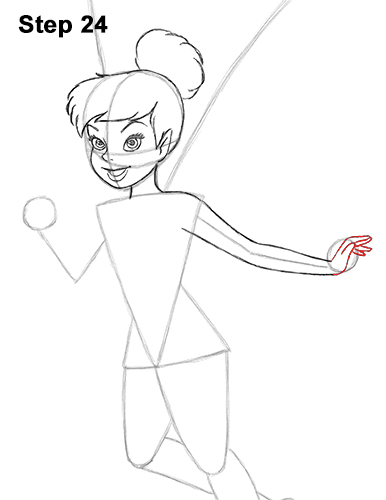
Step 24: Use the small circle as a basic guide to draw Tinker Bell's hand and fingers. Inside the circle , draw a curved line similar to a long upside- down letter U for the thumb. Above the thumb , draw a long, thin arc that curves slightly to the right for the index finger. Now below the index finger, draw three more long, thin curved arcs for the other fingers. The fingers should gradually get smaller, with the pinky being the smallest.


