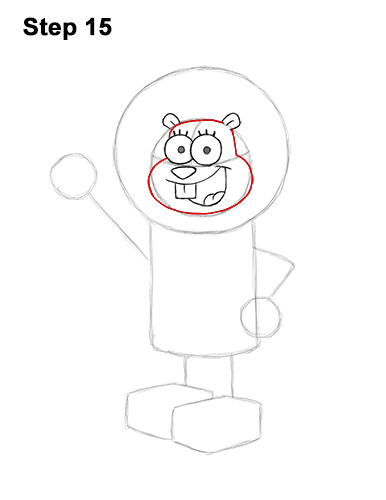
Step 15: Use the initial circle as a guide to draw the shape of the head. Make the sides of the head narrower than the initial circle. The right side of the head consists of a line that goes from the ear to the horizontal guide. Now draw Sandy's cheeks using the lower half of the initial circle as a guide. Follow the basic edge of the initial circle but make the cheeks a bit wider. The top half of the head should be narrow and the bottom wide.
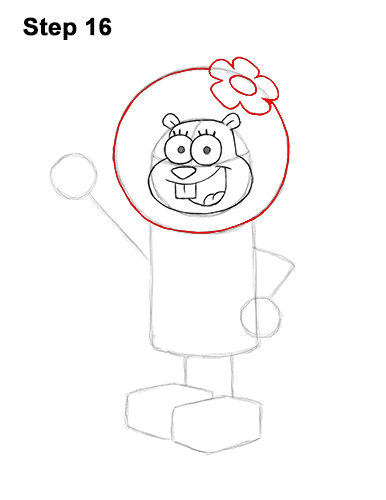
Step 16: Add the flower on Sandy's helmet by first drawing a small circle on the top, right side. Draw the petals around the small circle using a series of curved lines. Draw the petals around the small circle using a series of curved lines. The petals at the bottom should be very close to the ear on the right. There should be five petals, and they should be evenly spaced. Darken the initial circle for the helmet but don't overlap the flower.
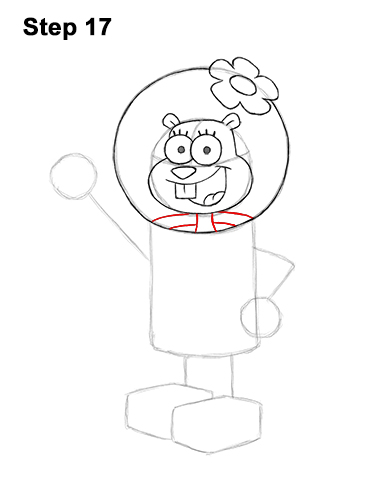
Step 17: Draw two short lines under the head for Sandy's neck. Draw a series of curved, horizontal lines on the sides of the neck for the top of the underwater suit.
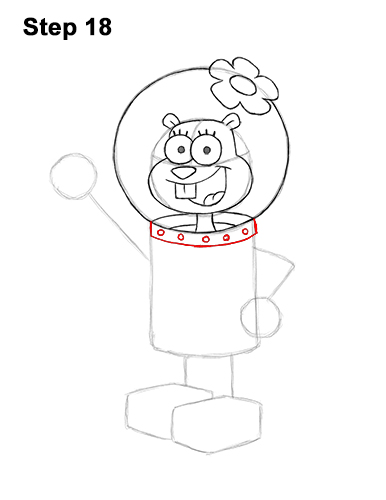
Step 18: Draw a curved, horizontal line under the helmet for the top edge of Sandy's suit. Inside the curved band, draw five tiny circles for the rivets on the suit.
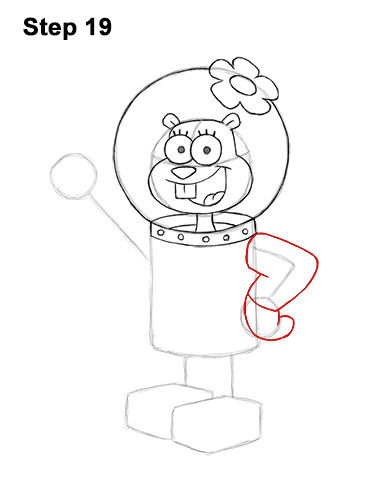
Step 19: Use the angled line on the right side of the body as a guide to draw Sandy's first arm. Follow the path of the guide and draw the shape of the arm around it. Make the shape of the arm thick around the guide. Sketch lightly at first and only darken the lines when you get the shape right. Darken the sides of the circle at the bottom for the hand. Draw a curved line on the right for the folded fingers.


