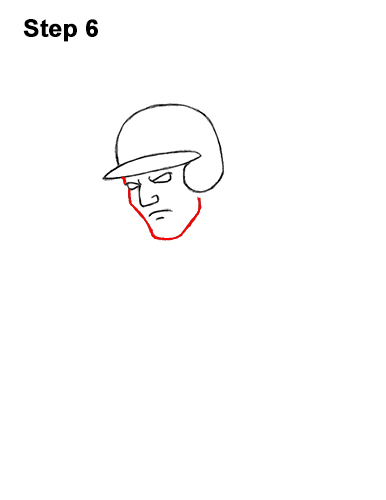
Step 6: Below the eye on the left, draw a short, vertical line for the side of the baseball player's face. Continue to draw the line toward the right and then up to the helmet for this athlete's chin and jaw.

Step 7: Below the chin, draw a big, curved line for the top of the shoulder. On the lower, left side, draw another big, curved line for the bicep. Below those lines, draw two more curved lines for the bottom edge of the arm. On the left side, connect the top and bottom using a curved line for the shirt sleeve.

Step 8: To the left of the shirt sleeve, draw two lines that curve top the top, left for the forearm. Sketch lightly at first and only darken the lines when you get the shape right. Make the bottom pointy for the elbow.

Step 9: Draw a blocky, square-like shape at the end of the forearm for the hand. Make the left edge of the hand wavy for the knuckles. The top and bottom part of the baseball player's folded hand should be pretty flat.

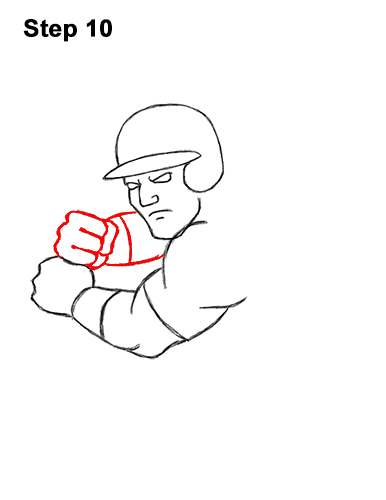
Step 10: Directly on top of the first hand, lightly sketch another square-like shape for the other hand. When you darken the shape, draw two lines on the right for the fingers and make the left side wavy for the knuckles. On the right side, draw a curved line for the thumb. Below that, add another curved line for the rest of the baseball player's hand. Draw two curved lines from the hand to the face for the visible part of the other arm.


