
Step 11: Draw a series of circles on the lower half for more decoration. You can make these circles bigger or smaller and have as many as you'd like.
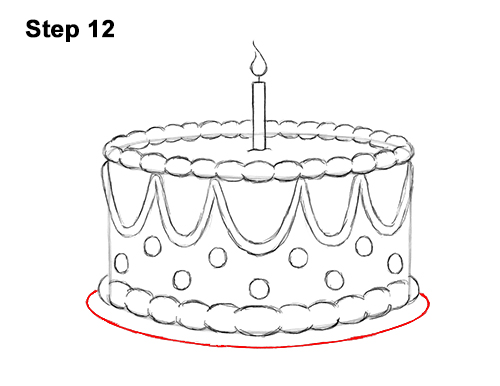
Step 12: Add a plate at the bottom by drawing a long, curved horizontal line. Don't draw this line too far away from the cake. Make sure the line is parallel to the bottom edge of the cake.

Step 13: Using a pen or marker, carefully go over the final lines to make your birthday cake drawing permanent. After inking, get rid of every pencil mark with an eraser.
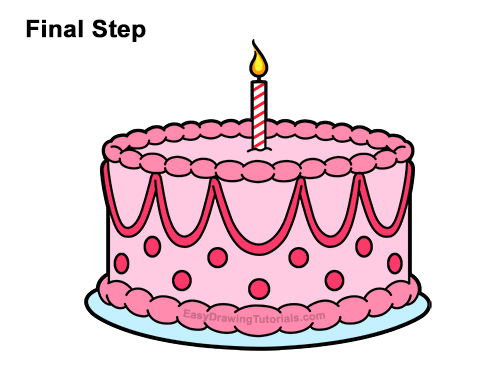
Final Step: Color your birthday cake using color pencils, markers or crayons! Use pink for the frosting on the edges. Use red for the decorations on the sides. You don't have to color your cake like this. You can color your drawing any way you want. Use light pink for the rest of the birthday cake. If you don't have light pink, just use regular pink but push lightly on your pencil. Add some stripes to the candle using red. The flame should be yellow-orange at the bottom and yellow at the top. Use light blue for the plate. Don't forget to pause the video to draw at your own pace.
Thanks for visiting! Subscribe to the EasyDrawingTutorials YouTube Channel for a new tutorial every Sunday.
To learn how to draw animals, visit How2DrawAnimals.com.
RELATED TUTORIALS
 |
 |
 |
 |
 |


