Step 6: Now that you have the base for your birthday cake, decorate it! Add a border of frosting along the lower edge of the oval at the top. Simply draw a series of short, curved lines along the bottom side of the first oval. Above it, draw another row of short, curved lines for the top part of the cake's frosting. Follow the path of the initial oval as you draw the curved lines for the frosting.

Step 7: Add the back portion of the frosting the same way. Follow the path of the initial oval and draw a series of short, curved lines under it. Don't overlap the shape of the candle as you draw the frosting in the back of the birthday cake. Use more curved lines to draw the top edge of the frosting but always follow the path of the initial oval.

Step 8: Draw more frosting at the bottom of the birthday cake by first drawing a couple of curved lines in the middle. Now draw a series of short, curved lines along the bottom line. Now draw more curved lines above to finish the lower border of frosting. The frosting should basically look like a bunch of tiny ovals joined together.

Step 9: Give the birthday cake more decoration by drawing a big U-shaped line at the front. Draw a parallel line above it to make the shape thicker.

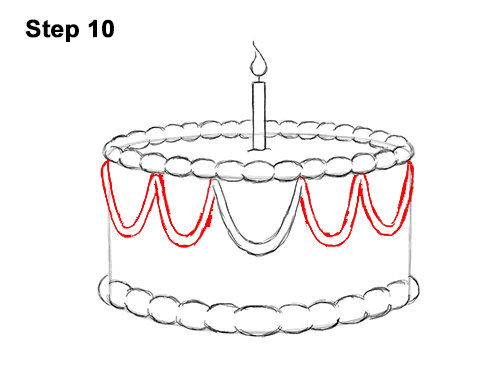
Step 10: Draw a couple more of these U-shaped lines on either side to make the birthday cake's decorations even. Remember to sketch lightly at first and only darken the lines when you get the shapes right. You can make these U-shaped lines as long or wide as you want. You can also draw more of them too. Each U-shaped line should be made up of two lines to make the shape thick.


