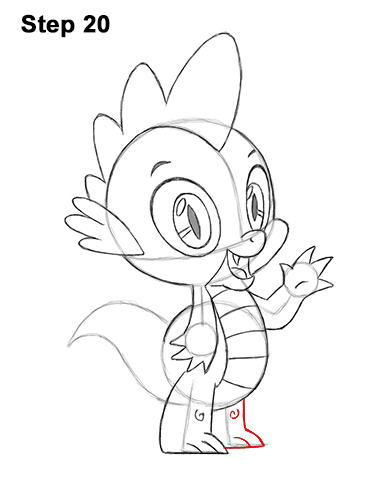
Step 20: Use the L-shape line at the bottom as a guide to draw Spike's second leg the same way as the first.
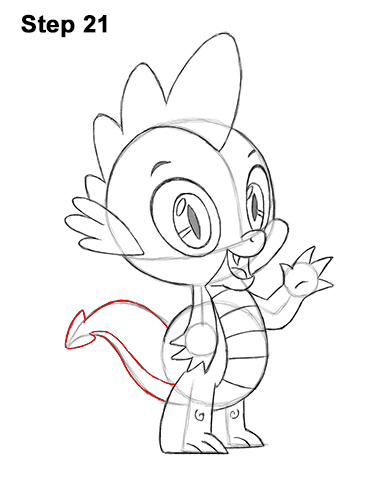
Step 21: Darken the curved guides on the left side of the body to create the shape of Spike's tail. At the tip, draw an arrow-like shape for the end of the tail. Inside the tail, near the bottom, draw a line parallel to the tail shape for the edge of the scales.
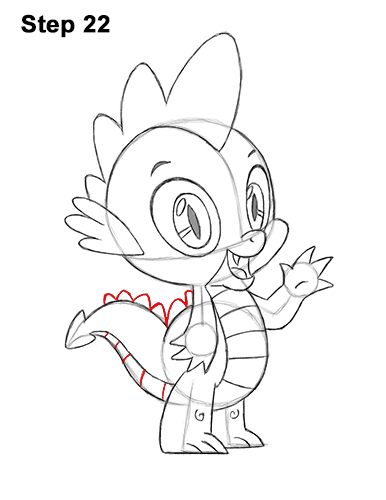
Step 22: Draw a series of short lines along the bottom of the tail for Spike's scales. Draw a series of small arcs along the back for the spikes on the body. The spikes should be smaller the closer they are to the tip of the tail. Now you have a nice sketch of Spike from My Little Pony.
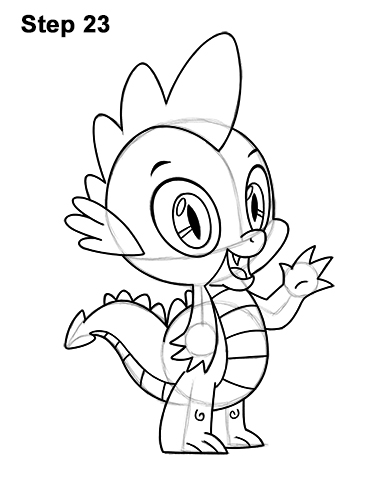
Step 23: For a more finished look, carefully go over the final sketch lines with a pen or marker.
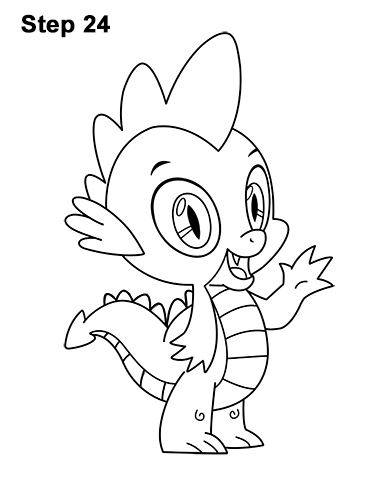
Step 24: After inking, get rid of every pencil mark with an eraser.
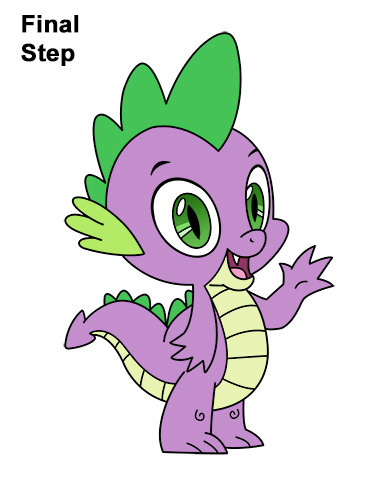
Final Step: Color Spike from My Little Pony using color pencils, markers or crayons! Use yellow-green for the spikes, the ear and eyes. Color the ear and bottoms of the eyes a bit lighter. Color the rest of the body purple except for the scales. Color lightly at first, then gradually build up to the level of darkness that you like. Color Spike's scales and the bottom part of the mouth yellow. Use dark red for the inside of the mouth and pink for the tongue. Remember to pause the video to draw at your own pace.
Thanks for visiting! Subscribe to the EasyDrawingTutorials YouTube Channel for a new tutorial every Sunday.
To learn how to draw animals, visit How2DrawAnimals.com.
RELATED TUTORIALS
 |
 |
 |
 |
 |


