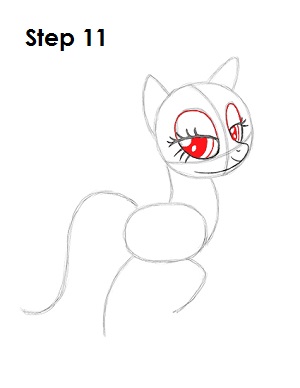
Step 11: Darken the top part of the ovals using a thinner line for Rarity's eyelids. Inside each eye, draw a curved line for the irises. Within the each iris, add another curved line for the pupil and shade it in except for two small circles that represent glare.
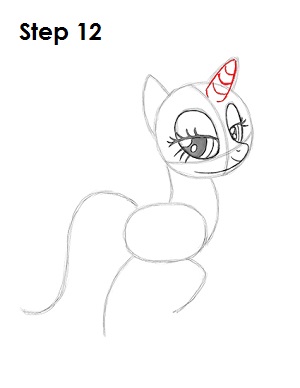
Step 12: Use the triangle-like shape on the top right side of the head as a guide to draw Rarity's horn. Darken the sides of the shape and add three curved lines inside for extra detail.
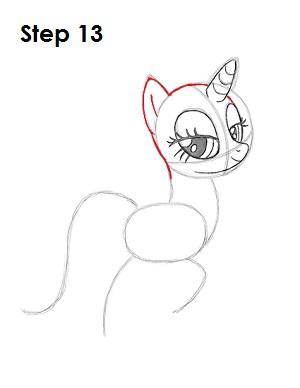
Step 13: Use the original circle and the triangle-like shape on the top left side as guides to draw the rest of Rarity's head. Follow the basic path of the guides as you darken the lines. Add a small curved line within the shape of the ear.
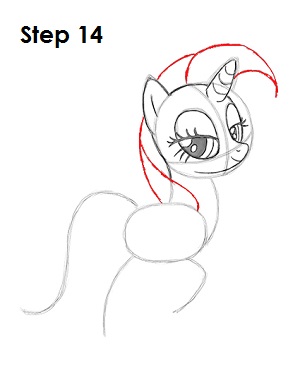
Step 14: Rarity's mane is a bit tricky, so it's divided into three parts. First draw three curved lines at the top of the head. The first line starts at the horn and curves right. The second line starts on the head and meets the first line on the right. The third line starts at the ear and meets the second line on the right. Now draw a line that starts on the bottom of the ear, then curves down and splits into two and ends on the top part of the torso.
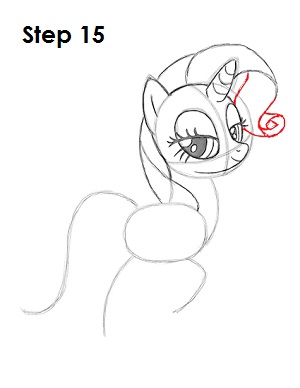
Step 15: Now draw the front part of the mane on the right of the head and directly under the first curved line of the previous step. This part of Rarity's mane basically consists of two curved lines with a small spiral to the right of them.


