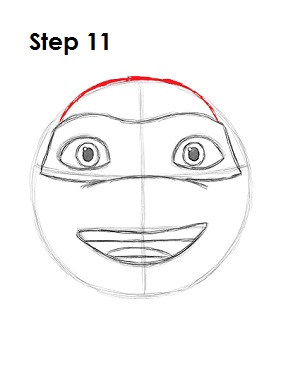
Step 11: Use the original circle as a guide to draw the top of Michelangelo's head. Follow the basic path of the circle and darken the line to create the head. The sides of the head should be narrower than the original circle.
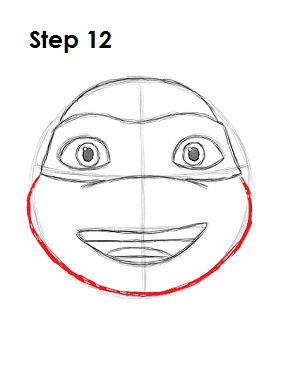
Step 12: Draw the bottom part of Michelangelo's head by using the original circle as a guide. Follow the basic path of the circle as you darken the line but make the sides bulge out more to create the cheeks.
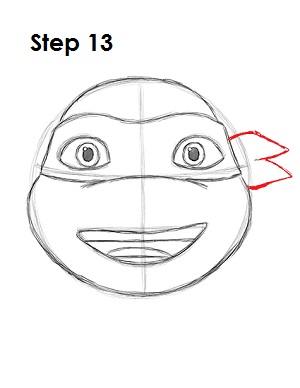
Step 13: On the right side of Michelangelo's head, draw the ends of his mask. The ends of the mask basically consist of two points that have bulging sides.
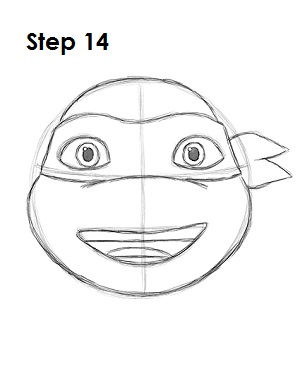
Step 14: That’s it! You now have a nice sketch of Michelangelo from Teenage Mutant Ninja Turtles. You can stop at this quick drawing for a rough, sketchy look or go for a more finished look by continuing to the step below.
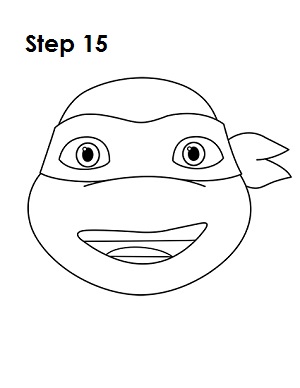
Step 15: For a more finished, inked look, carefully draw over the final sketch lines with a pen or marker. Wait for the ink to dry, and then get rid of every pencil mark with an eraser. You now have a finished inked drawing of Michelangelo! You can stop here or go to the final step to complete your Michelangelo drawing.
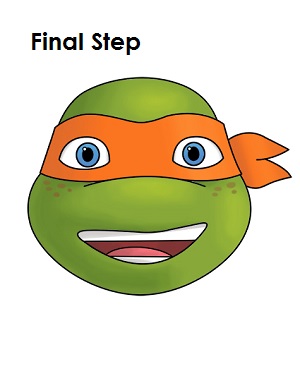
Final Step: For a completely finished Michelangelo drawing, you have to color it. You can use markers, color pencils or even crayons! Michelangelo's skin is light green. You can use dark green on the side of his head to give the head more dimension and volume. Add a few small circles on his cheeks using brown to give him freckles. Color his eyes blue, the inside of his mouth brown and his tongue pink. Michelangelo's signature color is orange, so color his mask orange. That’s it! You now have a completed drawing of Michelangelo from Teenage Mutant Ninja Turtles.
RELATED TUTORIALS
 |
 |
 |


