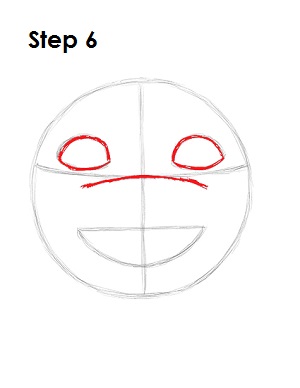
Step 6: Draw a curved line under Michelangelo's eyes, right on top of the horizontal construction line, as the top part of his nose. The length of this line should be about as long as the guide for the mouth. Darken the outline for Michelangelo's eyes and make the ends of the shapes pointier.
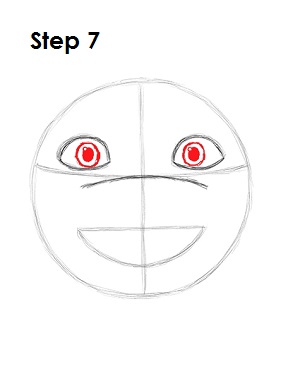
Step 7: Inside each eye, draw an oval for the irises. Inside each iris, add a tiny dot off to the side to represent glare. In the middle of each iris, draw another oval and shade it in for Michelangelo's pupils.
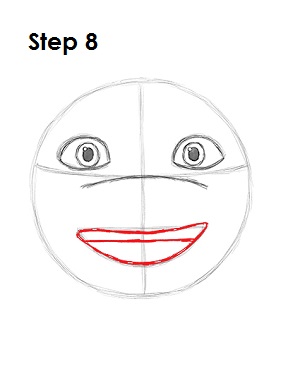
Step 8: Use the D-like shape as a guide to draw Michelangelo's mouth. Make the tip of the mouth a bit rounder, and the top of the mouth should be curvier too. Inside Michelangelo's mouth, on the top side, draw a horizontal line to represent the top teeth.
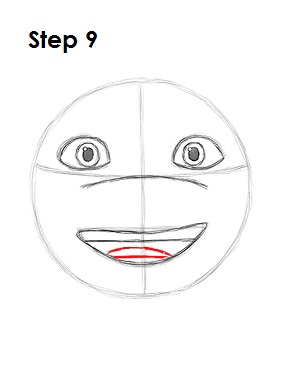
Step 9: On the bottom part of Michelangelo's mouth, draw a smaller line for the bottom teeth. Draw a curved line above the teeth for the tongue.
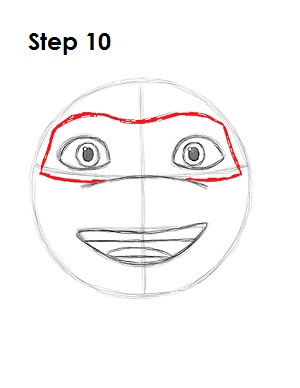
Step 10: Draw a wavy line around Michelangelo's eyes for his mask. Start the line on one side of the nose, then move it all the way around the eyes until you reach the other side of the nose. The top part of the mask should dip down a bit in between the eyes. The sides of Michelangelo's mask should also be narrower than the original circle.


