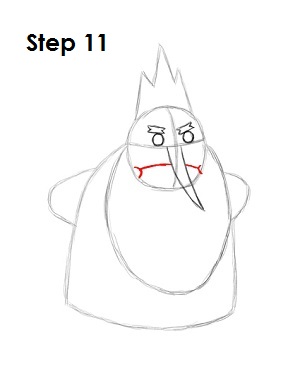
Step 11: Behind the Ice King's nose, draw a long line for his mouth. Draw a couple of arcs on either end for extra detail. Make sure the mouth extends the whole width of the original circle.
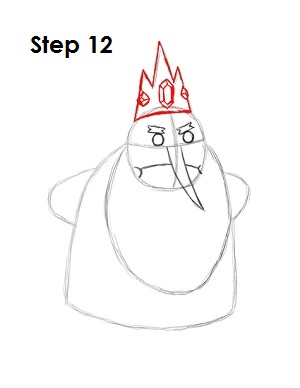
Step 12: Darken the shape of the Ice King's crown. Inside the crown, draw three jewels. The middle one should be the biggest. For the middle jewel, draw a long hexagon within a hexagon and connect the corners. Do the same for the other jewels but use diamond shapes instead.
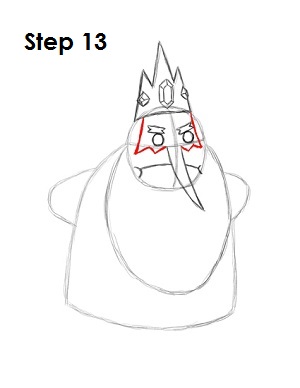
Step 13: The Ice King's big beard is a bit tricky, so it’s split up into two parts. First draw the top part as a couple of lines that come down from his crown toward the horizontal construction line. Then draw the shape inward toward the Ice King's nose with a zigzag line.
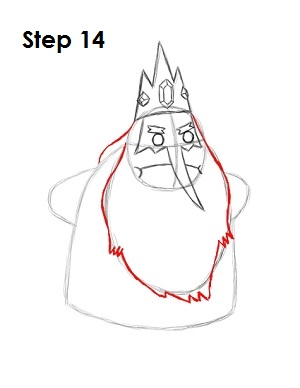
Step 14: Now the draw the bottom part of the Ice King's flying beard using the initial arc as a guide. Make it wavier and draw a few jagged edges for detail. On the left side, draw an extra line that goes over his body for his hair.
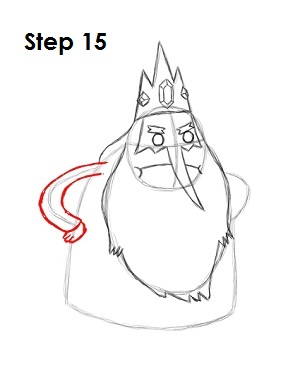
Step 15: Use the initial line as a guide to draw the left arm. Simply thicken up the guide line and give him a sleeve. At the end of the sleeve, draw the Ice King's hand and fingers using a series of curved lines.


