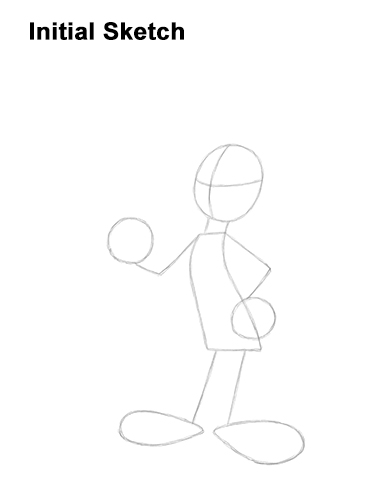
Step 6: Starting on the lower, right side of the body, draw a long, vertical line as a guide for Bugs Bunny's first leg. At the bottom, draw a shape that's a bit similar to an oval on its side as a guide for the foot. This shape should be pretty big in relation to the body. The left side should be thinner, like a drop of water.

Step 7: Draw a similar shape to the left as a guide for Bugs Bunny's other leg and foot. Notice that the lines for the legs slope to the left a bit. Make the guide for this foot smaller than the first foot.

That's it for the guides! For the next steps, use darker lines for a more defined drawing.

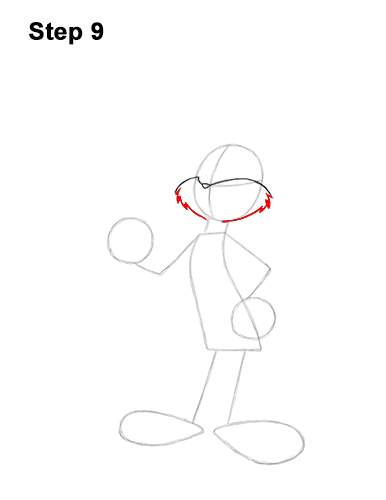
Step 8: Inside the head, to the left of where the guides intersect, draw a tiny triangle for Bugs Bunny's nose. To the left of the nose, draw a line that curves outside of the head for the top part of the cheek. Use the initial lines as guides. To the right draw a longer line that curves outside of the head for the other cheek. These lines should curve down outside of the initial oval. The line on the right should be longer.

Step 9: Continue to draw the line on the right down toward the bottom of the oval to complete the cheek. Draw three short, angled lines along the way for the tufts of fur on Bugs Bunny's cheek. Continue to draw the line on the left side downward for the other cheek too. Add some angled lines along the way for the fur on the cheeks.


