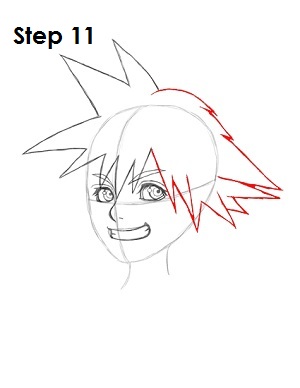
Step 11: Now draw the right side of Sora's hair, which is a bit less wild but spiky nonetheless. The spikes don't stand straight up but rather come down over his head. When drawing his hair, be sure to follow the original egg shape as a guide for the hair placement.
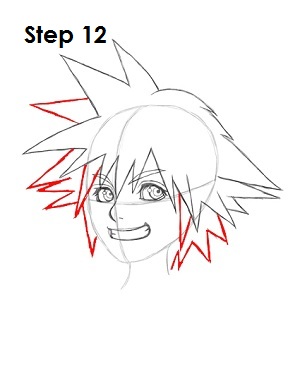
Step 12: The last part to draw is the backside of Sora's hair, which will give him more dimension and volume. Draw a few spikes on the left side behind the first set and a few on the lower right side behind the second set.
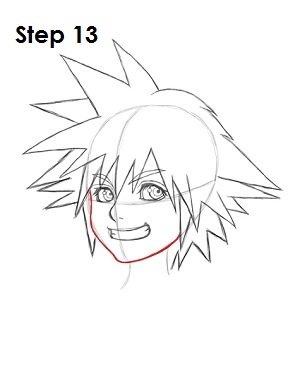
Step 13: Tighten the shape of Sora's face by making it curve more. Draw it so it dips in on the left toward his eye and then jet out a bit for his cheek. Then make the shape come in slightly towardshis smile before going out again. Round out the bottom of the original egg shape to create Sora's chin, and finally finish drawing the line on the right where his hair is.
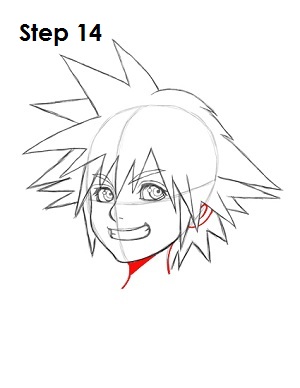
Step 14: Darken in the lines that make Sora's neck and create some shadow on his neck by shading a small portion under his chin. Sora has so much hair that you can barely see his ear, but it's there, so draw in two curves in between his hair to represent his ear.
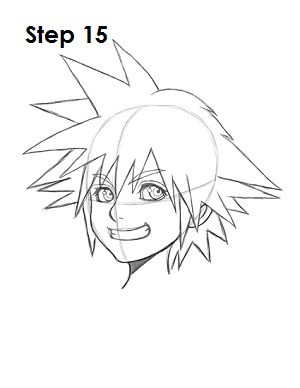
Step 15: That's it! You now have a nice sketch of Sora from the Kingdom Hearts video games. You can stop at this quick drawing for a rough, sketchy look or go for a more finished look by continuing to the step below.


