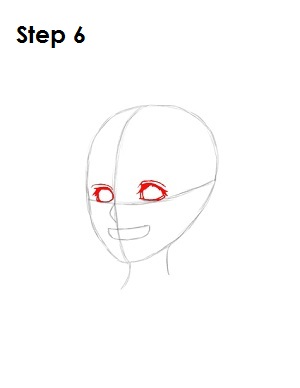
Step 6: Tighten the shape of Sora's eyes by drawing some extra lines for structure, eyelashes for detail and a line above each eye for his eyelids.
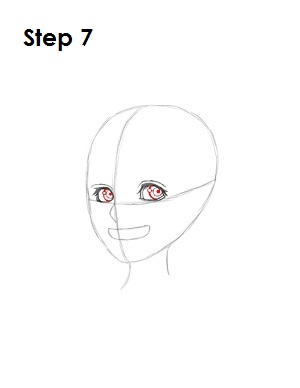
Step 7: For the inside of Sora's eyes, draw a big thick circle for his iris. Draw a smaller circle inside this one for detail and an even smaller one inside this one for his pupil and shade it in. On the top left side of each iris, draw another small circle to represent glare.
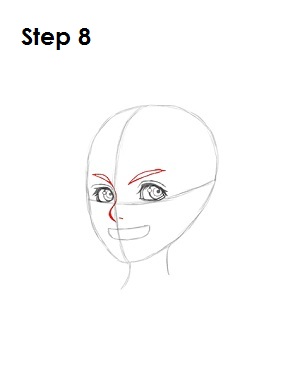
Step 8: Next, draw Sora's eyebrows. Above each eye, draw a long curve with a flat bottom that angles in toward the vertical construction line. Using the nose guide, tighten his nose by connecting the guide to the left eyebrow by drawing a backward S-shaped line. Draw a tiny line to the right of it for his nostril.
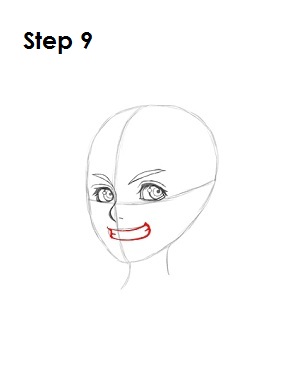
Step 9: Define Sora's smile by darkening in the initial mouth shape, but bend the mouth up more with a thicker, darker outline. On the inside of this shape on either side, draw two small horizontal lines to indicate where his teeth come together.
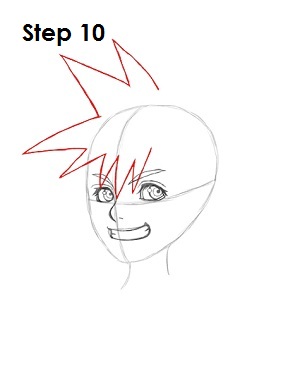
Step 10: Sora's hair is quite complex, so this section about how to draw Sora's hair is divided into three parts. Sora's hair is spiky, so draw it as angled triangles around his head. Start with the left side and draw three big spikes and a few more that come down over Sora's forehead.


