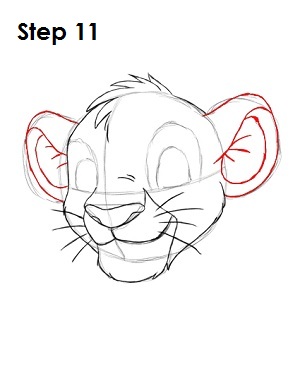
Step 11: Dip the top part of Simba's ears downward toward his head so they won't be so round. Draw a curved underneath below the tops of his ears to draw the top part of the inside of his ears. Draw a semicircle underneath these curved lines. Draw a few short lines within the semicircle represent the insides of his ears. Again, make all of these lines a little jagged for his fur.
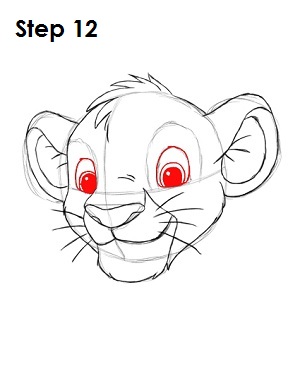
Step 12: Darken the shape of Simba's eyes, and draw two curves in each eye that are almost circles. These represent Simba's pupils.
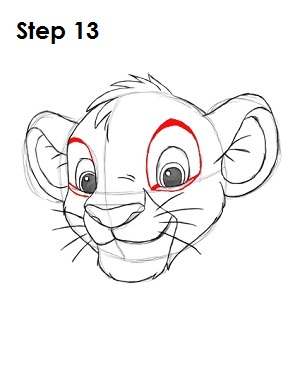
Step 13: Finish drawing the rest of Simba's eyes by giving him some eyebrows and darkening in parts of the shape that surrounds it. Draw two lines beneath each eye as well.
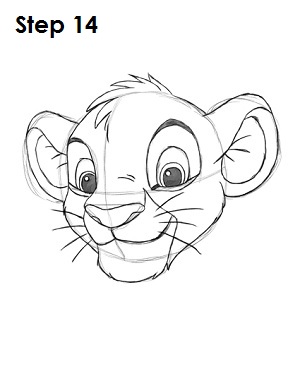
Step 14: That's it! You now have a nice sketch of Simba from The Lion King. You can stop at this quick drawing for a rough, sketchy look or go for a more finished look by continuing to the step below.
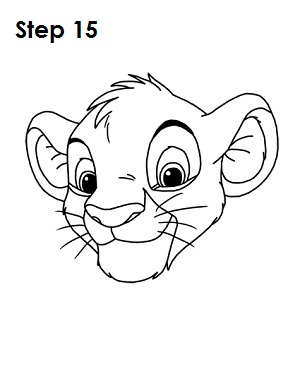
Step 15: For a more finished, inked look, carefully draw over the final sketch lines with a pen or marker. Wait for the ink to dry, and then get rid of every pencil mark with an eraser. You now have a finished inked drawing of Simba! You can stop here or go to the final step to complete your Simba drawing.
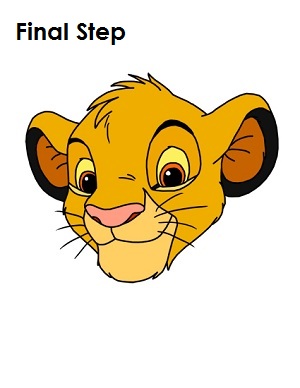
Final Step: For a completely finished Simba drawing, you have to color it. You can use markers, color pencils or even crayons! Color Simba's head and top of his ears a dark yellow or light brown color, or simply mix yellow and brown. Experiment. Use anything that looks good and comes close to his color. The insides of Simba's ears are a darker brown, and the outlines of the ears are black. His eyes are yellow, and his pupils are orange. His nose is pink, his nostrils are red, and his mouth is a light orange color. That's it! You now have a completed drawing of Simba from The Lion King.
RELATED TUTORIALS
 |
 |
 |
 |
 |


