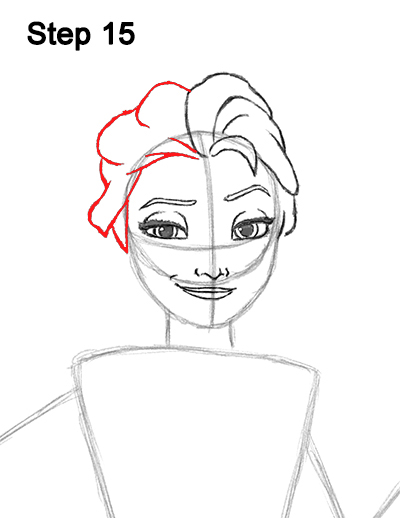
Step 15: Now draw the top, left side of Elsa's hair by first drawing a curved line high above the head. Now draw the hairline using curved lines that extend toward the edge of the main circle. Add the side of the hair and follow the basic curved path of the initial circle. Use curved lines for the individual clumps and sections of Elsa's hair.
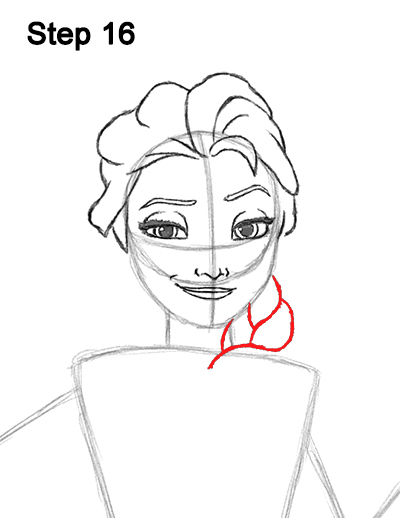
Step 16: Draw the top part of Elsa's braid as a line that's similar to a letter V with long, curved sides. Extend the bottom part of the V-shaped line so it looks like a Y. Draw a line similar to a backward letter S on the lower right side. Add a C- shaped line on the left side.
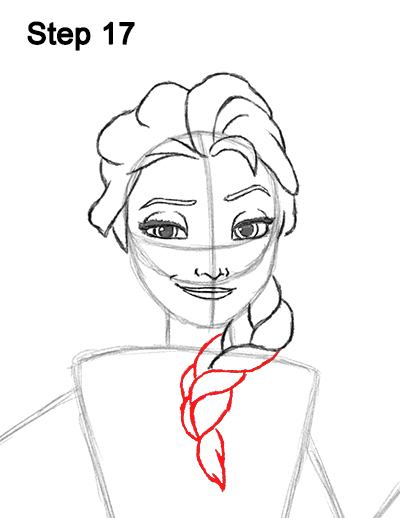
Step 17: Draw the bottom part of Elsa's braid like the top; use a series of curved lines. The curved lines should overlap each other, and the whole braid should curve toward the middle of the torso. The braid is a bit tricky, so use the image above as reference. Sketch the lines lightly at first. When you get the placement and shapes right, darken them.
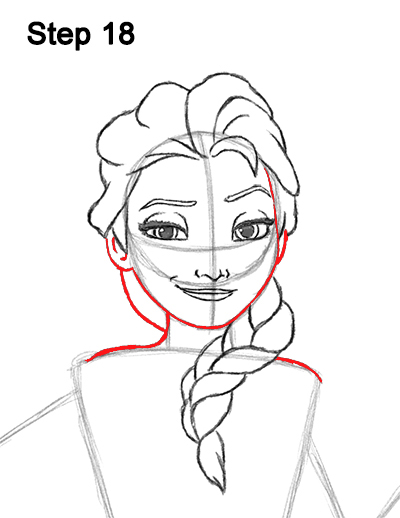
Step 18: Use the initial lines and shapes as guides to draw the rest of Elsa's head. Follow the basic outer edge of the initial guides as you darken the lines to create the shape of the face. Draw a curved line on either side of the head for the ears. The ears should be under the clumps of hair. Draw the neck and shoulders too by following the guides and using curved lines. Add a curved line on the bottom left side of the head for the back side of the hair.
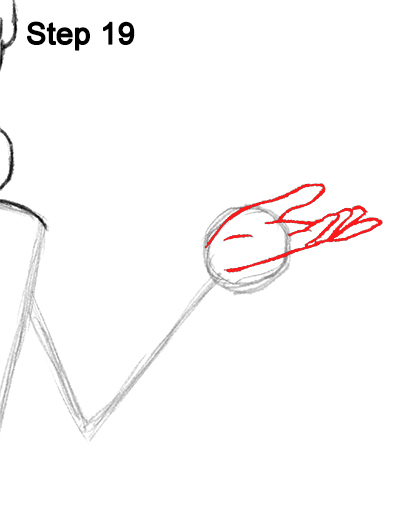
Step 19: Use the small circle on the top right side as guide to draw Elsa's hand. Draw the thumb as a thin arc on the top, right side of the circle. Draw the rest of the fingers as thin, long arcs on the right side of the circle. This is a side view of the hand, and the fingers will be behind each other, so only draw the visible portions. Sketch the shapes of the fingers lightly at first and only darken the lines when you get the structure right.


