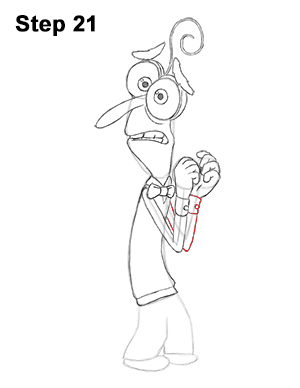
Step 21: Now add Fear's other arm using the initial line as a guide. Most of the arm is hidden by the arm you just drew, so be sure that the lines don't overlap.
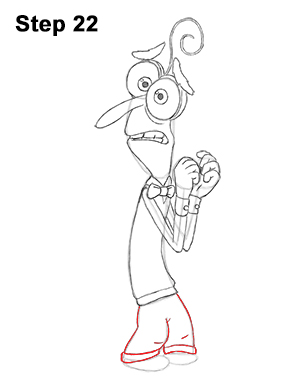
Step 22: Darken the lines of the initial W-like shape to create Fear's pants. Add an extra line at the bottom for the pants' folded cuff and a small line near the middle, where the knees are, for creases.
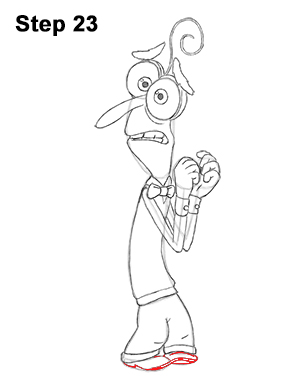
Step 23: Draw Fear's shoes using the initial ovals as guides. The shape of the shoes should fit within the shape of the ovals. Draw the heel of the shoe on the left only. Because of the perspective, the heel of the shoe on the right is not visible.
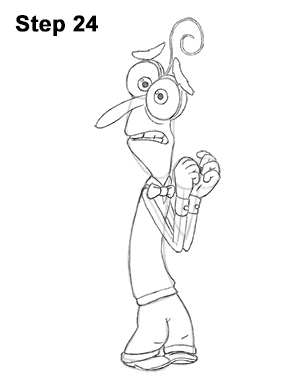
Step 24: That’s it! You now have a nice sketch of Fear from Disney•Pixar's Inside Out. You can stop at this quick drawing for a rough, sketchy look or go for a more finished look by continuing to the next step.
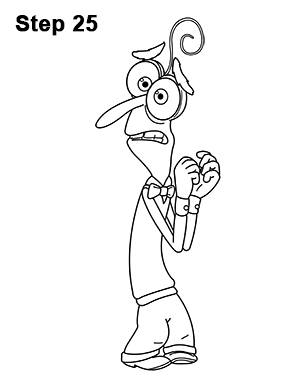
Step 25: For a more finished, inked look, carefully draw over the final sketch lines with a pen or marker. Wait for the ink to dry, and then get rid of every pencil mark with an eraser. You now have a finished inked drawing of Fear! You can stop here or go to the final step to complete your Fear drawing.
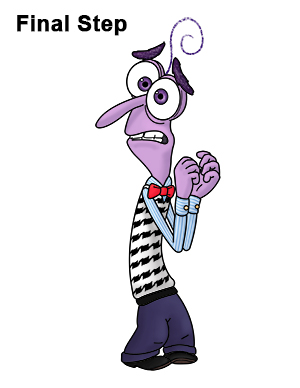
Final Step: For a completely finished Fear drawing, you have to color it. You can use markers, color pencils or even crayons! Fear's skin is purple. His eyebrows, pupils and hair are dark purple. His bow tie is red, and his shirt has thin, blue stripes. His vest has a pattern that's similar to a bunch of diamonds that are connected by a line on the sides. His pants are dark blue, and his shoes are black. That’s it! You now have a completed drawing of Fear from Disney•Pixar's Inside Out.
Thanks for visiting! Subscribe to the EasyDrawingTutorials YouTube Channel for a new tutorial every Sunday.
To learn how to draw animals, visit How2DrawAnimals.com.
RELATED TUTORIALS
 |
 |
 |
 |


