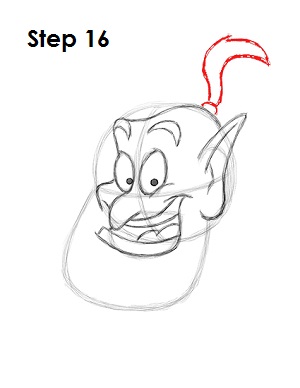
Step 16: Now learn how to draw the Genie's hair on top of his head. First draw a small half circle right on top of the head for the metallic hair tie. On top of that, draw two long curved lines that come to a point for this Aladdin character's small tuft of hair.
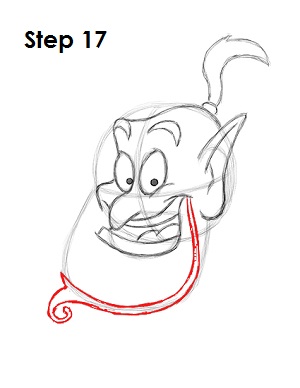
Step 17: Now learn how to draw the beard on Aladdin's Genie. Use the arc under the main circle as a guide. Follow the path of the line as you draw the strip of beard. At the bottom of the beard, curve the end to give the tip the distinctive swirl.
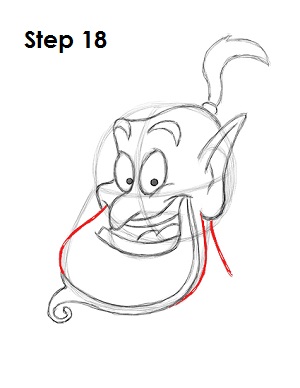
Step 18: Use the rest of the arc under the main circle to finish up your Genie drawing. Close up the chin on the left and right using curved lines. Also draw an extra line on the right for the Genie's neck.
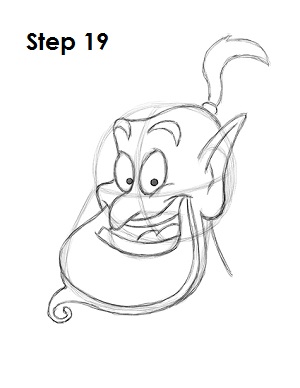
Step 19: That’s it! You now have a nice sketch of the Genie from Walt Disney's Aladdin. You can stop at this quick drawing for a rough, sketchy look or go for a more finished look by continuing to next step.
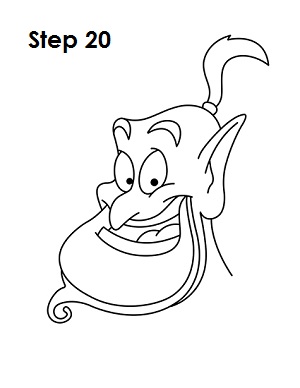
Step 20: For a more finished, inked look, carefully draw over the final sketch lines with a pen or marker. Wait for the ink to dry, and then get rid of every pencil mark with an eraser. You now have learned how to draw a finished inked drawing of the Genie from Walt Disney's Aladdin! You can stop here or go to the final step to complete your Genie drawing.
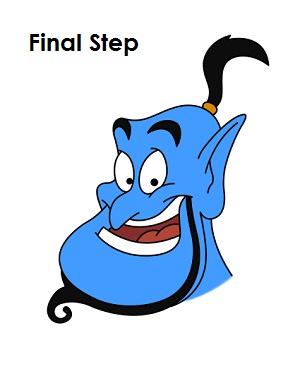
Final Step: For a completely finished Genie drawing, you have to color it. You can use markers, color pencils or even crayons! Color his hair, eyebrows and beard black. The metal hair tie is yellow. His skin is light blue. The inside of his mouth is brown, and his tongue is red. That’s it! You now have a completed drawing of the Genie from Walt Disney's Aladdin.
RELATED TUTORIALS
 |
 |
 |
 |
 |


