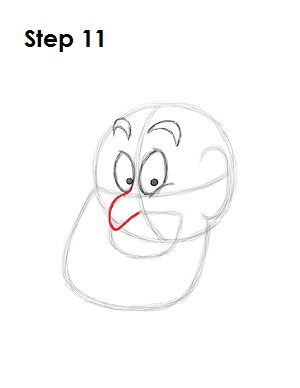
Step 11: Use the small arc as a guide to draw the Genie's nose. Bend the nose down a bit more as you darken it and make the end pointier.
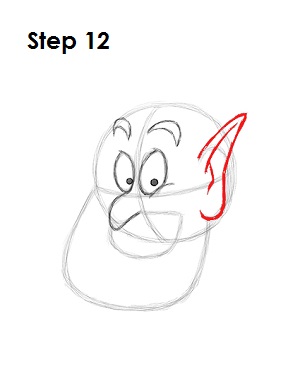
Step 12: Use the C-shaped arc on the right as a guide when learning how to draw the Genie's ear. Make the top of the ear a lot taller and pointier, and extend it outside of the main circle. Draw a few lines within the shape for the inner structure.
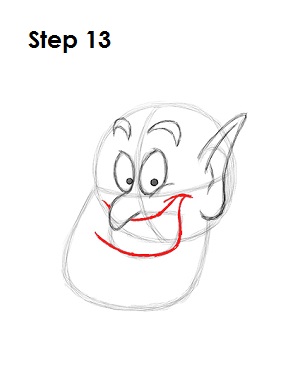
Step 13: Now learn how to draw the Genie's mouth by using the shape under his nose as a guide. Follow the basic path of the guide line and make the top right side taller. It should extend toward the horizontal construction line. Don't draw the left portion of this Aladdin character's mouth yet; leave the gap open.
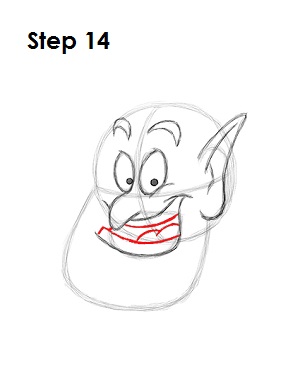
Step 14: Draw two lines inside the Genie's mouth, one on top and one on the bottom, for his teeth. Draw two curved lines in between for the tongue and a tiny line on the left side to close up the mouth shape.
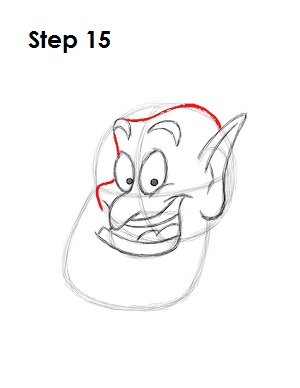
Step 15: Draw the top and left side of the Genie's face using a series of curved lines. The top of his head consists of a line that starts at the left eyebrow and curves back toward the ear. Then draw two shorter lines on the left side to complete the side of this Aladdin character's face.


