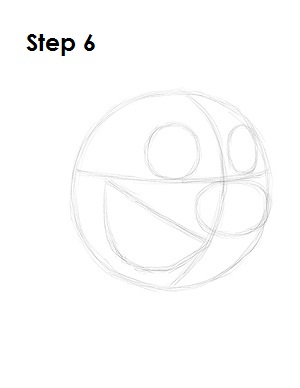
Step 6: That’s it for the initial sketch! You have the basic Timon shape. Now go in and tighten your drawing. From this point on, press harder with your pencil in order to get darker lines and a more defined sketch.
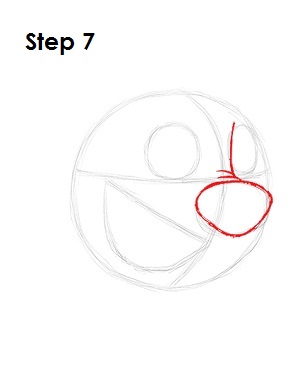
Step 7: Tighten the shape of Timon's nose by following the initial guide. Make the bottom pointier as you darken the lines. Draw a series of curved lines that stretch out toward the right eye to form the bridge of the nose.
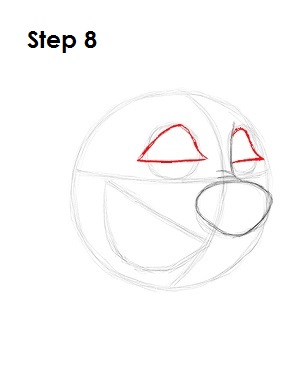
Step 8: Draw Timon's upper eyelids using the initial circles as guides. First draw a horizontal line across the circles, then draw an arc on top. The result should be similar to a bell.
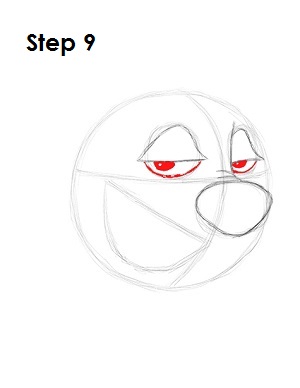
Step 9: On each eye, draw a small half-circle under Timon's eyelid and shade it in for the pupil. Draw the arc at the bottom for the lower part of the eye.
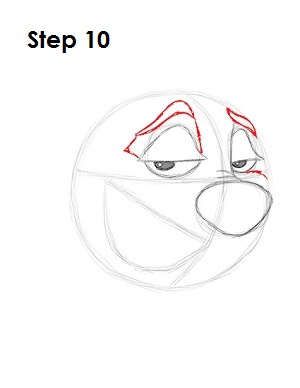
Step 10: Draw a wavy shape above each eye for Timon's eyebrows. Notice how the eyebrow on the left arcs up, while the eyebrow on the right arcs down a bit to give him that sly look. Draw a couple of lines that connect to the eyes for extra detail.


